

Your dining chairs endure daily assaults—spilled merlot, sticky fingerprints, and pet hair that seems magnetically drawn to fabric. Instead of replacing entire chairs or living with stained upholstery, custom covers offer an elegant solution that transforms your dining space while protecting your investment. Whether you’re a beginner with basic sewing skills or an experienced crafter, this guide walks you through creating professional-quality dining chair covers that fit like upholstery and look like custom furniture. You’ll discover exactly how to make covers for dining chairs that withstand real-life use while refreshing your entire dining room aesthetic without breaking the bank.
Stop Wrestling With Ill-Fitting Slipcovers: Measure Like a Pro

Accurate measurements prevent hours of frustration later. Start by measuring each chair individually—even matching sets vary slightly. For seat width, measure at the widest point and add 1 inch for seam allowance. Record back height from the seat seam to the top of the chair back, adding 2 extra inches for tuck-under space. Note the back width at its widest point (usually the top), leg spacing for skirt placement, and overall height from floor to back top.
Create a Foolproof Template With Muslin
Never cut your good fabric first. Drape an old sheet or inexpensive muslin directly over your chair. Pin the fabric to conform to every curve, then mark seam lines with fabric chalk. Remove the muslin and transfer these markings to paper using a ruler—this becomes your master pattern. Label each piece “front,” “back,” and “left/right” with arrows indicating grain direction. This critical step ensures your final cover follows the chair’s unique contours rather than fighting them.
Cut Fabric Without Costly Mistakes
Fabric selection determines your project’s success. Medium-weight cotton or linen blends offer beginner-friendly drape, while upholstery-weight fabrics (minimum 15,000 rub count) withstand daily use. For chairs used multiple times daily, prioritize machine-washable fabrics—because spills will happen. Fabrics with 2-5% spandex forgive minor measurement errors and create smoother fits on curved chairs.
Essential Cutting Techniques
- Pre-wash all fabrics to prevent post-sewing shrinkage (cotton shrinks 3-5%)
- Lay fabric flat on a clean floor—not a table—to avoid distortion
- Use weights instead of pins when cutting pattern pieces to maintain alignment
- Mark seam allowances directly on fabric with chalk for precision
- Cut back pieces 2 inches taller than needed—you’ll trim for perfect fit later
Pro tip: Place solid-color fabrics right-side down when cutting. This hides any chalk marks that might transfer during sewing.
Build a Seat Cover That Stays Put During Dinner Parties
The seat is your foundation—get this right or the whole cover fails. Cut your seat top piece using the width +1″ and depth +1″ measurements from your template. With right sides together, sew the perimeter using a 1/2″ seam allowance, leaving a 6-inch gap for turning. Clip corners at 45-degree angles to reduce bulk, then turn right-side out through the gap. Hand-stitch the opening closed using a ladder stitch.
Master Corner Darts for Sharp Edges
Square seats need darts; curved seats require eased seams. For square seats, pinch excess fabric at each corner into a 1.5-inch triangle and pin. Sew a straight line across the base of each dart, backstitching at both ends. For curved seats, clip the seam allowance every 1/2 inch along curves before turning—this allows the fabric to hug contours without puckering. Test-fit the cover on your chair now; adjust darts if fabric bubbles at corners.
Craft Back Panels That Hug Curved Chair Backs

Straight-back chairs are simple rectangles—but curved backs demand technique. Cut your back panel 2 inches taller than measured to allow for hem adjustment. For curved backs, shape the neckline by marking the chair’s curve directly on your fabric with chalk. Add two 1-inch darts at the waist points (where the back curves inward) to create a fitted silhouette.
Install the Perfect Closure System
Elastic bottoms work best for daily use; Velcro suits formal chairs. For elastic: fold the bottom edge 1 inch to create a casing, stitch three sides, and thread 1/4-inch elastic (cut to 75% of chair perimeter) through the opening. Pull tight and secure the elastic ends with a box stitch. For Velcro: sew hook strips to the cover’s back seam and loop strips to the chair frame every 6 inches—this allows micro-adjustments for perfect tension. Always place the rough hook side on the cover to prevent snagging clothing.
Style-Specific Construction Secrets
Create Formal Covers That Impress Guests
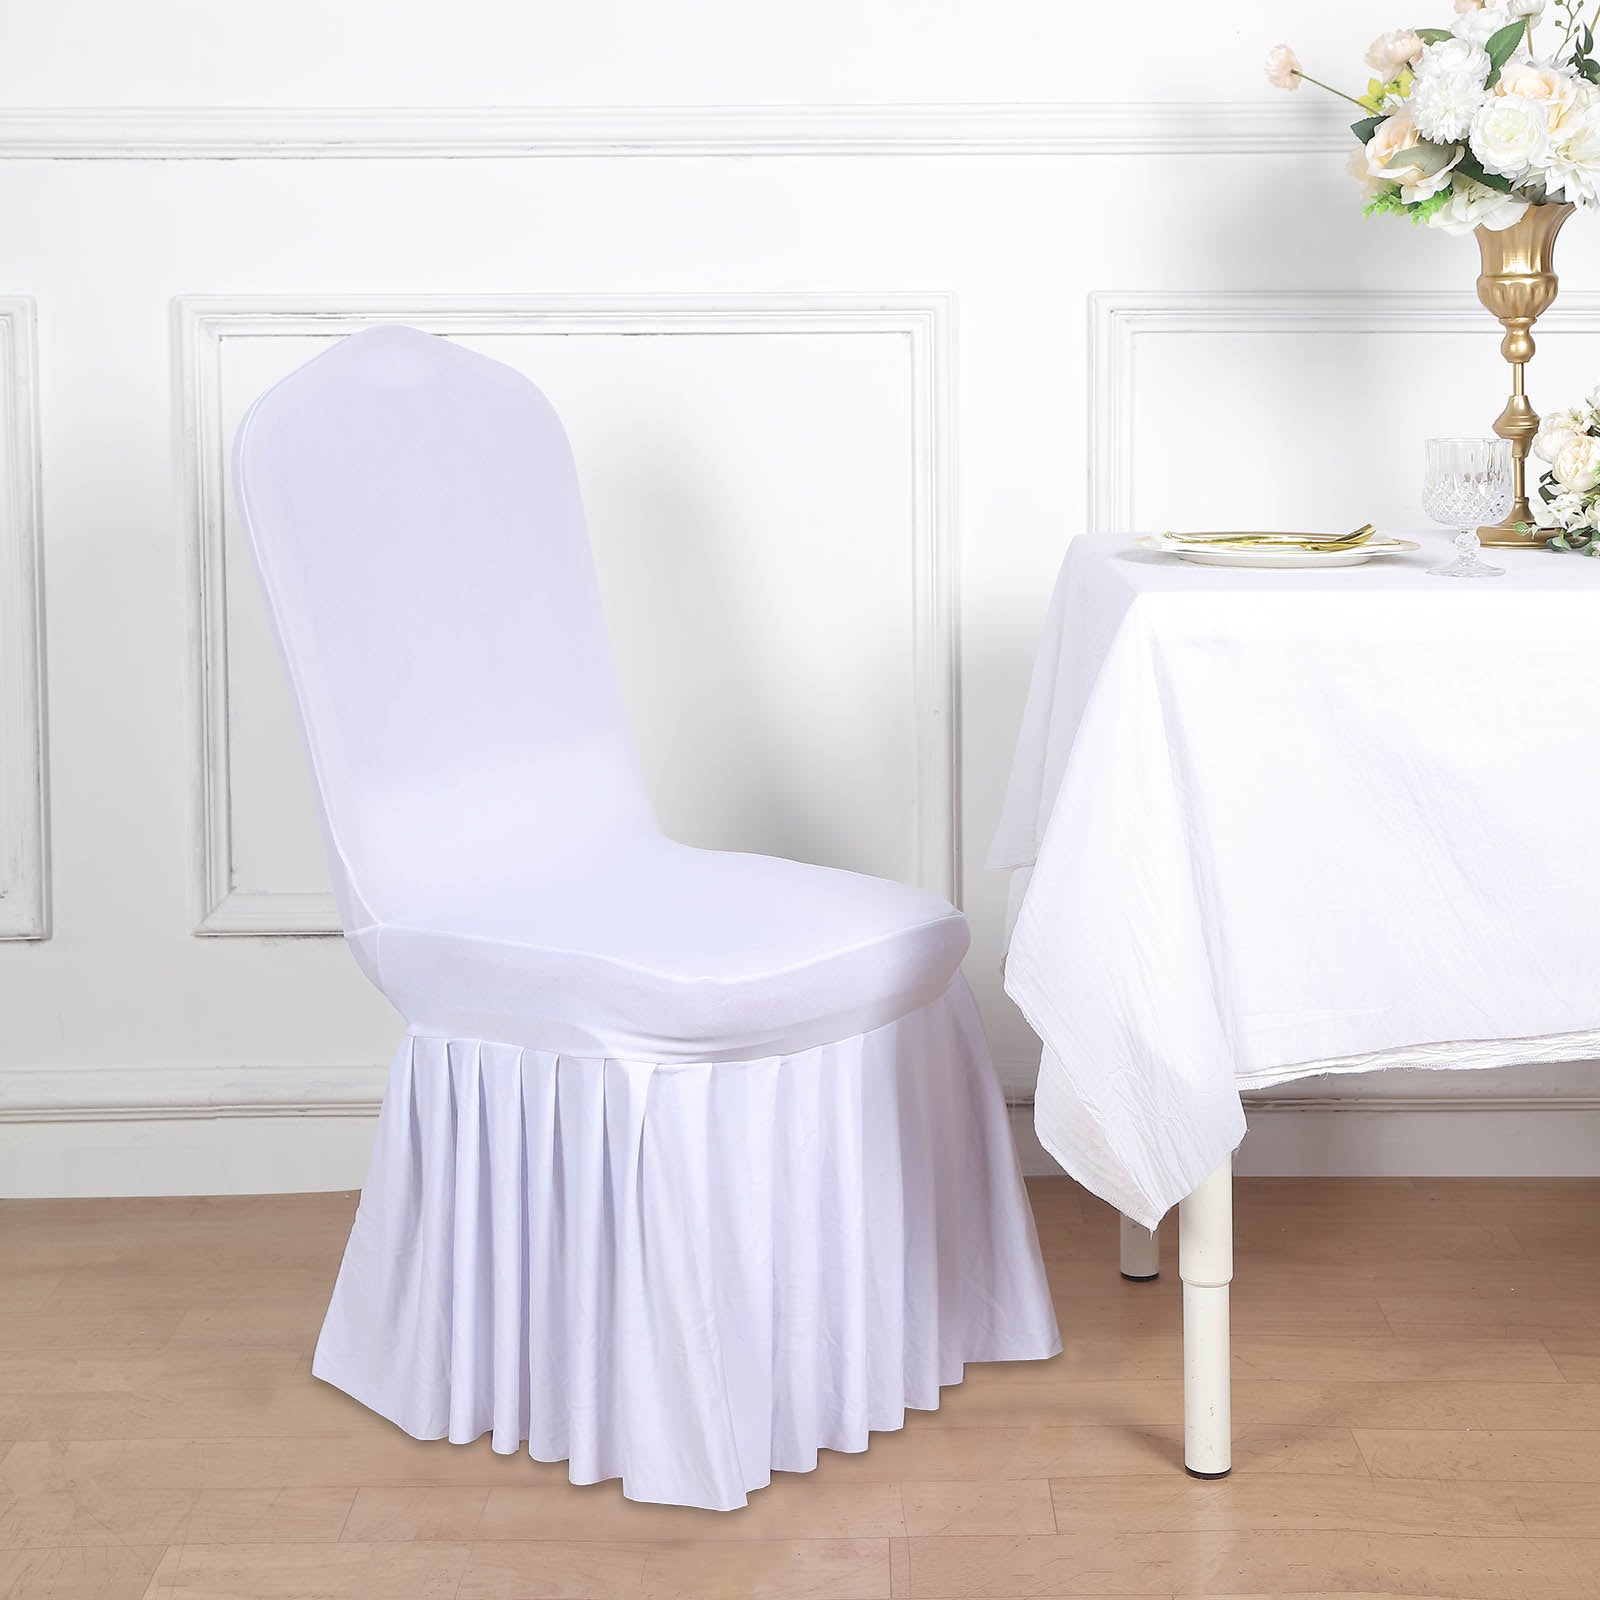
Elevate basic covers with three professional touches: First, add 1/4-inch piping along all seams using bias-cut fabric strips wrapped around cording. Second, install a 12-inch gathered skirt using twice the chair’s perimeter measurement. Third, sew box pleats at side seams—these create elegant folds that hide minor fitting issues. Use heavy cotton or damask fabric in deep jewel tones for holiday dinners.
Build Washable Everyday Covers in Under 2 Hours
Simplify for high-traffic kitchens. Skip the skirt and use a relaxed-fit pattern with only 1/2-inch seam allowances. Choose cotton twill or denim that hides stains, and add patch pockets for napkins. Instead of darts, use elastic threaded through the back seam casing for adjustable fit. These covers survive weekly machine washing when you follow the rule: always wash cold and tumble dry low.
Install Covers Without Calling for Backup
Your final fitting determines professional results. Start by ironing the cover completely—wrinkles multiply during installation. Position the seat portion first, centering any pattern or seams. Pull fabric taut from the center toward corners, smoothing with your palms like a squeegee. For back panels, work from top to bottom, easing fabric over curves. Secure ties or Velcro, then adjust the skirt (if present) to hang evenly.
Time-Saving Installation Hacks
- Label every piece with “FRONT” in permanent marker during construction
- Use a second person for high-back chairs—they hold tension while you secure closures
- Spritz with water and steam lightly during fitting to remove stubborn wrinkles
- Install covers immediately after drying when fabric is still slightly warm
Prevent Costly Fit Disasters Before They Happen
Twisted seams and loose covers ruin hours of work. If your cover slips constantly, add non-slip shelf liner strips under the seat—cut to size and tuck under the fabric. For twisted seams, mark center points on both chair and cover with safety pins before installation. If hems look uneven, use a hem gauge tool (or a credit card) to maintain consistent 1/2-inch folds.
Fix These Common Problems Immediately
- Too loose? Add vertical darts at back corners or take in side seams by 1/4 inch
- Too tight? Let out seams by 1/8 inch or replace elastic with a longer piece
- Puckered seams? Reduce sewing machine tension and use a walking foot
- Mismatched patterns? Mark match points on fabric before cutting
Budget-Friendly Fabric Math That Works
Real cost breakdown per chair:
– Basic cotton (8-15/yard): $16-30 for 2-3 yards
– Upholstery fabric (15-35/yard): $30-70 for 2-3 yards
– Notions (elastic, thread, Velcro): $5-15
Time investment reality check: Your first chair takes 3-4 hours. By chair four, you’ll complete each in 90 minutes—batch cutting all pieces at once saves 30% time. Compare this to professional custom covers costing $50-150 per chair. For high-use dining rooms, make three sets: one in use, one washing, one stored.
Seasonal Rotation System for Year-Round Style
Extend your chairs’ life with seasonal swaps. Create spring covers in light linen with floral prints (2 yards per chair). Switch to heavy canvas in autumnal tones for fall/winter. Holiday covers need just 1.5 yards—use red velvet for Christmas or pastels for Easter with simple appliqués. Store off-season covers rolled (not folded) in breathable cotton bags to prevent creases.
Wash and Care Like a Pro
Machine-wash covers monthly using cold water and mild detergent. Never use bleach—it degrades fabric fibers. Tumble dry on low for 10 minutes, then line dry to prevent shrinkage. Press while slightly damp for crisp seams. Spot-clean spills immediately with a damp cloth; test cleaners on hidden areas first. Replace elastic every 6 months—it loses 30% tension over time.
Your dining chairs deserve protection that matches your lifestyle. Whether you choose quick-wash cotton twill for family dinners or elegant damask for holiday gatherings, mastering how to make covers for dining chairs transforms worn furniture into statement pieces. Start with one chair using muslin and basic cotton—you’ll gain confidence with each stitch. Remember: precise measurements prevent frustration, elastic bottoms beat loose fits, and seasonal swaps keep your dining room feeling fresh. In just a weekend, you’ll create custom covers that protect your investment while impressing every guest who sits down to eat. The next time wine spills, you’ll smile knowing your chair is both stylish and stain-ready.


