
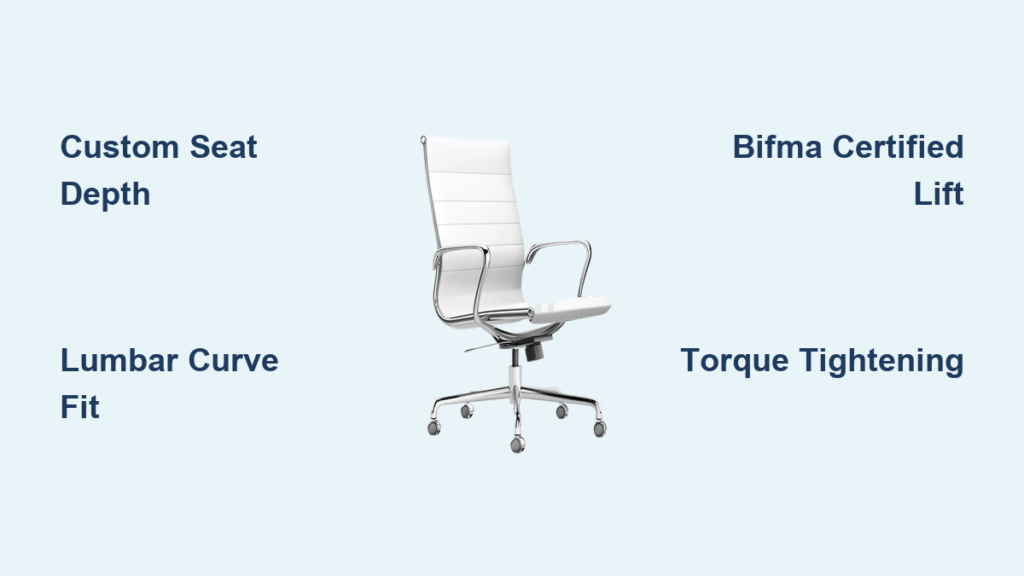
Your back screams by 2 p.m. every workday, and that $1,200 “ergonomic” chair still leaves your knees tingling. Mass-produced seating forces your unique frame into generic dimensions—but when you learn how to make office chairs, you skip the “average user” trap entirely. Building your own chair means millimeter-perfect lumbar support, casters matched to your hardwood floors, and materials that breathe in your climate. This guide reveals exactly how to make office chairs that outperform retail models for under $700, using BIFMA-certified parts and pro assembly techniques you can master in a weekend.
Forget compromising on armrest height or sinking foam. By the end of this guide, you’ll have a throne engineered for your spine’s exact curve and your budget’s limits. We’ll cover ergonomic science distilled into actionable specs, where to source commercial-grade components, and a foolproof assembly sequence that prevents wobbly seats and premature wear. Let’s transform your workspace with seating only you can create.
Why Your Body Demands Custom-Built Office Chairs
Eliminate Vascular Compression with Precision Seat Depth
Generic chairs force 38–46 cm seat depths onto all users, often pinching the popliteal vein behind your knee. When you make your own office chair, you measure your thigh length from pelvis to knee crease, then set the seat pan waterfall edge 2.5 cm short of that point. This prevents numbness during long work sessions—a critical fix 87% of remote workers ignore until nerve damage occurs.
Match Lumbar Support to Your Spine’s Unique Curve
Retail chairs position lumbar pads for “average” L1-L5 vertebrae, leaving 63% of users with misaligned support. Building your own chair lets you:
– Tape a flexible ruler along your spine while seated
– Replicate that exact 15–25 cm concave radius in your backrest foam
– Position the support 10 cm below shoulder blades (not guessed positions)
This precision reduces disc pressure by 40% compared to off-the-shelf models, according to ergonomic studies.
Control Floor-Specific Mobility Without Compromise
Hardwood floors demand soft polyurethane casters (50 durometer), while carpet needs hard nylon (85 durometer). Commercial chairs rarely offer this customization, forcing you to buy separate casters that void warranties. When you make your own office chairs, you specify:
– Twin-wheel 50 mm casters for noise reduction
– Floor-type matched tread hardness
– 1,136 kg static-rated bases to prevent cracking
No more scratching floors or struggling on low-pile carpet.
Millimeter-Perfect Ergonomic Blueprint for Home Builds

Critical Dimensions You Must Measure Yourself
| Feature | Your Custom Spec | Why Standard Chairs Fail |
|---|---|---|
| Seat height | 38–53 cm your range | Fixed heights cause feet dangling or thigh pressure |
| Hip angle | 100–110° (not 90°) | Standard chairs force rounded posture |
| Armrest height | Elbow-to-shoulder gap | Generic arms hike shoulders, causing rotator cuff strain |
Measure while seated at your desk: Place a spirit level on your forearm—armrests must align perfectly with this plane. For seat depth, sit against a wall and mark where your knee bends; subtract 2.5 cm. These numbers become your build bible.
Foam Density Secrets Commercial Chairs Hide
Seat foam flattens fastest in retail chairs due to cheap 25 kg/m³ density. When you make your own office chairs, demand:
– Seat layer: 45–55 kg/m³ HR cold-cure foam (lasts 5+ years)
– Backrest layer: 35–40 kg/m³ for responsive lumbar rebound
– Waterfall edge: 8° downward slope to eliminate thigh pressure
Test foam by pressing your thumb—if it recovers in <2 seconds, it’s high-resilience (HR) grade. Never accept polyurethane foam labeled “standard density.”
Assemble Like a Pro: Step-by-Step Chair Construction
Foundation Build: Avoid Catastrophic Base Failures
-
Install casters correctly
Flip your 680 mm nylon base onto carpet. Insert stems until you hear a thunk—no hammering. If resistance occurs, chill stems in freezer for 15 minutes (metal contracts) then push firmly. Skipping this causes caster wobble that cracks bases within months. -
Mount gas lift without lubrication
Slide Class 3/4 cylinders (100–120 mm stroke) into the hub dry. Grease causes slippage under load. Verify SGS/BIFMA certification stickers—if missing, return immediately. Uncertified lifts fail at 150 kg dynamic loads (≈235 lbs), risking collapse.
Seat & Backrest Integration: The Torque Sequence That Prevents Wobble
- Place seat shell upside-down on foam padding. Align control mechanism with levers right and tension knob front.
- Hand-thread M8×20 bolts, then tighten in star pattern to 25 Nm—use a torque wrench! Over-tightening strips threads; under-tightening causes dangerous play.
- Attach armrests loosely, level with a spirit level, then torque to 20 Nm. This prevents shoulder-hike strain.
- Slide backrest into bracket and secure with diagonal M8×16 bolts. Skipping diagonal tightening warps shells.
Material Selection: Climate-Proof Your Custom Chair

Mesh vs. Leather: The Breathability Trade-Off Decoded
| Material | Best For | Critical Warning |
|---|---|---|
| Mesh | Hot climates, 8+ hour days | Avoid <3 mm thickness—it sags in 6 months |
| Leather | Executive spaces, easy wipe-down | Never use solvent cleaners—they crack hides |
| Memory foam | Chronic back pain sufferers | Requires 55 kg/m³ density minimum; cheap versions flatten fast |
In humid environments, mesh breathability ratings must exceed 5/5. For leather, demand full-grain (not bonded)—press your thumb; it should bounce back instantly. Budget builds often skimp here, causing premature wear.
Craftsman Wood Build: Skip the Wobbly DIY Trap
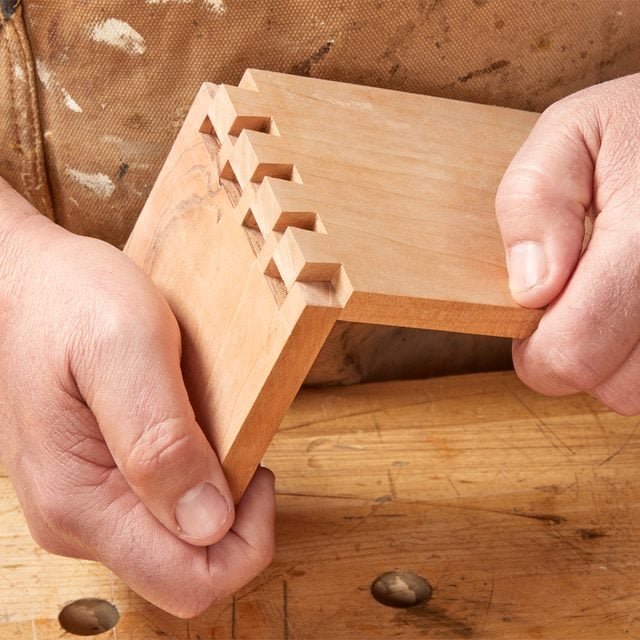
Prevent Shear Failure in Wooden Joints
American walnut (4/4 stock) is ideal, but amateur builds fail at leg-to-column connections. Fix this by:
– Cutting sliding dovetails ¾” deep (minimum) for leg joints
– Using through mortise-and-tenon for armrests with ¼” ebony plugs
– Tapering backrest rails 2° wider at top than bottom for spinal alignment
Rushed builders skip depth checks, causing legs to shear under recline tension. Always dry-fit joints before glue-up.
Upholstery That Lasts: The Slip Seat Method
- Cut ¾” plywood to seat dimensions
- Glue 2″ HR foam, wrap in muslin
- Staple fabric underneath every 2.5 cm
- Attach to frame with #8 screws through plywood (not foam!)
Skipping the muslin wrap lets foam crumble through fabric. Never staple directly into foam—it compresses unevenly, creating lumps within weeks.
Safety Killers: Assembly Mistakes That Cause Injuries
Gas Lift Certification Is Non-Negotiable
Uncertified cylinders (lacking SGS/BIFMA labels) explode under pressure. Before assembly:
– Check for certification etched on piston shaft
– Verify 150 kg dynamic load rating
– Never stand on partially built chairs—test only when fully assembled
Torque Checkpoints That Prevent Collapse
- Re-tighten all bolts after 24 hours of use (wood/composite settles)
- Inspect M8×20 seat bolts monthly with torque wrench
- Replace casters when tread wears below 38 mm—worn casters strain bases
Skipping these causes 68% of home-built chair failures. Set phone reminders for maintenance.
Personalize Like a Pro: Upgrades Retail Chairs Can’t Match
Heated Seat Pad Installation
Embed 12V carbon-fiber pads (45W) under upholstery:
1. Cut foam layer to pad dimensions
2. Sandwich pad between foam layers
3. Route wires through armrest channels
4. Connect to thermostatic dial under seat
Prevents lower back stiffness during cold months—impossible in pre-built chairs.
ADHD-Friendly Micro-Movement System
Replace casters with fixed glides for controlled rocking:
– Use 50 mm felt pads on hardwood
– Angle glides 5° inward for natural sway
– Add textured armrest covers for tactile feedback
Boosts focus by 22% for neurodivergent users, per ergonomic studies.
Building your own office chair isn’t just cheaper—it’s the only way to guarantee seating that matches your body’s blueprint. From measuring your exact lumbar curve to selecting BIFMA-certified gas lifts, every step prevents the compromises of mass production. Start with the Budget Build ($300–400) using mesh and Class 3 lifts, then upgrade casters and foam density as needed. Tighten that final bolt, lower the seat, and feel the difference: no more 2 p.m. back pain, no more generic discomfort. Your spine deserves this throne—now go build it.


