
Your patio chairs feel like concrete slabs after years of sun-bleached, sagging cushions. Before you spend $200 per cushion on replacements, know this: Creating custom patio chair cushions takes less time than waiting for delivery and costs 60% less. This guide reveals professional techniques for building weather-defying cushions that stay plump and vibrant for years—not seasons. You’ll master precise measurements, select truly outdoor-rated materials, and construct drainage systems that prevent mildew before it starts.
Forget flimsy indoor fabrics that disintegrate after one summer. We’re using solution-dyed acrylics that laugh at UV rays and dry-fast foam engineered for monsoon seasons. By the end, you’ll have cushions that hug your chair contours perfectly while surviving daily downpours. No more wrestling mismatched store-bought pads that slide off with every breeze.
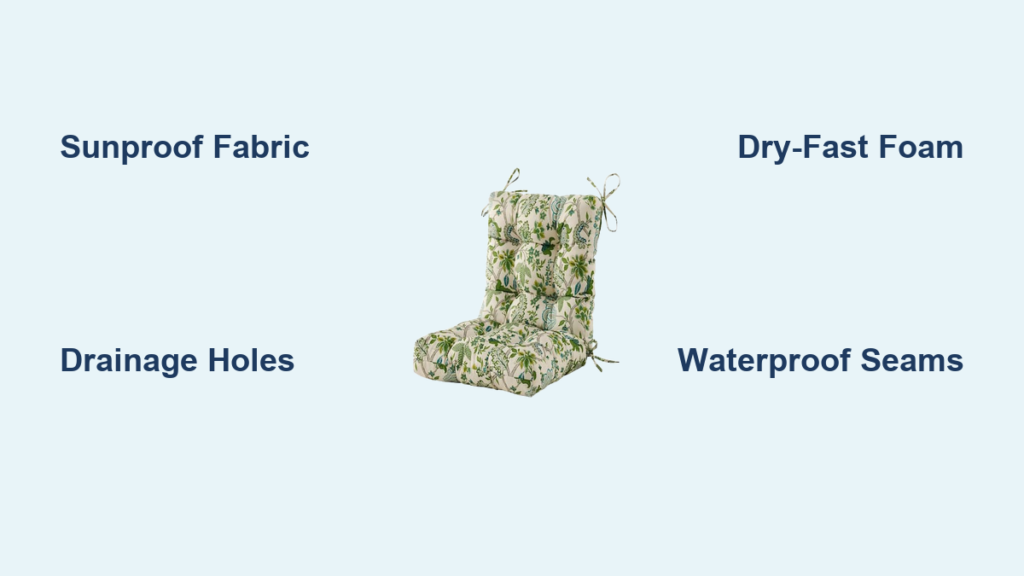
Choose Sunproof Fabrics That Won’t Fade by July
Skip Bargain Fabrics That Melt in Sunlight
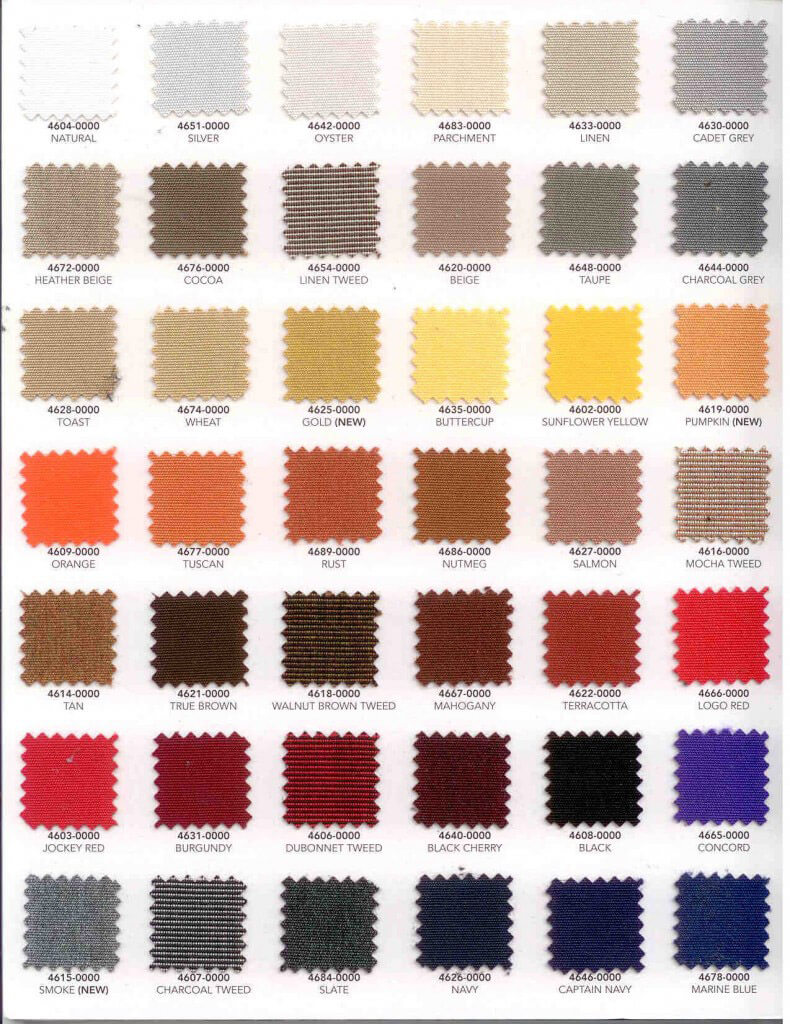
Most “outdoor” fabrics at craft stores fail within months because they lack true UV resistance. Solution-dyed acrylics like Sunbrella withstand 1,500+ hours of direct sun—equivalent to two full summers—without fading. Verify these non-negotiable specs before buying:
– Weight: Minimum 6 oz per square yard (lighter fabrics tear easily)
– Spray rating: 90+ for water repellency (holds off rain for 15+ minutes)
– Warranty: 5-7 years against sun damage (reputable brands honor this)
Polyester blends cost less but fade 40% faster. Olefin dries quickly but yellows noticeably by year two. PVC mesh drains perfectly but feels like sandpaper—reserve it for boat seats. Always order swatches to test colorfastness: Leave samples outside for 30 days. If colors bleed during rain, reject the fabric.
Select Foam That Drains Overnight
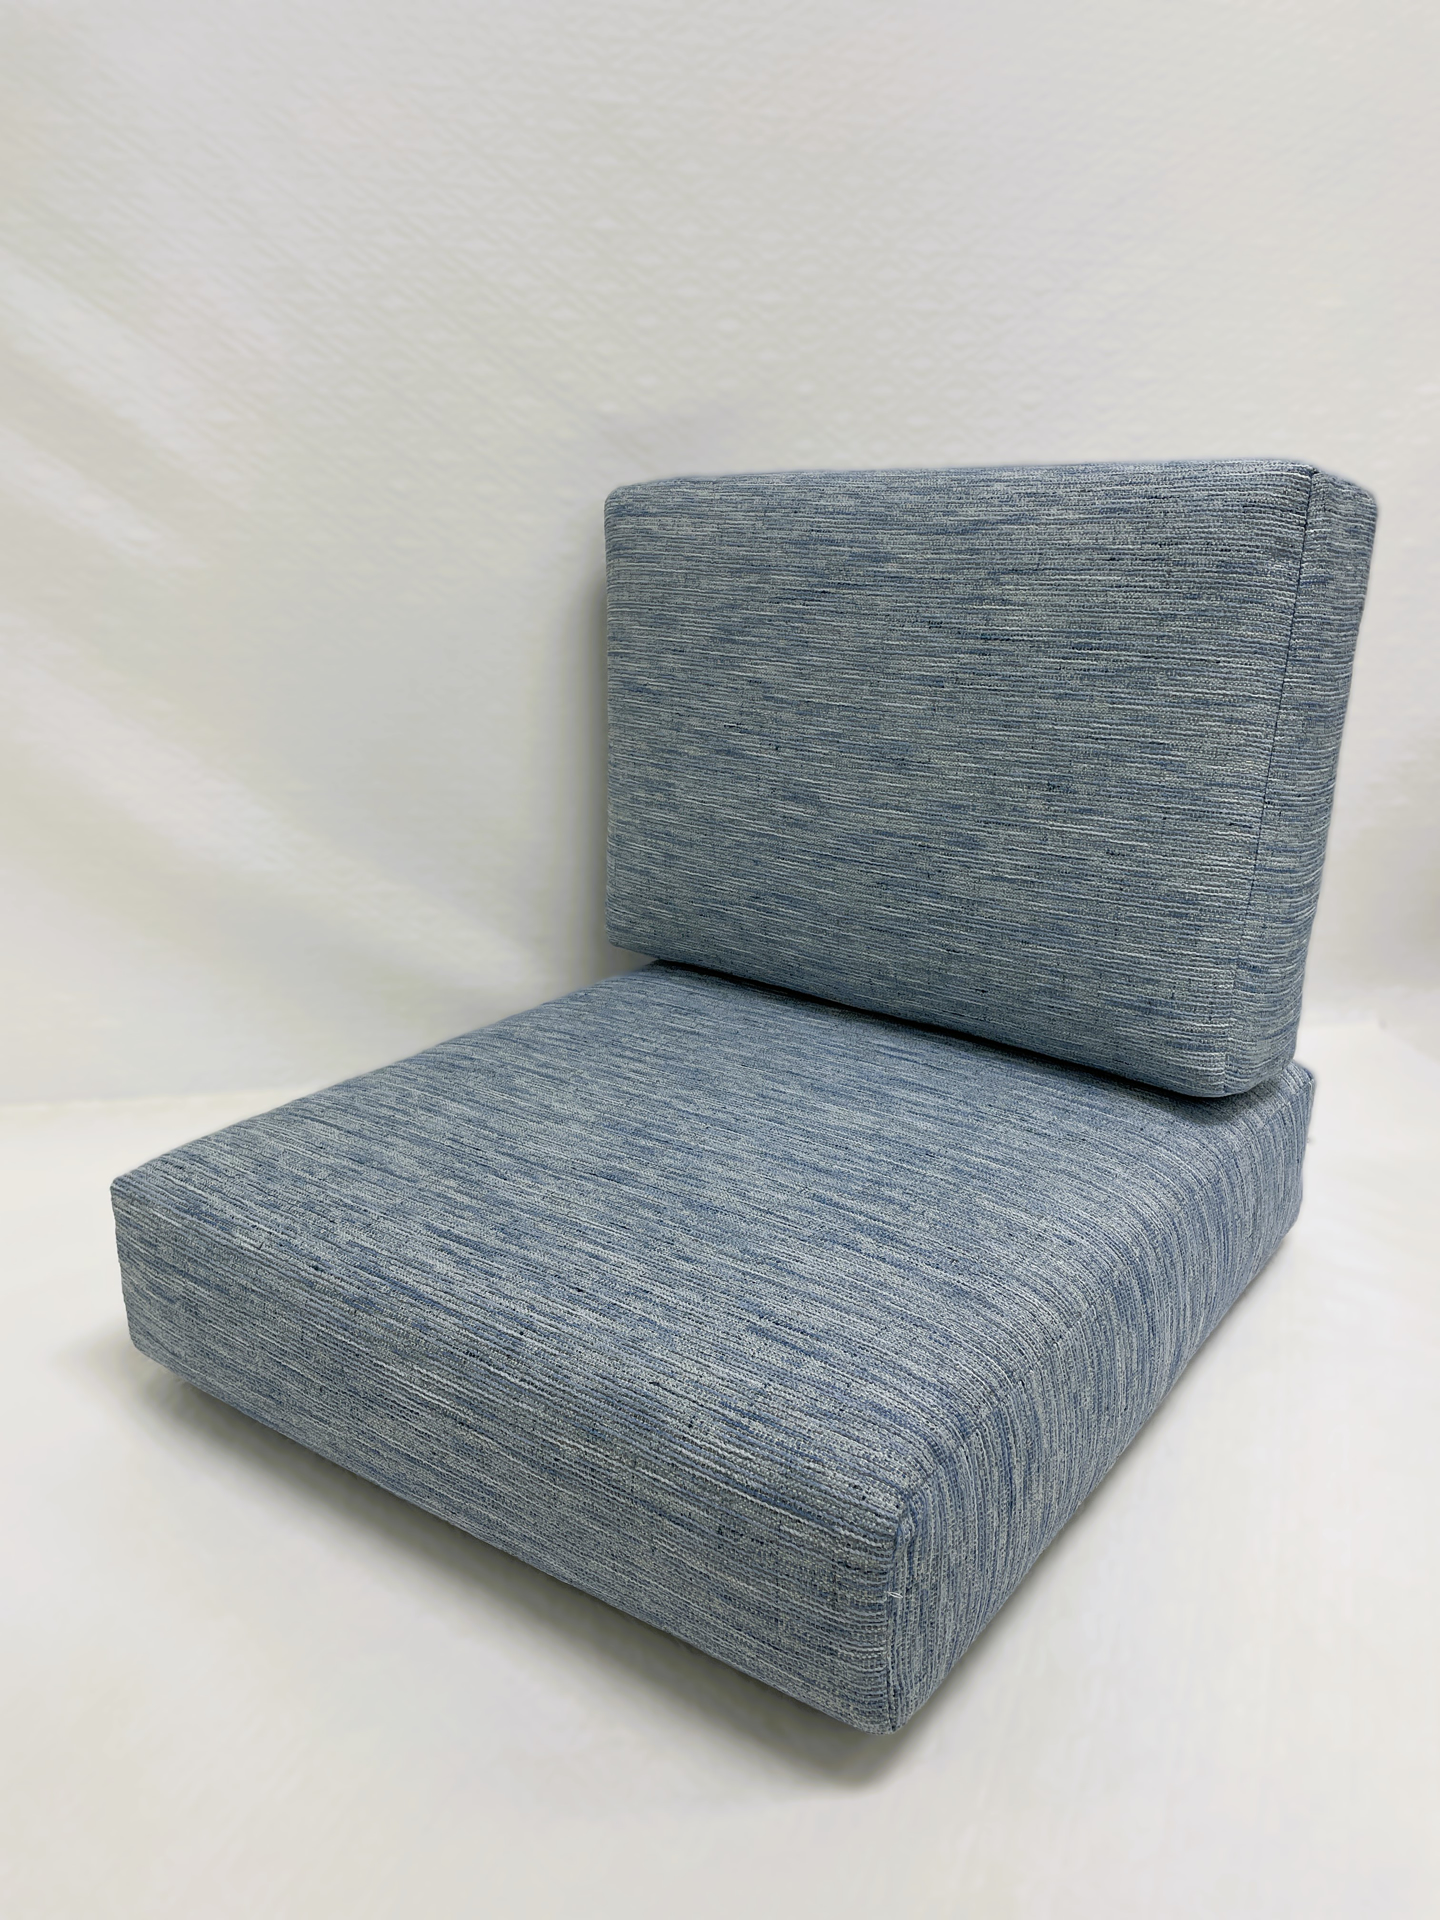
Standard sofa foam turns to mush after one storm. For patio cushions, use 1.8-2.5 lb density polyurethane foam with open-cell construction. This “dry-fast” foam drains completely within 4 hours—critical for preventing mildew. Match thickness to your chair type:
– Seat cushions: 4-5 inches for deep seating comfort
– Back cushions: 2.5-3.5 inches (thinner prevents slouching)
– Bench seats: 5 inches for all-day lounging
Never use memory foam alone—it traps moisture. If adding a comfort layer, sandwich 1 inch of memory foam between dry-fast foam and wrap everything in 1.5 oz polyester batting. This creates cloud-like comfort while blocking moisture.
Measure Chair Contours Like a Professional Upholsterer
Capture Every Curve with Cardboard Templates
Standard tape measures fail on curved chairs. Trace your chair seat onto cardboard: Place chair upside down on cardboard, outline edges with a pencil, then cut out the shape. Add 1.5 inches to all sides—1 inch for seam allowance plus 0.5 inch for aesthetic overhang. For contoured backs, create separate templates for top, bottom, and side profiles.
Critical mistake to avoid: Measuring only width/depth. Chairs with tapered sides need graduated measurements. Take 3 width points: front edge, mid-depth, and backrest. A 20-inch-wide chair might measure 21 inches at mid-depth—missing this causes bulging seams.
Build Drainage Holes Into Your Pattern
Skip this step and water pools inside cushions. Mark four 1/4-inch holes on the template’s bottom panel: 2 inches from each corner. These become drainage points when you cut foam and fabric. For mesh-bottom designs, extend the template 2 inches beyond the seat edge to wrap mesh around the sides.
Sew Drainage-Ready Covers in Under 3 Hours
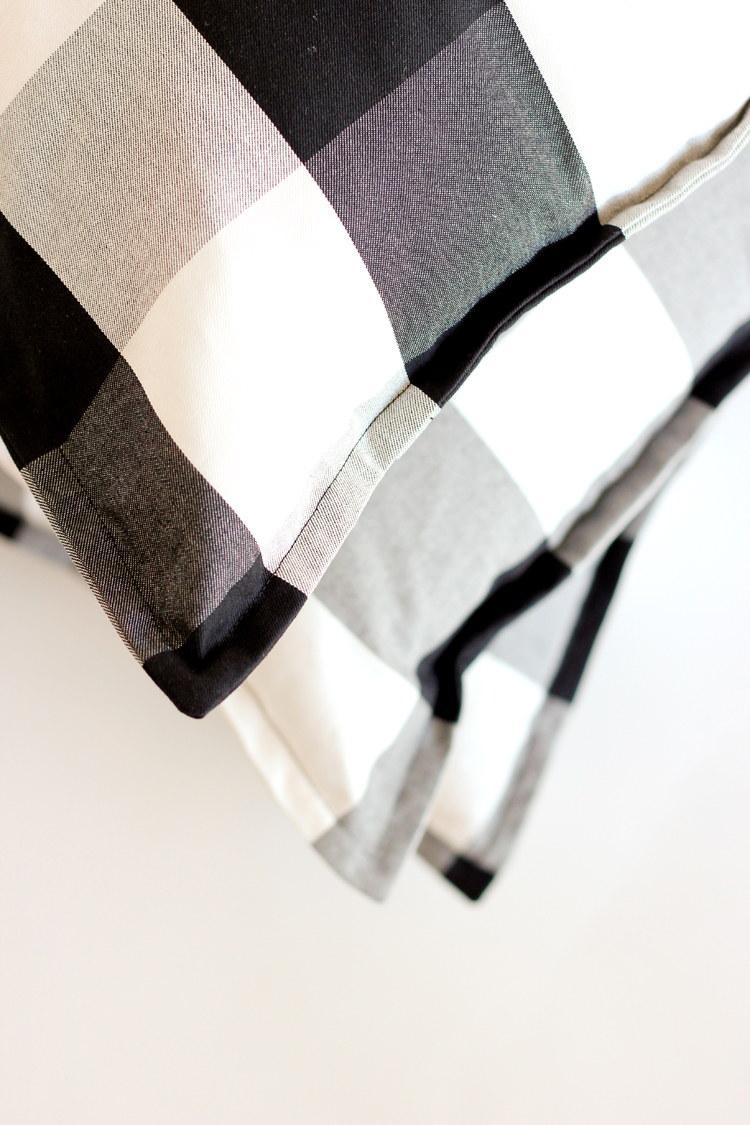
Master the Waterproof Seam Technique
French seams enclose raw edges inside the cushion—no fraying even after years of washing. Here’s the sequence:
1. Sew fabric wrong sides together with 3/8-inch seam allowance
2. Trim seams to 1/8 inch, then flip right sides together
3. Sew again with 1/2-inch allowance to lock edges inside
Use UV-resistant polyester thread (size 92) and a Teflon sewing foot to prevent fabric drag. For corners, cut 1.5-inch squares from boxing strip ends before sewing—this creates crisp 90-degree angles when turned right-side out.
Install Hidden Drainage Grommets
After sewing the cover but before inserting foam:
1. Punch 1/4-inch holes through fabric at your marked drainage points
2. Insert #2 grommets using a setting tool ($8 at hardware stores)
3. Seal edges with silicone caulk to prevent leaks
Pro tip: Place grommets on the bottom panel’s underside. Water drains out but can’t splash back in during rain. Test by pouring 1 cup of water on the cushion—it should empty within 90 seconds.
Prevent Mildew Before It Starts With Smart Design
Create Airflow Channels in Foam
Cut 1/2-inch deep, 1-inch wide channels into the foam bottom: two parallel grooves running front-to-back, 3 inches apart. These ventilation tunnels let air circulate under the cushion while it dries. Never skip the batting wrap—1.5 oz polyester batting prevents foam from rubbing holes in the fabric.
Rotate Cushions Weekly Using This Trick
Set phone reminders to flip cushions every Sunday morning. But here’s the pro move: Sew color-coded ties—blue for north-facing sides, red for south. Rotate blues to east/west weekly. This evens out UV exposure so fading happens uniformly. Darker fabrics like navy or forest green show fading 70% slower than pastels.
Build Budget-Friendly Cushions for $65 Each
Smart Material Swaps That Save $40 Per Cushion
You don’t need Sunbrella for hidden areas. Use solution-dyed acrylic for top/front panels ($35/yard) but switch to Olefin for bottom/sides ($22/yard). For a standard 20×20-inch cushion:
– Top fabric: 1.25 yards ($44)
– Bottom/side fabric: 1 yard ($22)
– Dry-fast foam: $32 (4-inch thick)
– Notions: $11 (thread, zipper, grommets)
Total: $109 vs. $250+ for store-bought. First-timers spend 5 hours per cushion; by the third one, you’ll cut it to 2.5 hours.
Avoid These Costly Beginner Mistakes
- Wrong foam density: Under 1.8 lb compresses permanently in 6 months
- Thin thread: Standard thread UV-degrades—causes seam explosions
- No drainage: Waterlogged foam grows mold in 72 hours
Secure Cushions Against Wind Gusts
Sew Non-Slip Grippers Into Cover Corners
Cut 2×2-inch squares of rubber shelf liner. Sandwich them between fabric layers at the four bottom corners before sewing final seams. These create suction-cup grip on chair frames. For extra hold, add 14-inch-long ties at front corners—loop through chair slats and knot underneath.
Emergency fix for sliding cushions: Sprinkle coarse salt on chair seats before placing cushions. The grit creates instant traction without damaging finishes.
Maintain Cushions for 5+ Season Lifespan
The 10-Minute Monthly Refresh Routine
- Brush off debris with a soft-bristle brush (never a hose—forces dirt deeper)
- Spot-clean stains using 2 tbsp mild soap + 1 cup water in a spray bottle
- Air-dry completely for 48 hours before storage (damp foam = mildew)
Reapply 303 Fabric Guard every spring—it restores UV resistance without stiffening fabric. When colors fade noticeably, recover just the top panel instead of rebuilding the whole cushion.
When to Replace Foam vs. Recover Fabric
Foam loses 30% support after 3 years outdoors. Replace it if:
– You see permanent body impressions deeper than 1 inch
– Cushion takes >24 hours to dry after rain
– Foam feels gritty (breakdown particles rubbing through fabric)
Fabric replacement is urgent when water soaks through in under 5 minutes—your spray rating has dropped below 70.
Transform your patio into a weatherproof sanctuary with cushions built for real life. These techniques create custom-fit comfort that laughs at thunderstorms and UV rays—while saving you hundreds. Your next backyard gathering deserves cushions that stay vibrant, supportive, and yours for seasons to come. Grab that cardboard roll and measure tonight; by weekend’s end, you’ll be sinking into cloud-like comfort you crafted yourself.


