

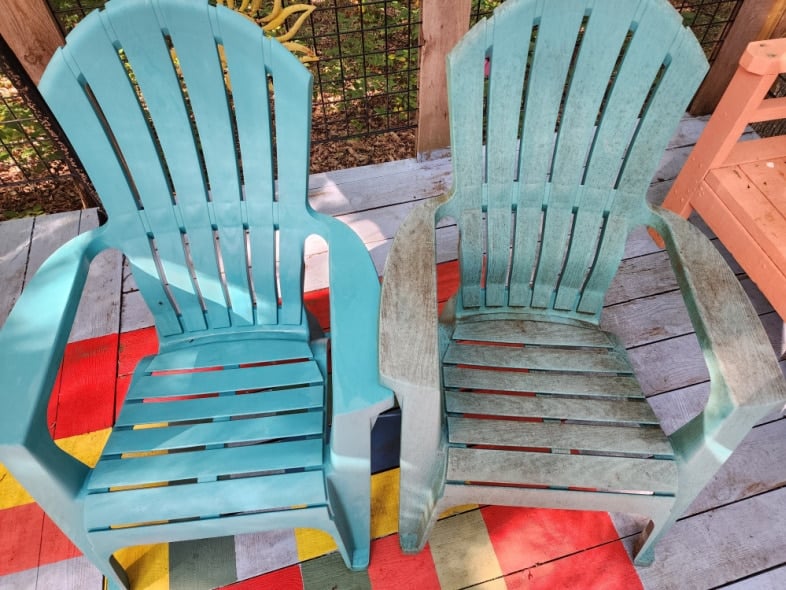
Your vibrant plastic Adirondack chairs have turned dull with stubborn pollen streaks, mysterious green mold patches, and sunscreen stains that won’t budge with a quick hose-down. Before you consider replacement, know this: proper cleaning techniques can restore them to near-new condition without damaging the material. Most modern plastic Adirondack chairs use high-density polyethylene (HDPE)—a durable, weather-resistant material that responds exceptionally well to the right cleaning methods. This guide delivers field-tested solutions for every soiling scenario, from routine pollen buildup to severe oxidation, so you can enjoy spotless outdoor seating all season long.
Whether you’re battling summer’s sticky spills or winter’s mold invasion, you’ll learn exactly which supplies prevent scratches, why certain techniques preserve UV protection, and how to establish a maintenance routine that keeps chairs looking fresh for years. By the end, you’ll have a clear action plan to tackle stains efficiently while extending your chairs’ lifespan.
Pre-Cleaning Assessment Checklist
Skipping this step guarantees wasted effort—five minutes of evaluation prevents hours of ineffective scrubbing. Start by confirming your chair’s material. Most contemporary plastic Adirondack chairs use high-density polyethylene (HDPE), identifiable by its slightly flexible feel and matte finish. Check the underside or original packaging; this matters because HDPE tolerates vinegar-based solutions but can warp under harsh chemicals.
Next, categorize the soiling level. Run your hand across the surface: light dust requires gentle cleaning, while chalky white residue indicates oxidation needing specialized restoration. Spot black or green fuzzy patches? That’s mold requiring a kill-before-scrub approach. Ignoring this assessment leads to using dish soap on mold (spreading spores) or pressure washing on oxidized chairs (etching permanent damage).
Essential Supplies for Spotless Results
Basic Cleaning Arsenal
Gather these non-negotiable tools before starting: a soft-bristled car wash brush (never wire or stiff nylon), microfiber cloths (paper towels scratch), an adjustable-spray garden hose, two buckets (one for washing, one for rinsing), and spray bottles for targeted treatment. Skip abrasive sponges—they create microscopic grooves where dirt accumulates faster.
Proven Cleaning Solutions
Your safest arsenal combines ¼ cup Dawn dish soap + 1 gallon warm water + 2 tbsp white vinegar for routine grime. For mold, mix 1 cup vinegar + 1 gallon water; for oxidation, use baking soda paste (3:1 with water). Critical warning: Never use chlorine bleach or pressure washers—both degrade HDPE by stripping UV inhibitors and etching surfaces. Oxygen bleach (OxiClean) is the only bleach alternative safe for plastic.
Monthly Maintenance Cleaning Method
Quick 15-Minute Routine
This routine prevents deep-set stains and takes less time than brewing coffee. Begin by dry-brushing loose debris with your soft brush. Pre-rinse thoroughly with the hose, then apply your soap-vinegar solution from top to bottom. Scrub systematically: seat first (where dirt accumulates fastest), then backrest, arms, legs, and finally the underside—where overlooked grime drips onto clean surfaces.
Pro tip: Use an old toothbrush around screws and grooves. Rinse until water runs completely clear—any soap residue attracts new dirt. Air-dry in shade for 2-3 hours; direct sun causes rapid drying that leaves streaks. Key insight: Cleaning in early morning or late afternoon prevents “soap spots” from premature drying.
Deep Cleaning for Heavily Soiled Chairs
When monthly cleaning fails against mold or oxidation, escalate strategically.
Mold and Mildew Removal Protocol
The fatal error: Scrubbing mold without killing it first. Instead, saturate affected areas with vinegar solution, keeping surfaces wet for 60 minutes to penetrate roots. Only then gently scrub with your soft brush. For stubborn patches, add 2 tbsp baking soda to the vinegar—the fizz lifts mold from textured surfaces without abrasion. Rinse thoroughly and dry completely; residual moisture reignites growth.
Oxidation Restoration Process
That chalky film is UV damage, not dirt. After washing with soap solution, apply automotive plastic restorer (303 Aerospace Protectant) with a microfiber cloth, buffing in circular motions. Finish with UV protectant spray—this step is non-negotiable for preventing rapid re-oxidation. Expect 45-60 minutes per chair, but results often look miraculous.
Targeted Stain Removal Guide
Organic Stains (Leaves, Bird Droppings)
Leaf stains lift with baking soda paste: apply, wait 30 minutes, then gently scrub. For bird droppings, scrape excess with a plastic putty knife first—its acidity etches plastic if left untreated—then saturate with straight vinegar. Rinse immediately to neutralize acid.
Grease and Oil Stains
Sunscreen or grill grease? Sprinkle cornstarch on fresh stains overnight to absorb oil, then clean normally. For set-in stains, apply undiluted dish soap, wait 15 minutes, and scrub. Avoid degreasers—they strip plastic’s protective layer.
White Chair Yellowing
Revive faded whites with ¼ cup baking soda + hydrogen peroxide paste. Spread on yellowed areas, cover with plastic wrap, and sit in direct sun 3-4 hours. The sun activates oxygen bleach action. Rinse thoroughly—this often restores original brightness without harsh chemicals.
Color Restoration for Faded Chairs
Colored chairs need different care than whites. After deep cleaning, apply plastic color restorer (303 Aerospace or Armor All) sparingly with a microfiber cloth, working in 2×2-foot sections. Buff immediately with a clean cloth to prevent streaking. Note: This restores depth but won’t reverse severe fading—consistent UV protection is far more effective.
Textured Surface Cleaning Technique
Wood-grain textures trap dirt in grooves. Always scrub with the grain pattern using a soft detailing brush; cross-grain scrubbing creates permanent scratches. For drying, use a leaf blower on low to expel water from crevices—textured surfaces take 30% longer to clean but yield stunning results when done right.
Maintenance Schedule That Actually Works
Daily: Quick hose rinse after use, especially post-meals. Blot spills immediately—never rub.
Weekly: Inspect for new stains and spot-clean.
Monthly: Full wash using the 15-minute routine. Tighten loose screws (lubricate with silicone spray).
Seasonal: Spring (deep clean + UV protectant), Summer (clean every 2-3 weeks), Fall (pre-storage wash), Winter (store clean and dry).
Storage Strategies That Prevent Problems
For short-term protection, use breathable UV-resistant covers—not plastic tarps that trap moisture. Elevate chairs with glides to block ground moisture. Before long-term storage, complete a deep clean and dry thoroughly. Store upright in a ventilated shed; stack only if designed for it. Critical: Never store dirty chairs—residual grime becomes permanent over winter.
Common Cleaning Mistakes to Avoid
Pressure washers—even on “low” settings—force water into hardware joints, causing rust and mold. Abrasive cleaners like Comet create dirt-trapping scratches. Skipping the underside rinse means dirty runoff re-soils clean surfaces. Rushing the final rinse leaves soap residue that attracts fresh grime within days.
Eco-Friendly Cleaning Options
Use 2 cups white vinegar + 1 tbsp castile soap + 1 gallon water for most grime—biodegradable and plant-based. Conserve water with the two-bucket method instead of continuous hose spray, cutting usage by 60%. Collect rinse water for landscape irrigation where safe.
When to Call It Quits
Replace chairs only when cracks appear in stress areas (like seat-back joints), color is completely gone despite restoration attempts, hardware is severely rusted with no replacements available, or warping creates safety hazards. Well-maintained HDPE chairs often last 15+ years.
Plastic Adirondack chairs reward consistent care with decades of service. Your secret weapon isn’t expensive products—it’s using the right technique at the right time. Start with monthly maintenance, escalate to deep cleaning only when needed, and always finish with UV protection. This routine transforms next spring’s deep clean from a dreaded chore into a 15-minute refresh. Your spotless chairs will be the envy of the neighborhood, proving that with proper knowledge, restoring outdoor furniture is simpler than you ever imagined.


