

You’ve been eyeing those threadbare dining chairs for months. The frames are solid, but the fabric looks like it survived a toddler tornado—and replacing them costs more than your monthly grocery bill. Professional reupholstery quotes make you wince ($200-$700 per chair!), so you’re wondering: How hard is it to reupholster chairs yourself? The truth? Simple dining chairs with removable seats are shockingly beginner-friendly—think 3-5 hours for your first attempt. But jump straight into a tufted wingback? That’s like trying to bake soufflés your first time in the kitchen. This guide cuts through the guesswork so you can decide if your project matches your patience, tools, and tolerance for stapler-induced thumb bruises.
Dining Chairs vs. Wingbacks: Why Difficulty Isn’t One-Size-Fits-All
Simple Dining Chairs: The “Paint-by-Numbers” Starter Project
Your average dining chair with a screw-secured seat pad is reupholstery’s perfect entry point. Remove 4-6 screws, pop off the pad, and you’re left with a flat surface to recover—no complex curves, hidden staples, or structural mysteries. First-timer reality: Your initial chair takes 3-5 hours as you wrestle with fabric tension and corner folds. By chair #3? You’ll finish in 90 minutes flat. The steep learning curve works for you here—each chair sharpens your muscle memory for staple placement and fabric folding.
Critical red flags that make even “simple” chairs hard:
– Wobbly legs needing regluing (fix frames before upholstery)
– Non-removable seat cushions (skip these as a beginner)
– Curved seat bases (requires foam-carving skills)
– Decorative nail heads (adds 2+ hours per chair)
Why Tufted Chairs Break Beginner Spirits
Wingbacks or deep-seated armchairs with attached cushions demand skills built through practice. You’ll face:
– Button tufting: Requires precise hole-punching, thread tension control, and button-wrapping—mess this up, and your cushion looks like a deflated soccer ball.
– Attached cushions: No easy removal means working around armrests and frames, often requiring complete disassembly.
– Foam sculpting: Curved shapes need hand-carved foam that matches original contours (a single slip creates lumpy seating).
– Multiple fabric sections: Pattern matching across arms, backs, and seats multiplies complexity.
Pro Tip: If your chair has more than 100 staples holding the original fabric, assume it’s an intermediate+ project. Count them first!
Your $50 Starter Toolkit vs. “Everything Else” Nightmare

Essential Tools That Actually Matter
Skip the $200 “upholstery kits” promising magic. For dining chairs, you only need:
– Electric staple gun ($25): Manual guns fatigue your wrist; electric models (like Bostitch T6-8) fire 500+ staples per charge. Critical: Use 3/8″ or 1/2″ staples—never shorter.
– Tack puller ($8): Or a flathead screwdriver to pry out old staples without shredding wood.
– Electric carving knife ($15): The secret weapon for clean foam edges (yes, that turkey knife from Thanksgiving).
– Upholstery pliers ($10): For gripping stubborn fabric near corners.
Fabric & Foam: Where Beginners Waste $100
Stop buying cheap craft foam: Low-density foam (under 1.8 lb density) flattens in 6 months. Invest in high-density 2-3″ foam ($25-$40 per seat) for seats that stay supportive. For fabric:
– Avoid lightweight cotton: It wrinkles and stains instantly. Start with microfiber or indoor-outdoor fabric ($15-$30/yard)—they hide tension mistakes.
– Buy 20% extra: Patterned fabric? Add 30%. Your first cut will be wrong.
– Never skip batting: $8 of polyester batting smooths foam imperfections and prevents “staple shadow” on your fabric surface.
Step-by-Step: Reupholstering Your First Dining Chair (Without Crying)
Frame Assessment: The 5-Minute Make-or-Break Check
Flip the chair upside down. Shake each leg aggressively—any wobble means loose joints. Do this first or risk a collapsing chair later. Check screw holes: Striping = wood filler needed. Run sandpaper over bare wood surfaces to prevent splinters. If the frame fails this test, stop. Reupholstering a damaged frame is like decorating a sinking ship.
Disassembly: Preserve the Blueprint
Remove seat screws and place them in a magnetic tray (lost screws derail projects). Photograph every angle of the original fabric attachment. Notice:
– Where staples cluster near edges
– How corners were folded
– Fabric direction (critical for patterns)
Keep old fabric pieces intact—they’re your cutting templates. This step takes 10 minutes but saves 2 hours of guesswork later.
Fabric Removal: Archaeology, Not Demolition
Use your tack puller to gently lift staple crowns. Work clockwise around the seat, removing 10 staples at a time. Save every fabric scrap—even tiny pieces show original tension points. If fabric tears, don’t panic; note where it ripped for your new layout. This “forensic” phase teaches how professionals achieve clean finishes.
Cutting New Materials: The 30-Minute Precision Phase
Foam cutting hack: Trace the old foam onto new high-density foam. Cut slightly smaller (1/8″ less) using your electric carving knife—new foam expands when compressed. Fabric cutting rule: Place old fabric on new material, add 5″ excess on all sides, and mark with chalk. For patterns, align motifs at the seat’s front center—this becomes your focal point.
Assembly: The Staple Gun Ballet
- Foam attachment: Spray adhesive on the seat base (not foam!), wait 30 seconds, press foam centered.
- Batting layer: Lay batting face-down on foam. Staple the center of each side first—never corners. Pull taut toward edges, then staple outward in 2″ increments.
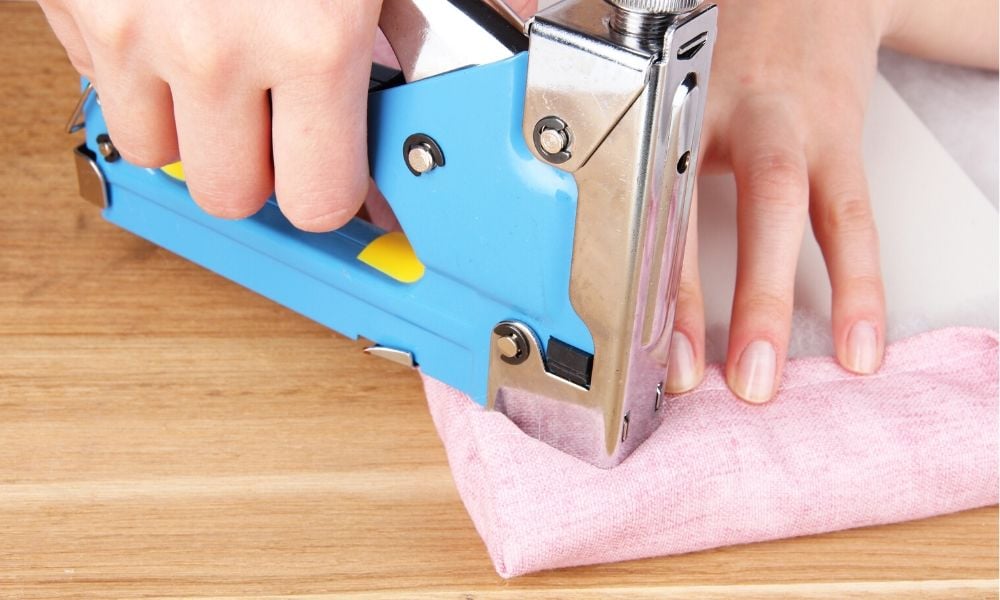
- Fabric application: Position fabric face-down on batting. Staple centers first (top/bottom/sides), then work toward corners. Critical tension tip: Pull fabric with pliers until your knuckles whiten—fabric stretches slightly over time.
- Corner folding: Stop 2″ from corners. Fold left flap toward center, staple. Fold right flap over left, staple. Trim excess fabric close to staples.
Time-saver: Staple every 1″ along edges but space staples 2″ apart in the center—no one sees the middle!
Why Your First Chair Looks “Meh” (And How to Fix It)
Wrinkled Fabric? Here’s the Real Culprit
Most beginners staple too loosely, assuming “tight enough.” Fix: Remove staples from wrinkled sections. Pull fabric with pliers until it pings like a guitar string. Restaple while singing “Row, Row, Row Your Boat”—the rhythm forces slow, even tension. Wrinkles disappear after 24 hours as fabric settles.
“I Ran Out of Fabric!” Panic Solutions
- Corner rescue: Fold excess fabric inward at corners instead of outward—creates a neater pouch.
- Strategic trim: Add 1/2″ decorative cording ($3/yard) to hide gaps (hot-glue it over staples).
- Pillow camouflage: Place a 14×14″ lumbar pillow over problem areas—this becomes your “design choice.”
Foam Failures: Why Your Seat Feels Like a Pancake
Using 1″ craft foam (or worse, memory foam) guarantees a saggy seat. Solution: Rip out the foam and replace it with 2.5″ high-density (1.8+ lb) foam. For dining chairs, add a 1/2″ dacron wrap over the foam—it creates that luxurious “plush but supportive” feel professionals use.
When to Quit Before You Quit Your Sanity
DIY Disaster Warning Signs
Stop immediately if you see:
– Leather seats (requires specialized needles/glues)
– Buttons attached with thread (not glue)
– Springs poking through fabric (indicates major disrepair)
– Curved arms requiring fabric stretching
Call a pro for:
– Heirloom pieces (one mistake = $500 value loss)
– Tufted backs (button spacing must be millimeter-perfect)
– Chairs needing frame repairs (regluing takes 48 hours to cure)
Cost reality: If your chair’s frame is worth under $100, buy new. Professionals charge $75/hour—reupholstering a $50 chair makes zero sense.
The Skill Progression You Didn’t Know You Needed

Month 1: Conquer One Dining Chair
Use $10/yard microfiber—mistakes won’t break the bank. Focus on tension and corners. Your goal: A seat that looks decent from 3 feet away. Document every step; your notes become cheat sheets for future projects.
Month 3: Tackle a Full Dining Set
Now you’ll see the real payoff. Chair #1 took 5 hours. Chair #4 takes 75 minutes. Pro move: Mix fabrics—use bold patterns on seat fronts, solids on sides—to hide minor alignment errors.
Year 1: Attempt an Armchair
Start with a chair featuring a removable cushion (like a Parsons style). You’ll apply dining chair skills to larger pieces while learning:
– How to handle fabric roll direction
– When to use glue vs. staples for curved edges
– Why batting thickness varies by seat angle
Final Verdict: How Hard Is It Really?
Reupholstering simple dining chairs ranks as “moderately easy”—like assembling IKEA furniture with clearer instructions. If you can operate a staple gun and follow a photo, you’ll succeed. The biggest hurdle isn’t skill; it’s trusting your tension as you staple. Complex chairs? That’s “expert” territory requiring 10+ projects of practice.
Your real cost calculation: $50 in tools + $80 in materials = $130 to transform 4 chairs ($32.50 each). Professional reupholstery? That’s $1,000+ for the same set. By chair #3, you’ve earned back your toolkit investment. By chair #6, you’re saving $500 while gaining a skill that breathes life into every worn chair you encounter.
Start with one dining chair. Embrace the wonky first attempt—it’s your tuition payment. In 5 hours, you’ll sit on proof that “how hard is it to reupholster chairs” has a simple answer: Harder than painting a wall, easier than fixing your plumbing, and infinitely more satisfying when you sink into your hand-restored seat at dinner.


