
Tired of looking at worn-out wooden dining chairs that no longer match your home’s aesthetic? Reupholstering wooden dining chairs is your ticket to a stunning dining space transformation without the hefty price tag of new furniture. This hands-on project lets you breathe new life into cherished heirlooms or refresh bargain finds from thrift stores. Most DIYers complete each chair in just 1-2 hours using basic tools, with material costs ranging from $25-45 per chair—far less than professional services that charge $150-300 per piece. Whether your seats are stained, sagging, or simply outdated, this comprehensive guide delivers professional results you’ll be proud to show off at your next dinner party.
The satisfaction of sitting on a chair you’ve personally reupholstered adds character and warmth to your dining experience that mass-produced furniture simply can’t replicate. With the right techniques, your newly upholstered wooden dining chairs will become conversation starters while providing superior comfort. Let’s dive into the exact process that turns drab seats into stunning focal points of your dining space.
Gather Your Materials Before Starting Upholstering Wooden Dining Chairs

Select the Right Fabric for Daily Use
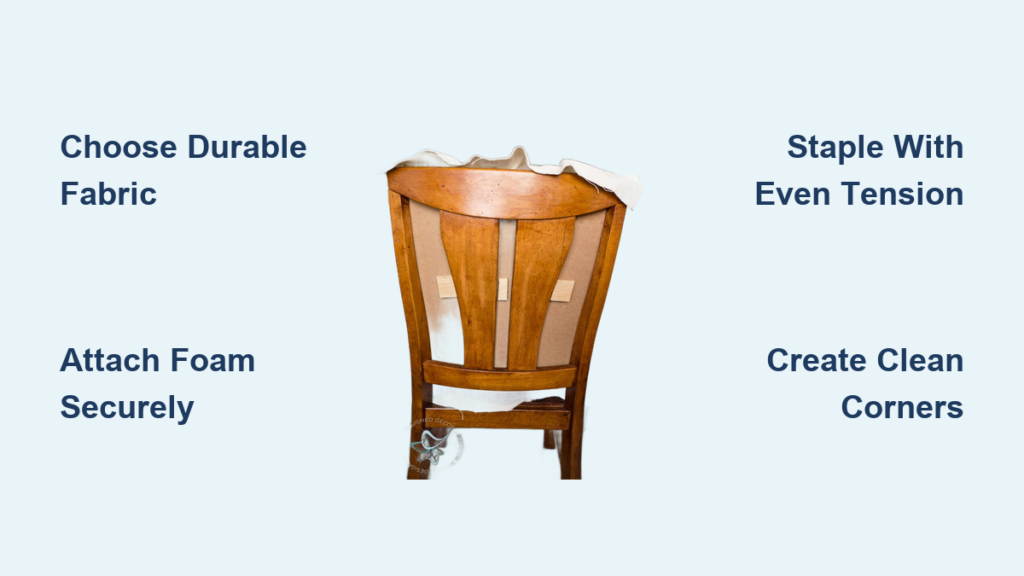
Choose upholstery-weight fabric with a Martindale rub count of 15,000+ to withstand daily dining wear and tear. For easy maintenance, select fabrics with W (water-based) or S-W cleaning codes that allow gentle spot cleaning. Measure carefully based on your chair style—standard dining chairs need ¾-1 yard of 54″ wide fabric, Parsons chairs require 1¼-1.5 yards, while Windsor-style seats only need ½-¾ yard. When cutting, add 4-6 inches around all edges for proper wrapping and account for pattern repeats under 6″ to maximize fabric efficiency. Always cut pattern pieces face down and mark centerlines to ensure symmetrical placement across multiple chairs.
Prepare Foam and Padding Layers
Purchase foam with 1.8-2.2 pounds per cubic foot density and 2-4 inches thickness for optimal comfort in dining applications. Check the IFD (Indentation Force Deflection) rating—aim for 30-45 to support your weight without excessive sinking. Before attaching, trace your seat shape onto the foam and cut slightly inside your lines for a compression fit. Apply spray adhesive to both the seat board and foam bottom, press firmly for 30 seconds, then allow 15 minutes for proper curing. Complete your cushion with ½-inch polyester batting cut 3 inches larger than the foam on all sides. Staple the batting starting at center points of each side, working toward corners while maintaining even tension that compresses the foam slightly without creating dimples.
Disassemble and Prepare Your Wooden Dining Chairs
Remove Old Upholstery Safely
Flip each chair upside down onto a padded surface and wear gloves with safety glasses before removing old staples. Locate the tack strips along the seat perimeter and carefully pry up staples using a flathead screwdriver with needle-nose pliers. Pull fabric gently to avoid damaging the wood frame, then remove all layers including foam, batting, and dust cover. If working with multiple chairs, number each one and keep hardware in labeled bags to prevent mix-ups during reassembly. This systematic approach ensures you maintain the original structure while creating a clean slate for your new upholstery.
Restore the Wood Surface
Vacuum all crevices using a brush attachment, then wipe surfaces with a tack cloth to remove fine dust particles. Lightly sand rough spots with 220-grit sandpaper and touch up the wood finish where previous fabric was attached. Before proceeding, inspect for loose joints needing regluing, check seat board integrity, and note any repairs required. A well-prepared wood surface prevents future issues and ensures your new upholstery sits perfectly flush. This preparation stage takes only 15-20 minutes per chair but makes a dramatic difference in your final professional appearance.
Perfect Your Fabric Attachment Technique
Follow the Stapling Sequence
Achieve wrinkle-free results by following this precise stapling sequence: Start with one staple at the front center, then position a second at the back center while pulling the fabric snug. Add staples at left and right center points next, alternating sides as you work toward corners. Press the fabric firmly after each staple—proper tension means the material should spring back without wrinkles. Use ¼-inch staples for initial layers and upgrade to ⅜-inch staples for the final fabric attachment. Check your work frequently by sitting on the chair to ensure comfort and appearance meet your standards before moving to the next section.
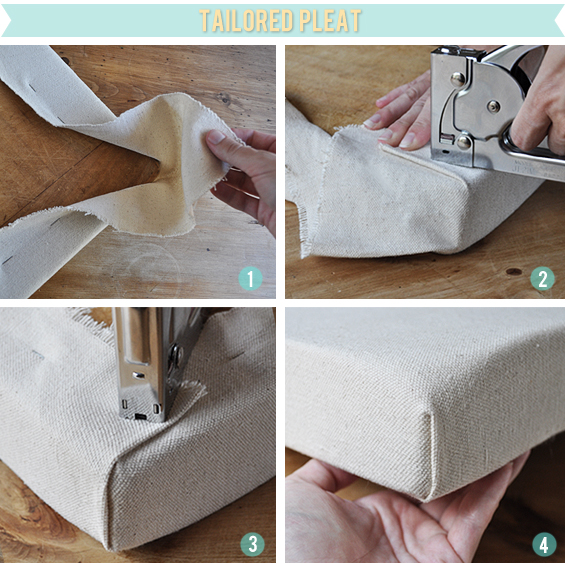
Master Professional Corner Folds
Hospital corners create the cleanest finish for upholstering wooden dining chairs. Pull the fabric straight across each corner, then create a precise 45-degree fold toward the center. Fold the excess fabric under to form a sharp edge and secure with 3-4 staples in a triangular pattern. For thicker fabrics or detailed corners, try the envelope fold technique that wraps excess material neatly underneath. Take your time with corners—they’re the most visible detail when seated at the table. Perfect corners transform a DIY project into something that looks professionally done, elevating your entire dining space.
Solve Common Upholstering Challenges
Fix Fabric Wrinkles Before They Set
Wrinkles typically occur from uneven tension or improper staple placement. Diagnose the issue by checking if staples sit too close to the edge (causing puckering) or if pattern distortion indicates uneven pulling. To correct, remove only the affected staples, reposition the fabric with even tension, and restaple working in smaller sections. For stubborn wrinkles, temporarily remove all staples on one side, smooth the fabric completely, then restart the stapling sequence from the center. Prevention is better than correction—always test tension by pressing the fabric firmly before committing with additional staples.
Align Patterns Across Multiple Chairs
Create a cohesive dining set by matching patterns across all chairs. Mark centerlines on both your fabric and seat before cutting, then use temporary pins to hold position while you check alignment. Work systematically from center outward, checking your progress before each staple. For complex patterns, complete one chair as your “master” piece before cutting remaining fabric to ensure consistency. This attention to detail makes your upholstering wooden dining chairs project look professionally coordinated rather than mismatched.
Extend Your Upholstered Chairs’ Lifespan
Implement Daily Maintenance Practices
Preserve your newly upholstered wooden dining chairs with simple daily habits. Vacuum weekly using an upholstery attachment to remove crumbs and debris that could damage fibers. Immediately blot spills with a clean white cloth—never rub, as this pushes stains deeper. Rotate chairs monthly for even wear across all seating positions, and apply fabric protector annually to boost stain resistance. These small efforts dramatically extend the life of your upholstery while keeping your dining space looking fresh.
Plan for Future Refreshes
Schedule professional-level maintenance every 3-5 years to keep your upholstered chairs in prime condition. Tighten any loose staples, replace compressed foam sections, and touch up wood finishes where needed. Consider a full reupholstery project when style updates are desired—this process becomes faster and easier with practice. Your initial investment in learning how to upholster wooden dining chairs pays dividends for years through multiple refresh cycles that keep your dining space current without constant replacement costs.
Reupholstering wooden dining chairs transforms both your furniture and your dining experience with remarkable results. Start with one chair to perfect your technique, then tackle the full set with confidence. The personalized touch you add through fabric selection and careful craftsmanship creates a dining space that reflects your unique style while providing comfort that store-bought furniture can’t match. Within a weekend, you’ll enjoy the satisfaction of sitting on chairs you’ve personally revitalized—pieces that will serve your family beautifully for years to come.


