
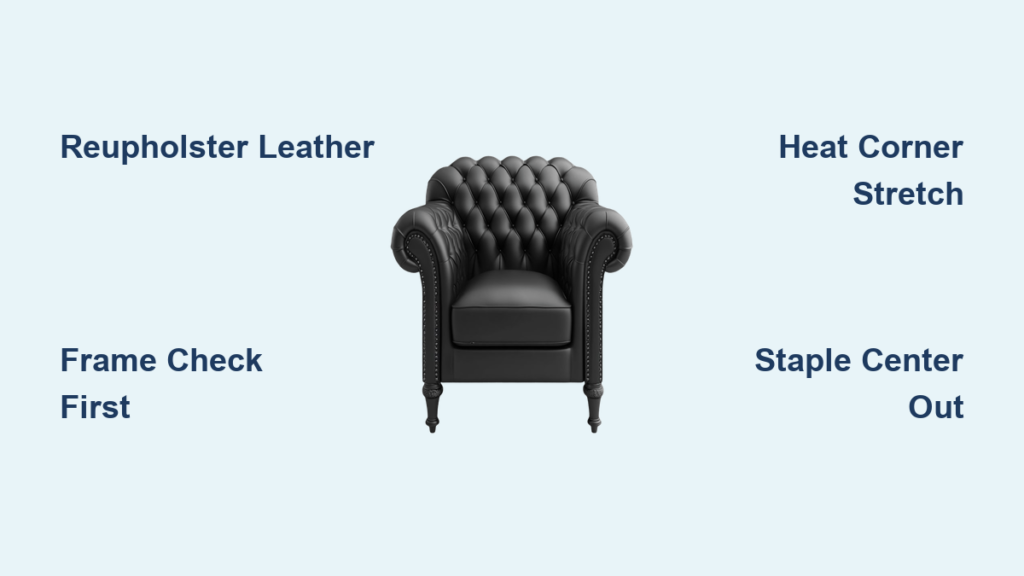
That cracked leather armchair you’ve been avoiding? Don’t call the junk haulers yet. Reupholster leather chairs yourself and transform worn seating into showpieces for under $100—versus $2,000 professional quotes. Whether it’s your great-grandfather’s wingback or thrift-store dining chairs, this guide reveals exactly how to breathe new life into leather furniture. You’ll gain complete control over materials while saving 80% compared to replacement costs.
Most leather chairs are prime candidates for reupholstery, from dining sets to bar stools. The secret lies in matching your project to your skill level: simple seat cushions take beginners just 4 hours, while complex armchairs challenge even experienced DIYers. By the end of this guide, you’ll know precisely how to assess, dismantle, and reupholster leather chairs with professional results.
Skip $2,000 Quotes: Real Cost Breakdown for Leather Reupholstery
Professional leather reupholstery for dining chairs runs $800-$2,000—enough to buy new furniture. But your DIY reality? Just $60 for leather remnants plus tools you’ll reuse. For a single chair, you’ll need only 2-3 square feet of leather ($40-$60 per yard), two layers of padding ($15), and basic fasteners ($10). That’s under $100 versus professional quotes, with identical materials.
Don’t waste money on bonded leather—it’s the lowest-grade option that peels within months. Focus on top-grain or full-grain hides for lasting value. Remember: well-constructed vintage frames justify the reupholster leather chairs investment, while particleboard pieces may be beyond saving. Always inspect for wood rot first—press a screwdriver into hidden joints; if it sinks in easily, skip the project.
Your Essential Toolkit: Leather-Specific Gear You Can’t Skip

Precision Cutting Tools That Prevent Costly Mistakes
Dull scissors ruin leather—invest in professional leather shears or a 60mm rotary cutter. Pair these with a 36-inch aluminum straight edge for flawless straight cuts and a clear acrylic ruler for curved sections. Mark patterns with grease pencils (they wash off after cutting) and wear compression gloves to grip slippery hides. Skip fabric scissors—they’ll fray leather edges immediately.
Stapling Systems for Wrinkle-Free Results
Standard staple guns fail on thick leather. You need a long-nose upholstery staple gun that reaches tight corners, plus two staple sizes: 3/8″ for thin leather layers, 1/2″ for thick padding stacks. A magnetic tack hammer prevents dropped staples from scratching surfaces, while an upholstery tack puller saves your frame during disassembly. Never use nails—they loosen as leather stretches.
Leather-Specific Supplies for Pro-Level Finishes
Heat guns (or high-setting hair dryers) soften leather for corner stretching. Leather needles pierce thick material without breaking, while UV-bonded nylon thread (Tex 90) prevents sun-fade damage. Keep leathercraft cement and a burnishing machine for edge finishing—these transform amateur corners into gallery-worthy details. Skip regular thread; it snaps under leather’s tension.
Frame Rescue: Pre-Project Checks That Make or Break Your Project

Structural Integrity Tests Before You Begin
Flip chairs upside down and shake aggressively—any wobble means loose joints requiring glue reinforcement. Probe hidden areas with a screwdriver; soft spots indicate wood rot that can’t be repaired. Photograph every angle before disassembly—these become your blueprint for reassembly. If the frame creaks or flexes, stop: reupholstering leather chairs on unstable frames wastes materials.
Smart Disassembly Without Frame Damage
Remove seats by unscrewing attachment points underneath—label each screw location with painter’s tape. Use a flathead screwdriver to pry out old staples, working from the center outward to avoid wood splits. Save original leather pieces as cutting templates—they account for subtle curves new patterns miss. Sand the bare frame smooth and apply wood scratch cover to hide flaws; test finishes on hidden areas first.
Leather Selection Secrets: Avoiding Costly Material Mistakes
Exact Yardage Calculations That Prevent Shortfalls
Dining chair seats need just 2-3 square feet of leather—check remnant bins at upholstery shops first. For a 6-chair set, budget a full hide (50-55 sq ft). Always add 3 extra inches on all sides—a 20″ seat requires 26″ of leather for stretching and stapling. Measure twice: leather can’t be unstitched like fabric, so miscalculations mean starting over.
Grade Selection for Your Chair’s Real-World Use
Full-grain leather develops rich patina over decades but costs 30% more. Top-grain offers 90% of the durability at better value. For bar stools, choose semi-aniline leather with protective finishes—it resists spills better than pure aniline. Dark colors hide wear; avoid light shades for high-traffic areas. Skip “genuine leather” labels—it often means split leather that tears at stress points.
Seat Reupholstery: No-Sew Method for Flawless Results
Layering Sequence That Prevents Sagging
Lay your leather piece face-down, then add in this exact order:
1. Polyester batting (for cushion protection)
2. 2″ foam padding (½” wider than wood base)
3. Wooden seat base
Center everything precisely—offset layers cause lumps. Mark front/back center points on leather with grease pencil before proceeding. This sandwich method creates professional tension without sewing.
Stapling Technique That Eliminates Wrinkles
Start by tacking center front with one staple, then stretch leather tightly to center back and add another. Repeat for both sides, creating an “X” of tension. Staple from center toward corners in each direction, stopping 2-3 inches from corners. Maintain firm, even pressure—loose spots now become permanent wrinkles. Remove temporary tacks as you permanently staple.
Heat-Assisted Corner Mastery
Warm corners for 30 seconds with a hair dryer on high. Pull excess leather diagonally backward from the corner point, set one staple, then create tiny pleats to gather remaining material. Each pleat gets one staple—this hides bulk underneath. For stubborn corners, remove staples back to center, then make micro-pleats while stretching leather away from the corner. The finished corner should lie perfectly flat without visible folds.
Pro Finishing: Details That Trick Experts
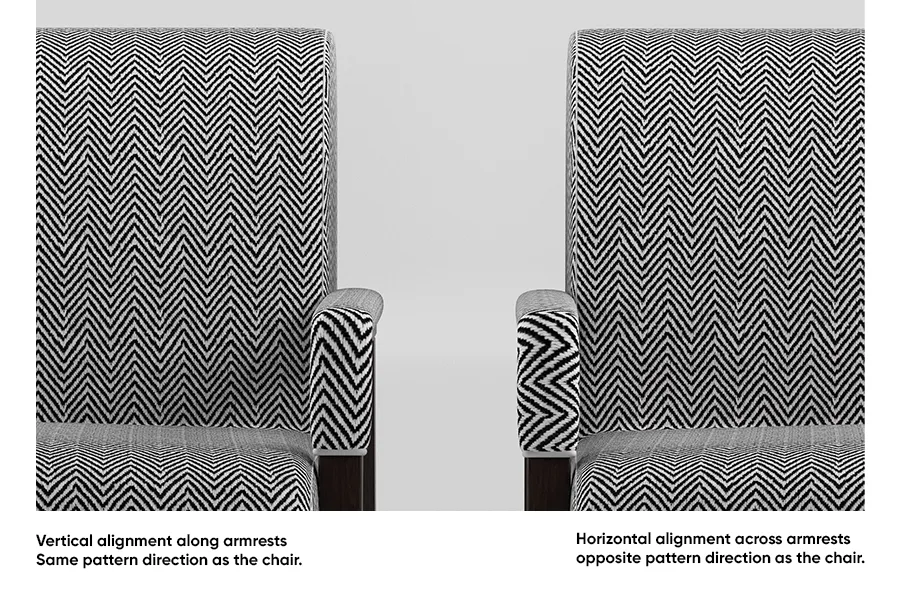
Pattern Alignment for Matching Chair Sets
When reupholstering leather chairs in a set, measure 1″ up from the cushion edge to find pattern repeats. Mark center points on each seat before cutting—this ensures stripes or textures flow continuously across all chairs. Misaligned patterns scream “DIY disaster,” while perfect matching looks professionally done.
Invisible Edge Treatment That Lasts
Never staple within 1″ of outer edges—this allows clean trimming later. After stapling, cut excess leather close to staples, then flatten bulk with ½” staples. Cover the underside with non-woven cambric (or landscaping weed barrier) stapled tightly to the frame. This dust cover prevents debris buildup while giving your project a $2,000 professional underside.
Post-Project Care: Protecting Your Investment
First 24 Hours That Determine Longevity
Apply leather protector within one day of finishing—this creates a stain barrier during the critical settling period. Test cleaners on hidden areas first; aniline leather reacts poorly to some conditioners. Vacuum weekly with a soft brush attachment to prevent grit abrasion. Wipe spills immediately with a dry cloth—rubbing spreads stains into the grain.
Annual Maintenance Routine
Professional leather cleaning every 12-18 months removes embedded dirt that dulls finishes. For high-use chairs, apply conditioner every 6 months to prevent cracking. Check stress points (seat corners, armrest edges) quarterly for loose staples. Reinforce torn seams immediately by gluing a fabric patch behind the tear before restitching—delaying causes total failure.
Fix Common Mistakes in Under 10 Minutes
Wrinkle Emergency Protocol
Small wrinkles vanish with targeted heat: Hold a hair dryer 8 inches from the surface for 15 seconds while smoothing with your palm. Never exceed medium heat—leather scorches at 140°F. Work from the wrinkle’s center outward, applying gentle pressure. Test on hidden areas first; aniline leather is heat-sensitive.
Bulging Corner Repair
Remove staples from the problem corner back to the center. Stretch leather firmly away from the corner while creating 3-4 micro-pleats, adding one staple per pleat. The excess material disappears beneath the seat when upright. Don’t cut excess leather—it creates weak spots that tear under pressure.
Project Reality Check: Time vs. Skill Level
Simple dining chair seats take 3-5 hours for first-timers. Complex armchairs with curved arms require 15+ hours spread over multiple days. Start with square stools—no sewn corners or complex curves. Your success indicator? Smooth surfaces with no shifting when pressed firmly. If you hear staples popping, remove and restaple with tighter tension.
Reupholster leather chairs transforms furniture with soul into conversation pieces. That armchair molded to your shape? It’s worth saving. With $60 in materials and one weekend, you’ll own a custom piece no store can replicate—plus the pride of mastering a timeless craft. Your perfect chair isn’t out there; it’s waiting in your living room, ready for renewal.


