
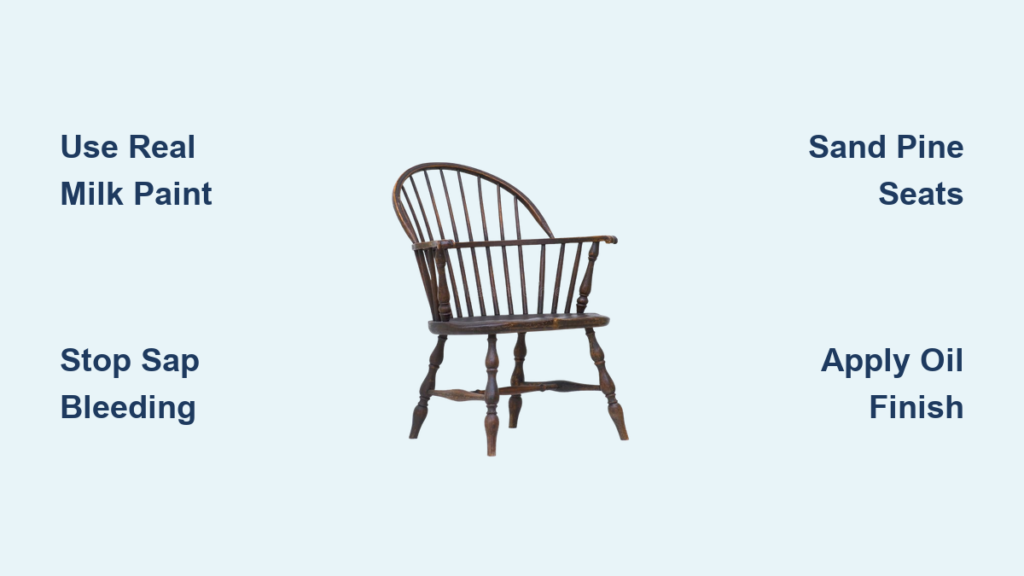
That chipped green spindle-back chair in your attic isn’t just furniture—it’s a piece of American history whispering for revival. When you start painting Windsor chairs, you’re continuing a centuries-old tradition where colonial craftsmen unified mismatched woods with vibrant milk paint. This guide cuts through modern confusion to deliver authentic restoration techniques, revealing why those shockingly bright spring-grass greens on original Windsors weren’t design flaws but status symbols. You’ll discover exactly how to transform flea-market finds into heirlooms using non-toxic milk paint that develops genuine patina over decades—not peeling acrylics that scream “DIY disaster.”
Most failed Windsor chair restorations begin with poor paint choices. Contemporary “milk paint” in liquid form is typically acrylic imposter paint lacking historical accuracy and durability. True restoration requires powdered milk paint mixed fresh for each coat—a process that demands precision but rewards you with finishes that age gracefully through generations. By the end of this guide, you’ll confidently prep pine seats bleeding sap, apply period-accurate color layers, and protect your work with finishes that honor 18th-century craftsmanship.
Select Authentic Milk Paint Colors Like Colonial Craftsmen
Your chair’s color tells a social story invisible to modern eyes. Colonial Williamsburg research confirms green dominated original Windsors—not the muted sage we imagine, but electric spring-grass green made with toxic verdigris. This wasn’t subtle decor; it screamed wealth when lead-based paints cost more than the chair itself. Today’s safer milk paint alternatives capture that historical vibrancy without copper poisoning risks.
Choose colors based on historical context:
– Bright green: Most common for everyday chairs (avoid dark forest greens)
– Jet black: Reserved for formal taverns and dining rooms
– Rust red: Country kitchens and work furniture
– Lapis blue: Rare and expensive—only for elite households
Critical purchasing tip: One pint of dry milk paint powder covers exactly one Windsor chair. Buy extra for touch-ups—The Real Milk Paint Company’s “Colonial Green” matches original hues better than pre-mixed alternatives. Never substitute liquid “milk paint” from big-box stores; these acrylic imposters lack the porous texture that creates authentic aged patina.
Prep Pine Seats to Stop Sap Bleeding Forever
Pine seats sabotage 90% of Windsor chair painting projects when sap bleeds through paint. Colonial craftsmen faced this too, but modern restorers have a heat-powered solution they lacked. Ignoring this step guarantees yellow stains ruining your finish within months.
Heat and Solvent Sap Removal Protocol
Wear nitrile gloves and work outdoors—this isn’t gentle cleaning. Start by blasting the entire seat with a heat gun until pores visibly glisten. Immediately wipe with a naptha-soaked rag; the solvent grabs liquified resin as it surfaces. Repeat until rags stay clean—pitchy antique seats may require 3-4 cycles.
Never skip the grain-raising step: After sap removal, wet the seat thoroughly with clean water. Let it dry overnight to swell compressed fibers, then lightly sand with 220-grit paper. This creates microscopic “tooth” for paint adhesion. Skipping this causes paint to peel off smooth, compressed pine like stickers on glass.
Prepare Hardwood Spindles for Flawless Paint Adhesion
Oak spindles and maple legs need different prep than pine seats. Their density resists paint penetration, causing peeling on high-wear areas like armrests. Colonial craftsmen hand-sanded to microscopic smoothness—a step modern restorers often rush with power tools.
Hardwood Sanding Sequence for Paint Bonding
Begin with 180-grit paper to remove decades of grime, progressing to 220-grit for final smoothing. Crucially, wet the entire chair after sanding; water swells compressed wood fibers invisible to the naked eye. Let dry 12 hours before a final 220-grit pass. This reveals hidden “whiskers” that would otherwise poke through paint layers. Check every joint with a magnifying glass—glue residue spots are paint’s kryptonite.
Pro tip: For turned spindles, sand at 320-grit while rotating on a lathe. If hand-sanding, wrap paper around dowels to reach curved surfaces. Always finish with the grain direction—cross-grain scratches telegraph through thin milk paint coats.
Mix Milk Paint to Avoid Brush Marks and Runs
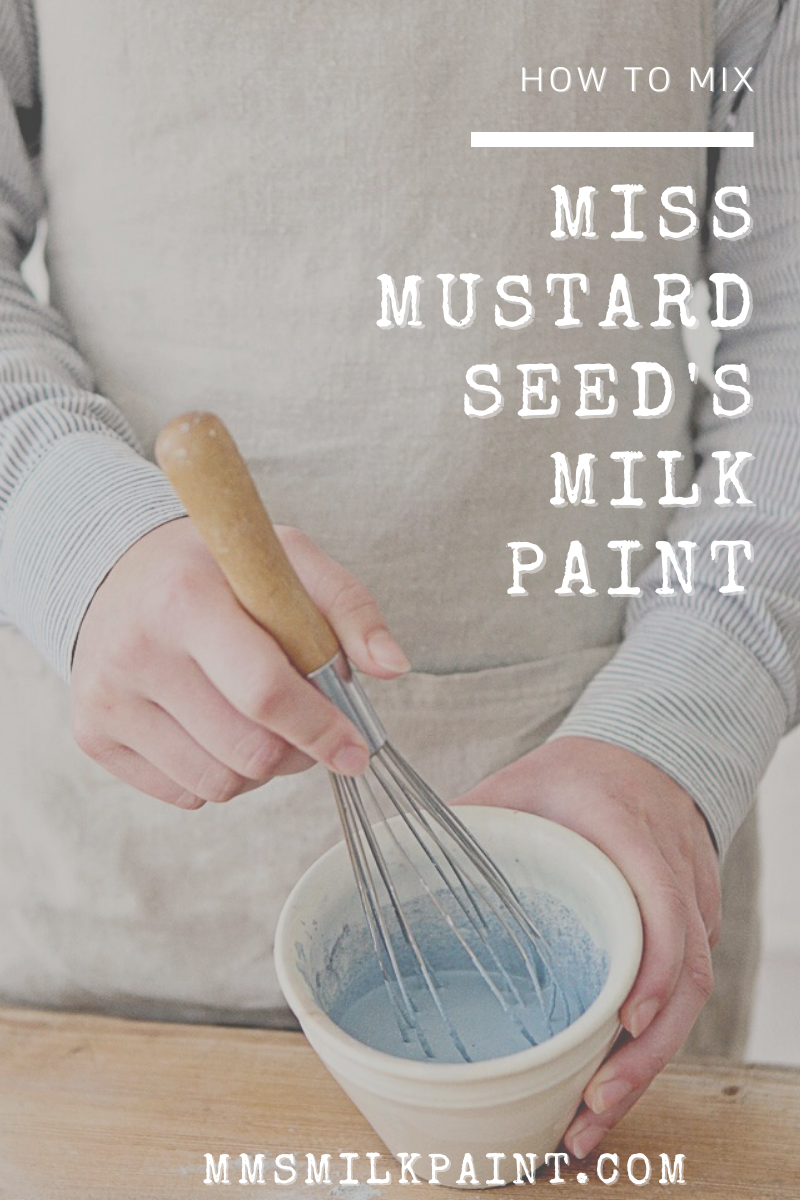
Milk paint disasters almost always trace back to improper mixing. Too thick? Brush marks crater your finish. Too thin? Runs pool in chair crevices. The 2:1 water-to-powder ratio seems simple but requires laboratory precision—colonial painters measured by eye after years of practice.
Perfect Mixing Formula for Brushable Consistency
Combine ⅓ cup dry powder with ⅔ cup ice-cold water (room temperature causes clumping). Add exactly 3 drops anti-foam agent—no substitutes. Whisk 90 seconds until smooth as buttermilk, then strain through pantyhose. Work fast: mixed paint thickens after 20 minutes and becomes useless after 24 hours.
Critical warning: Never save leftovers. Fresh mixing for each coat is non-negotiable—reconstituted paint lacks adhesion. Test batches on scrap wood first; red pigments often require slightly more water than greens. If your mix resembles pancake batter, add water by the teaspoon until it flows like heavy cream.
Apply Paint Like an 18th-Century Master: Brush vs. Spray
Windsor chairs’ complex geometry demands strategic application. Brushing offers control for intricate spindles but risks lap marks. Spraying covers faster but requires chair rotation mastery. Colonial painters used hog-hair brushes you can still buy today—modern synthetics work but lack the “snap” for crisp edges.
Two-Color Distressed Finish Technique
For authentic black-over-red finishes:
1. Apply two thin coats of red base (24 hours dry time between coats)
2. Lightly sand entire chair with 0000 steel wool
3. Apply two coats of black topcoat, waiting 12 hours between
4. Sand sharp edges (arms, seat rim) with 320-grit to reveal red
Spray shortcut: Use a Wagner Studio Pro with Control Finish nozzle. Rotate the chair vertically, horizontally, and upside-down for full spindle coverage. Strain paint through 180-micron mesh first—clogs ruin fine finishes. Always spray in 70°F+ temperatures; milk paint dries too fast in heat, causing “alligatoring.”
Protect Your Paint with Authentic Historical Finishes
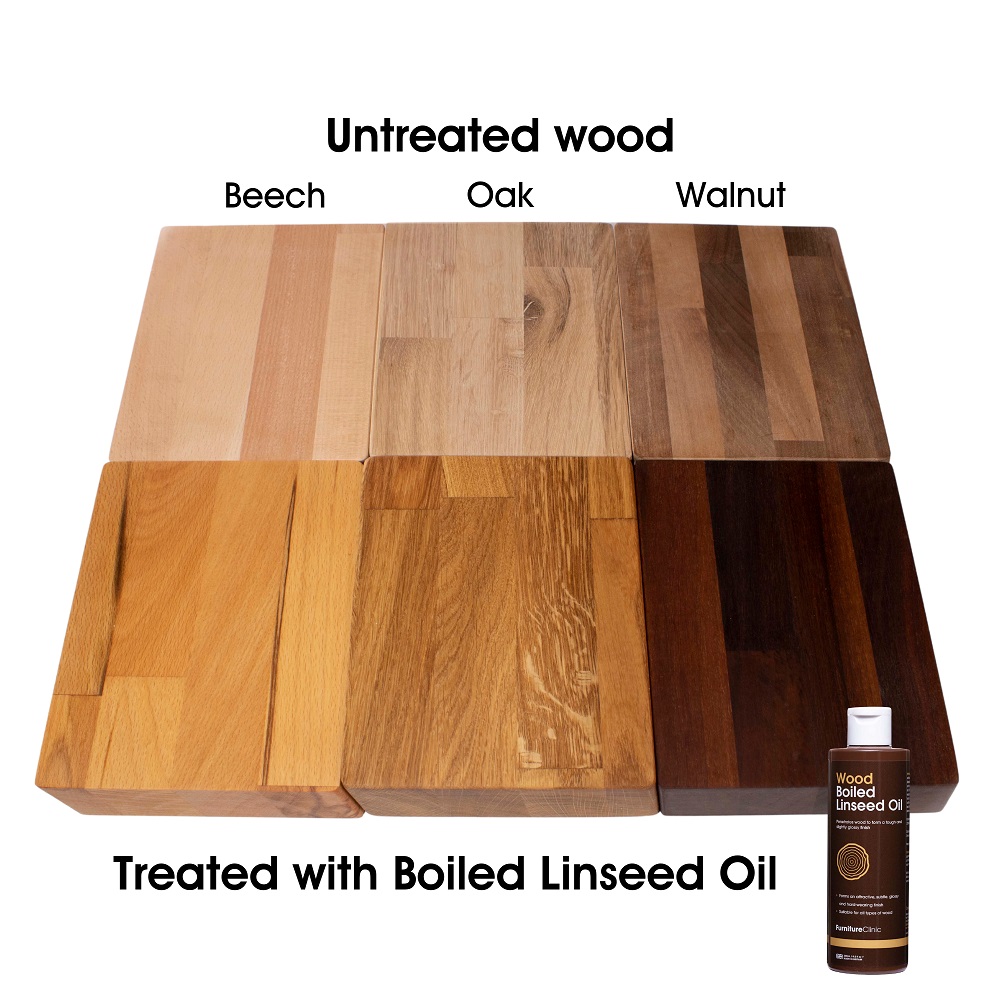
Skip polyurethane—it yellows milk paint and kills patina development. Colonial craftsmen used boiled linseed oil (BLO), but modern restorers need tiered protection based on chair use. Display pieces need minimal finish; dining chairs require armor-like durability.
Oil/Varnish Blend Recipe for Maximum Durability
Create your own finish mimicking museum conservation labs:
– 1 part boiled linseed oil
– 1 part Behlen’s spar varnish
– 1 part mineral spirits
Apply liberally with a lint-free cloth, then wipe completely dry. Repeat after 24 hours. This penetrates paint while building a satin surface film that resists water rings. For wall-mounted display chairs, pure paste wax (Briwax) suffices—just rub and buff. Never apply oil finishes until milk paint cures fully (48+ hours).
Fix Common Painting Failures Immediately
Catching mistakes early saves stripping the entire chair. Raised grain after first coat? That’s normal—not a disaster. Rough texture means you skipped the wet-sand-dry protocol on pine. Act within 24 hours: dampen the chair, let dry overnight, then 220-grit sand smooth.
Sap Bleeding Emergency Response
If yellow spots appear post-painting:
1. Heat affected area with heat gun
2. Wipe immediately with naptha-soaked rag
3. Sand spot lightly with 320-grit
4. Reapply matching paint coat
Never paint over sap stains—they’ll resurface stronger. For adhesion failures (peeling paint), contamination is 100% the culprit. Strip back to bare wood with methylene chloride stripper (milk paint resists it better than acrylics), then restart your cleaning protocol.
Maintain Painted Windsor Chairs for Generational Beauty
Authentic milk paint isn’t meant to stay perfect—it evolves. Colonial chairs developed “burn-through” where edges wore to undercoats, creating visual depth modern reproductions lack. Your restoration succeeds when you stop fighting natural patina.
Quarterly Maintenance Checklist
- Monthly: Dust with microfiber cloth (no polishes)
- Quarterly: Rub high-wear areas with BLO on cotton rag
- Annually: Full wax application using Briwax in “Antique” finish
Touch-up secret: Sand damaged spots to sound paint, clean with mineral spirits, then apply Real Milk Paint’s “Bonding Agent” before new paint. Feather edges with 0000 steel wool—visible repair lines defeat the purpose of historical restoration.
Final Note: Your painted Windsor chair now carries forward a tradition where function met artistry—each scratch adding to its story like the original colonials intended. Resist over-maintenance; these chairs were built for daily use, not museum cases. Within five years, sunlight will mellow that vibrant green to antique perfection while wear patterns reveal your family’s life in its grain. This isn’t just painting Windsor chairs—it’s preserving American craft one spindle at a time.


