
Your garden chairs have endured seasons of sun, rain, and neglect. What were once vibrant accents for your patio now sit faded and peeling—a constant reminder of the outdoor space you could be enjoying. Instead of replacing these functional pieces, painting garden chairs offers a budget-friendly solution that breathes new life into your entire outdoor area. This single weekend project lets you customize your patio’s aesthetic for a fraction of the cost of new furniture while creating a cohesive, personalized retreat.
Whether you’re dealing with rusted metal frames, sun-bleached plastic, or weathered wood, this guide delivers the exact professional techniques for long-lasting results. You’ll discover material-specific prep methods that prevent premature peeling, learn which paints withstand harsh elements, and master application secrets for that coveted smooth finish. Most importantly, you’ll avoid common DIY mistakes that turn a simple refresh into a recurring chore.
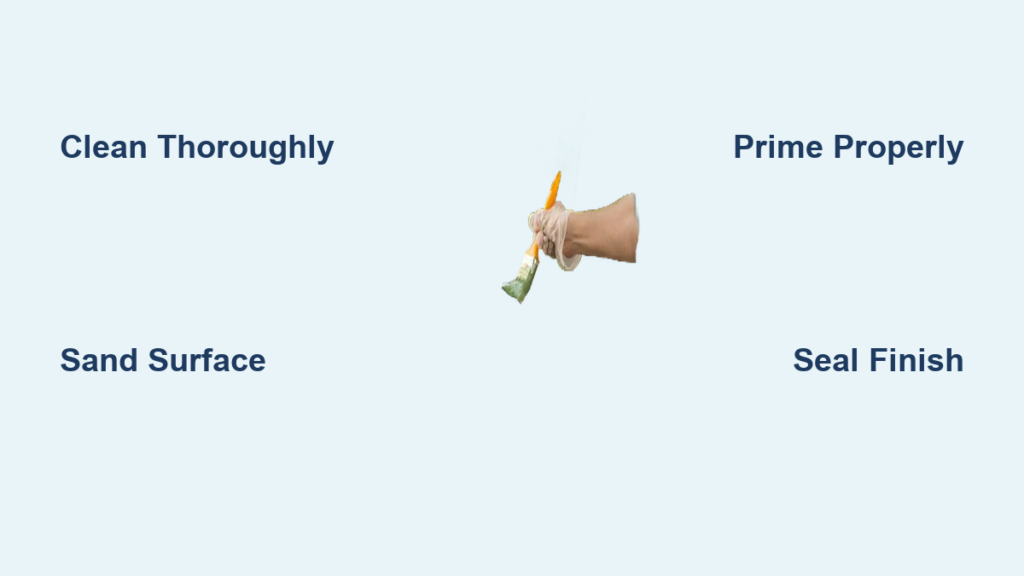
Essential Materials Checklist for Every Surface
Gather all supplies before starting to prevent mid-project delays that compromise color matching and material compatibility. Having everything ready streamlines your painting garden chairs process significantly.
Universal Supplies for All Materials
- Mild detergent mixed with warm water in a bucket for deep cleaning
- 120-grit sandpaper essential for creating paint-adhesion surfaces
- Painter’s tape to protect armrests, legs, and intricate details
- Quality exterior brushes or rollers designed to handle weather-resistant paints
- Drop cloths to shield surrounding patio surfaces from overspray
Material-Specific Requirements
Metal Chairs:
– Wire brush or coarse sandpaper (80-grit) for aggressive rust removal
– Rust converter primer to chemically stabilize corroded spots
– Exterior-grade acrylic latex or enamel paint formulated for metal
– Rust-resistant sealant providing critical moisture barrier protection
Plastic Chairs:
– Pintyplus Tech Plastic Spray Primer (400ml) creating molecular bonding sites
– Pintyplus Evolution Gloss acrylic spray paint (400ml) in vibrant options
– Color choices: Pure white, Antique Pink, Gentian Blue, Mint Turquoise
Wooden Chairs:
– High-quality exterior primer sealing porous wood fibers
– UV-resistant acrylic latex paint preventing sun-induced fading
– Water-repellent outdoor sealant guarding against moisture damage
Pro tip: Rent the WAGNER Paint Sprayer (Wood & Metal W 100 model) for under $50. This professional tool cuts application time by 70% while delivering flawless coverage on textured metal and porous wood surfaces.
Surface Assessment First Steps
Identify Your Chair Material
Run your hands over surfaces to determine your chair’s composition. Metal feels cold and heavy with visible weld points, plastic shows slight flexibility and smooth seams, while wood reveals distinct grain patterns. Painting garden chairs requires material-specific approaches—using wood techniques on plastic guarantees peeling within weeks.
Damage Inspection Checklist
Conduct a thorough structural evaluation before any prep work:
– Wiggle tests for loose joints that need tightening
– Crack mapping along plastic seams or wood legs
– Rust bubble identification on metal frames
– Fabric integrity checks for mesh or sling seats
Critical warning: Never paint over structural damage. Repair broken components first, or your beautiful new finish will crack along with the underlying failure.
Deep Cleaning Process
Initial Wash Method
Fill a bucket with warm, soapy water using a mild detergent. Scrub every surface—including undersides, joints, and crevices—with a stiff-bristled brush. Focus on dirt traps: armrest grooves, seat slats, and hardware connections where grime accumulates.
Rinse and Dry Protocol
Rinse thoroughly with clean water until runoff runs clear. Non-negotiable rule: Allow minimum 24 hours drying time. Painting over damp surfaces causes bubbling and immediate adhesion failure. Speed drying by positioning chairs in direct sunlight with rotating every 3 hours for even evaporation.
Material-Specific Prep Techniques

Metal Chair Restoration
Scrub rust spots with coarse sandpaper until you see bare metal. Apply rust converter primer to stubborn areas—thin coat, wait 15 minutes, then wipe excess. Always sand in the direction of metal grain (following chair contours) to create microscopic grooves for paint grip.
Plastic Chair Preparation
Lightly scuff surfaces with 220-grit sandpaper to break gloss. Clean thoroughly with plastic-specific cleaner to remove manufacturing residues that repel paint. Unlike other materials, plastic requires minimal sanding—aggressive prep creates visible scratches.
Wood Chair Refinishing
Sand through old finishes using 120-grit paper, progressing to 220-grit for smoothness. Always follow wood grain direction to prevent cross-grain scratches visible through paint. Remove all dust with a tack cloth—microscopic particles create texture in your final finish.
Primer Application Secrets
Why Primer Matters
Primer creates molecular bonding sites that paint alone cannot achieve. Skipping this step when painting garden chairs guarantees premature failure, especially on weathered surfaces exposed to UV rays and moisture.
Application Techniques by Material
Metal: Apply rust-inhibiting primer to entire chair—not just rust spots—with foam brush. Watch for runs on curved legs; immediately smooth with brush tip.
Plastic: Spray Pintyplus Tech primer from 15cm distance in light, even coats. Heavy application causes drips that ruin adhesion.
Wood: Apply two thin primer coats with synthetic brush (never one thick coat). Sand lightly between coats for ultra-smooth results.
Paint Application Mastery
Brush vs. Spray Decision Guide
Choose brush/roller when: Painting intricate wrought iron details, applying multiple colors, or working with textured surfaces where overspray creates mess.
Choose spray when: Covering large smooth surfaces, achieving factory finishes, or using metallic paints that brush marks disrupt.
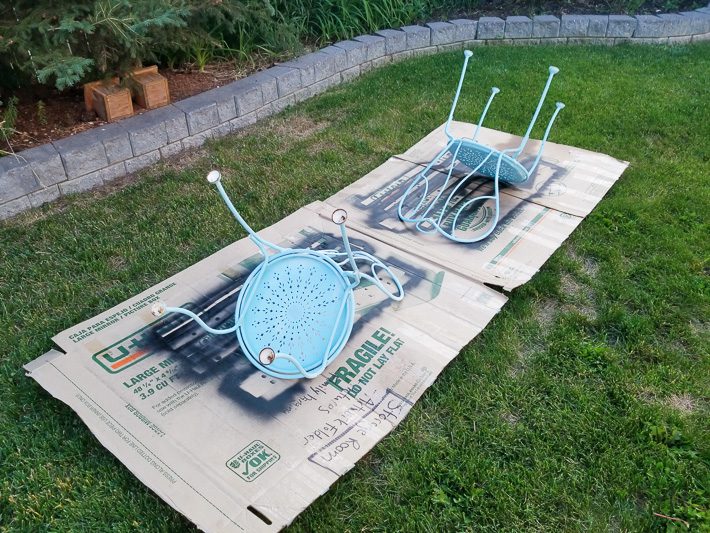
Professional Spray Technique
Hold sprayer 15cm from surface—closer causes runs, farther creates orange-peel texture. Maintain consistent left-to-right motion while keeping hand moving. Apply first coat slightly streaky for optimal adhesion, then add second coat after 2 hours for full coverage. Never spray when temperature exceeds 85°F or humidity is high.
Protective Sealant Application
When to Seal
Wait 24-48 hours after final paint coat (72 hours for enamel). Test cure by pressing fingernail into hidden area—no indentation means ready for sealing. Rushing this step traps moisture under sealant.
Material-Specific Sealants
- Wood: UV-resistant sealant prevents graying and color fading
- Metal: Rust-resistant topcoat adds moisture barrier
- Plastic: Clear acrylic sealer guards against UV color degradation
Apply thin, even sealant coats with foam roller—avoid buildup at joints where pooling occurs. Two light coats outperform single heavy applications every time.
Troubleshooting Common Problems
Runs and Drips
Cause: Sprayer too close or brush overloaded
Fix: Sand smooth with 220-grit after full drying, then reapply thin coat
Paint Not Adhering
Cause: Inadequate prep or wrong primer
Fix: Strip paint completely, re-prep surface, apply correct material-specific primer
Uneven Coverage
Cause: Insufficient coats or poor lighting
Fix: Add third thin coat under bright work lamp before sealing
Time and Budget Reality Check

Realistic Timeline
- Prep/cleaning: 2-3 hours (including mandatory drying)
- Painting: 4-6 hours for 4 chairs (with between-coat drying)
- Sealing: 1 hour application + 24-hour cure
- Total project: One full weekend for professional results
Cost Breakdown
- Budget option: $35 using basic supplies and brushes
- Professional results: $100 including sprayer rental and premium paints
- Savings vs. replacement: $300-700 depending on chair style
Money-saving tip: Buy paint during end-of-season sales—quality exterior paint stores well for future touch-ups.
Final Curing and Use Guidelines
The Critical Curing Period
Paint feels dry to touch in hours but requires 5-7 days to reach maximum durability. Using chairs too soon causes permanent scuffing and wear. Protect your work by storing chairs under cover during this phase.
First Use Protocol
After curing, test one chair thoroughly: sit, shift weight, check for paint transfer. This reveals weak spots needing immediate attention before full use. Establish an annual maintenance routine—inspect each spring, touch up chips immediately, and reseal every 1-2 years.
Your freshly painted garden chairs transform tired patios into personalized retreats. The satisfaction of restoring furniture yourself—knowing you saved hundreds while creating exactly the look you wanted—makes painting garden chairs one of the most rewarding DIY projects. By following these professional techniques, your chairs will withstand seasons of sun and rain while reflecting your unique style. Start this weekend, and by next weekend, you’ll be relaxing in a revitalized outdoor space that looks better than store-bought. Remember: proper prep today means years of enjoyment tomorrow—never skip the primer step when painting garden chairs.


