
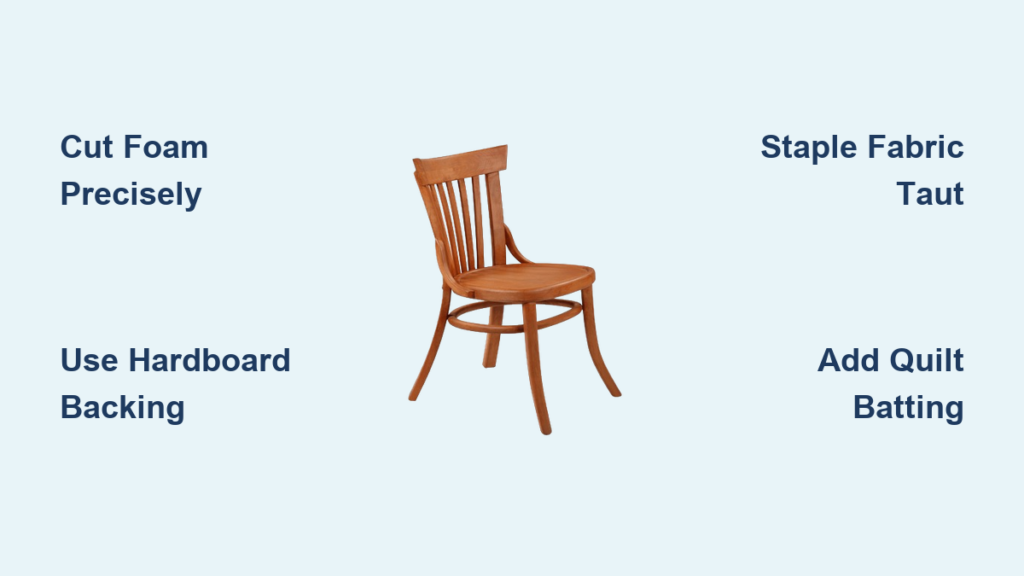
That solid wood dining chair has served you well for years, but the hard seat is killing your back during long dinners. Instead of replacing perfectly good furniture, transform those wooden chairs into comfortable upholstered seating. This complete guide walks you through every step—from basic seat padding to full tufted backs—whether you’re tackling a single chair or reimagining an entire dining set.
You’ll discover how to achieve professional results using tools you probably already own, choose materials that last decades, and avoid common mistakes that ruin projects. With costs starting at just $75 per chair, this weekend project delivers custom furniture at a fraction of retail prices.
Select Your Chair Transformation Approach
Solid-Back Wood Chairs
Solid-back chairs offer the simplest starting point for upholstery projects. These chairs accept both basic seat-only updates and full back upholstery without structural modifications. The flat wooden back provides natural backing support, eliminating the need for hardboard installation. When working with solid-back chairs, focus your energy on perfecting foam cutting and fabric tension—these elements make the difference between amateur and professional results.
Curved-Back Chair Modifications
Curved-back chairs require thin 1/8″ hardboard backing to follow the chair’s natural contours. This flexible material bends smoothly around curves while providing structure for your upholstery foam. Measure the curve’s radius before purchasing materials—tight curves need the thinnest hardboard available. For dramatic curves, consider adding small wood blocks behind the hardboard at strategic points to maintain the chair’s original shape while supporting the foam.
Straight-Back Wood Chairs
Straight-back chairs accommodate thicker hardwood backing, creating more substantial upholstered sections. The rigid backing adds comfort and durability, perfect for chairs that see daily use. These chairs handle both simple padding and complex tufting techniques equally well. When upholstering straight-back chairs, you can achieve deeper tufting for dramatic visual effect because the rigid structure supports greater tension without compromising the chair’s integrity.
Gather Professional-Grade Materials and Tools
Core Upholstery Supplies
Start with 1 yard of upholstery fabric per chair, plus an extra yard for pattern matching and mistakes. Choose fabrics with high rub counts (15,000+ for dining chairs) to withstand daily use. Avoid lightweight decorator fabrics—they tear easily under staple pressure. For dining chairs, consider performance fabrics with built-in stain resistance—they’re worth the slight premium for family-friendly durability.
Foam selection determines comfort level:
– 2″ luxury foam: Premium comfort for dining chairs
– 1″ standard foam: Basic padding upgrade
– Multi-layer system: 1/4″ high-density base + 1/2″ medium center + 1/4″ soft top for custom comfort
Add quilt batting to smooth foam edges and prevent fabric tension lines. This thin layer creates the rounded, professional appearance found on high-end furniture. Without batting, your upholstery will look flat and boxy—batting is the secret to that luxurious, pillowy finish.
Professional Tools You Need
An electric knife transforms foam cutting from frustrating to effortless. This inexpensive tool slices through foam like butter, creating clean edges without compression. Skip the serrated kitchen knife—it creates jagged, uneven cuts that show through fabric. For curved cuts, use the knife’s tip to make precise relief slits that allow the foam to bend without bunching.
Invest in a pneumatic stapler if tackling multiple chairs. Manual staplers work for single projects but cause hand fatigue during larger sets. The consistent staple depth from air-powered tools prevents fabric damage and loose spots. If using a manual stapler, practice on scrap fabric first—proper tension takes muscle memory to master.
Prep Your Chair Frame for Upholstery
Disassembly Process
Flip your chair upside-down and locate the four screws securing the seat. Most wood chairs use standard Phillips head screws, though antique pieces may require flathead drivers. Save all hardware in labeled containers—mixing screws between chairs creates problems during reassembly. Remove the seat completely, noting how it fits into the chair frame. Some seats drop into recessed areas, while others sit flush on top. This positioning affects your foam thickness calculations later.
Surface Preparation Steps
Strip existing finish only from areas that will remain exposed wood. Use 120-grit sandpaper to smooth rough spots, then wipe clean with tack cloth. Avoid sanding upholstered areas—you’ll cover these sections completely. Inspect the frame for loose joints or cracks. Tighten any wobbly connections now; adding upholstery weight can worsen structural issues. Wood glue and clamps fix most minor problems within 30 minutes.
Create Precision Templates for Perfect Fit
Cardboard Template Method
Place heavy cardboard against the chair back and trace the exact shape with a marker. Cut the template 1 inch inside your traced lines to account for foam thickness and fabric wrap. This reduction ensures your finished upholstery fits snugly within the chair frame. Test your template by sliding it into place. It should fit firmly without forcing, leaving consistent gaps around edges for fabric thickness.
Transfer to Hardboard
Transfer the cardboard template onto 1/8″ hardboard using a permanent marker. Cut along the lines with a jigsaw, keeping the blade perpendicular to the surface for straight edges. Curved cuts require slower blade speeds to prevent chipping. Sand cut edges smooth with 220-grit paper. Rough edges snag fabric during installation, creating pulls and tears that ruin your finished appearance.
Master Foam Cutting and Layering Techniques
Single-Layer Foam Method
Mark foam dimensions directly from your seat or template using a permanent marker. Cut foam slightly larger than needed—1/4 inch oversize on all sides compresses under fabric pressure for a smooth, wrinkle-free finish. For curved backs, cut relief slits along the foam’s back edge every 2 inches. These slits allow the foam to bend without bunching, creating smooth curves that match your chair’s shape.
Multi-Density Foam System
Create custom comfort by layering different foam densities. Start with 1/4″ high-density base foam for support, add 1/2″ medium foam for cushioning, and finish with 1/4″ soft foam for luxurious feel. Spray adhesive between layers prevents shifting during use. Bevel foam edges at 45-degree angles using your electric knife. These angled edges eliminate the “stepped” appearance common in basic upholstery projects.
Execute Flawless Fabric Attachment
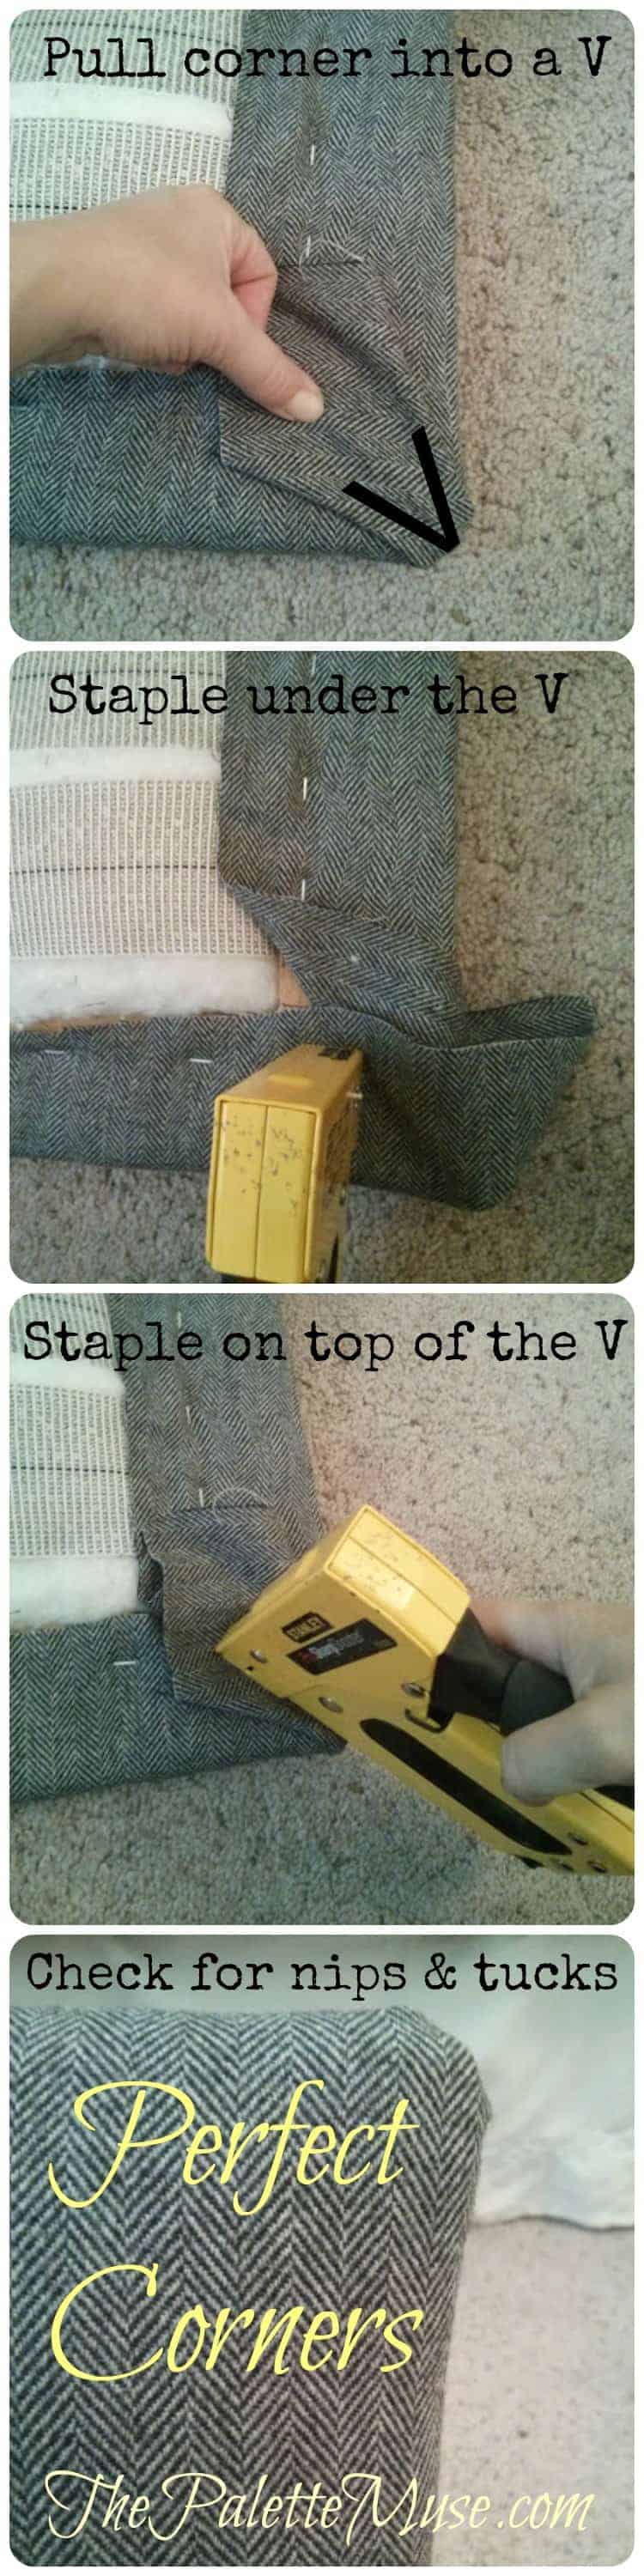
Professional Corner Technique
Pull fabric straight up at each corner, creating a triangular point. Fold this point toward the seat center, then fold the resulting side flaps inward. Staple through all folded layers for a flat, professional underside finish. Practice corners on scrap fabric first—perfect technique requires muscle memory. Uneven folds create lumps that telegraph through the finished seat.
Stapling Sequence Strategy
Start stapling at the center of each edge, working outward toward corners. Pull fabric taut but not stretched—overstretching causes fabric to tear at staples. Maintain consistent tension throughout the process. Use 1/4″ wire staples for secure holding power. Space staples 1 inch apart along straight edges, closer at corners for extra strength.
Troubleshoot Common Upholstery Problems

Fabric Fit Issues
If fabric appears loose after installation, remove staples from affected areas and restretch. Work in small sections—removing all staples at once causes complete fabric shift. Add temporary staples to maintain tension while adjusting. For tight curves that resist smooth fabric application, cut small relief slits in fabric overlap areas. These slits allow fabric to curve without puckering while remaining hidden on the chair’s underside.
Durability Concerns
Prevent future issues by using upholstery-grade thread count fabrics only. Cheap decorator fabrics tear at staple points within months. Test fabric stretch by pulling diagonally—minimal stretch indicates suitable durability. Avoid placing staples in high-stress areas like seat front edges. These locations bear maximum weight and cause early staple failure.
Maintain Your Newly Upholstered Chairs
Daily Protection
Apply fabric protector spray before installation to all fabric surfaces. Post-installation application can cause rust spots from wet tack strips contacting metal hardware. Reapply protector annually for continued stain resistance. Use removable slip seats for dining chairs that see heavy use. These seats lift out for easy cleaning and eventual reupholstery without complete chair disassembly.
Cleaning Protocol
Vacuum upholstered surfaces weekly using upholstery attachments. Address spills immediately—blot (never rub) with clean white cloth. Test cleaning products on fabric scraps before applying to visible areas. Professional cleaning extends upholstery life significantly. Schedule cleaning every 12-18 months for heavily used pieces.
Plan Your Project Budget and Timeline
Realistic Expectations
Plan 1-2 hours per chair for basic seat upholstery, including removal and installation. Full chair transformation requires 4-6 hours per piece, depending on complexity and your experience level. Tufted designs need a full day per chair for proper execution. Build in extra time for learning curves—your first chair takes twice as long as subsequent pieces.
Cost Breakdown
Expect $50-75 per yard for designer upholstery fabrics, though $10-20 per yard options provide excellent durability at lower cost. Natural fibers like cotton and linen wear beautifully but cost more than synthetics. Foam represents your next largest expense—$15-30 per chair depending on thickness and quality. Start with basic tools: manual staple gun ($20-40), electric foam knife ($30-50), and basic measuring tools.
Transforming wooden chairs into upholstered seating combines creativity with practical skills. Whether you’re updating a single heirloom piece or reimagining an entire dining set, these techniques deliver professional results that balance comfort and style. Start with simpler projects to build confidence, then gradually tackle more advanced techniques as your skills develop. Your newly upholstered chairs will provide comfort and style for decades to come.


