
Your favorite leather chair has developed that familiar tear near the armrest, or perhaps your cat finally claimed victory with those sharp claws. Maybe it’s just showing its age with cracks and fading color. Before you shell out hundreds for replacement, know this: most leather chair damage can be fixed at home with the right approach. This guide reveals exactly how to repair leather chairs for under $50, transforming damaged furniture into pieces that look—and feel—like new. Whether you’re dealing with minor scratches or significant tears, you’ll gain the confidence to tackle repairs that restore both beauty and function to your cherished seating.
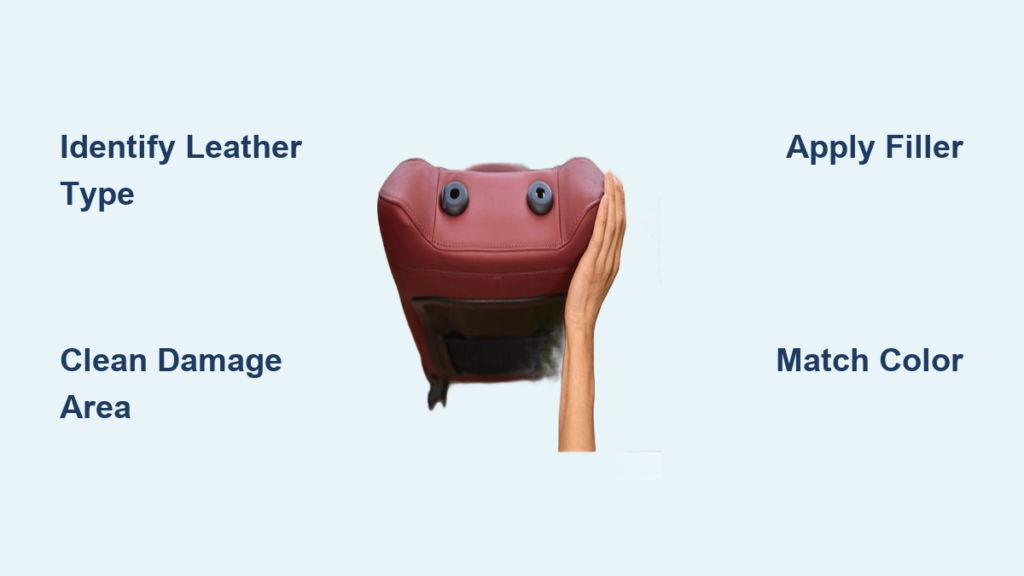
Diagnose Your Leather Damage Type Before Starting
Identify Your Chair’s Leather Type First
Not all leather repairs follow the same process—your chair’s leather type determines your repair approach. Full-grain leather, the highest quality option, develops character over time and responds beautifully to DIY repairs. Top-grain leather, commonly found on dining chairs, has a smooth surface but requires careful handling during restoration. Bonded leather, made from leather scraps combined with synthetics, often peels and may need professional help since home repairs frequently fail on this material.
Recognize Specific Damage Patterns for Proper Treatment
Surface scratches remain purely cosmetic, affecting only the finish layer. Small tears penetrate partially through the leather’s thickness but haven’t created a hole. Deep punctures form actual holes through the material requiring substrate reinforcement. Worn patches appear rough and discolored from repeated contact points. Color fading results from UV exposure, while cracks develop when leather dries out. Each damage type demands specific repair techniques—misidentifying your problem leads to wasted time and materials.
Complete This Damage Assessment Checklist
Clean the entire chair thoroughly with leather cleaner first—dirt and oils hide the true extent of damage. Work in bright, natural lighting and photograph all problem areas from multiple angles. Gently feel the damage with your fingers: surface issues need simple conditioning, while structural damage requires filling and patching. Critical warning: When in doubt about repair complexity, test methods on the chair’s underside before working on visible areas.
Gather These Exact Repair Supplies for Professional Results

Build Your Essential Leather Repair Kit
Start with these non-negotiable items: high-quality leather cleaner ($12-15), matching conditioner, and appropriate filler for your damage type. You’ll need 220-500 grit sandpaper for smoothing transitions, soft microfiber cloths for application, and a palette knife for precise filler placement. Tweezers become invaluable for positioning substrate materials, while painter’s tape keeps repair lines crisp. A simple $20-50 repair kit from Amazon contains everything needed for basic fixes.
Match Fillers to Your Specific Damage Severity
Fine cracks respond best to leather binder ($18), which penetrates deep into the material. Deeper damage requires flexible leather filler ($35) that moves with the chair during use. Substantial holes and tears need heavy filler ($10) to build structural integrity. For color matching, Angelus acrylic paint offers excellent results at $6 per color. Pro tip: Always seal your work with Fiebing’s acrylic resolene ($10) for lasting protection against future damage.
Prepare Your Chair Properly Before Applying Any Repairs
Deep Clean Using Damage-Specific Techniques
Vacuum with a soft brush attachment to remove debris trapped in crevices first. Apply leather cleaner using circular motions, working in small sections. For food spills, use mild soap and water solution. Blot grease stains with a dry cloth immediately, then cover with cornstarch for several hours before wiping clean. Ink stains require gentle dabbing with alcohol on a cotton swab—never rub, as this spreads the stain further into the leather fibers.
Complete Final Surface Preparation Steps
Clean damaged areas thoroughly with denatured alcohol to remove oils and residues that prevent adhesion. Lightly sand rough edges around damage using 220-grit paper to create a smooth transition zone. Critical step: Test all repair products on a hidden spot first—what works on one leather type may damage another. Mask surrounding areas with painter’s tape to maintain clean repair boundaries, especially when working near seams or contrasting materials.
Fix Minor Scratches and Small Tears in Under an Hour
Eliminate Surface Scratches with Conditioning Method
Clean the scratched area thoroughly with leather cleaner. Apply conditioner sparingly using circular motions, continuing until the leather stops absorbing product. Let it sit for several hours—rushing this step causes uneven results. Buff gently with a soft cloth to reveal significantly reduced or completely eliminated scratches. This simple method works for 80% of minor surface damage on full and top-grain leather.
Repair Small Tears Under 2 Inches Using Filler Technique
Clean around the tear with leather cleaner and let dry completely. Using a palette knife, apply leather filler smoothly across the damaged area, extending slightly beyond the tear edges. Allow 20-40 minutes drying time between coats—thinner layers prevent visible buildup. Sand lightly with fine-grit paper if needed for a seamless transition. Apply matching dye to blend the repair with surrounding leather, feathering edges outward for invisible results.
Patch Major Cuts and Punctures Like a Professional
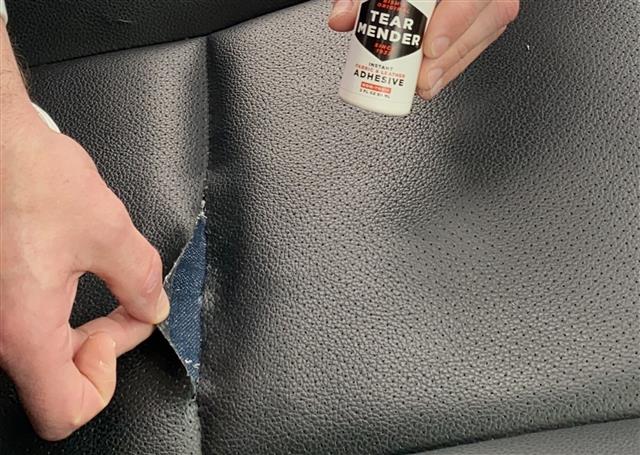
Create Strong Substrate for Large Holes Over 1 Inch
Cut a denim patch ½ inch larger than the hole on all sides, trimming patch edges to reduce bulk. Insert the patch shiny-side-up using tweezers, positioning it carefully beneath the damaged area. Apply flexible adhesive around the hole perimeter, pressing the patch firmly into place. Allow complete drying—typically 24 hours—before proceeding. Expert note: This substrate creates the foundation for durable repairs that withstand regular use without reopening.
Apply Layered Filling Technique for Seamless Results
After substrate installation, clean the area with denatured alcohol to ensure proper adhesion. Apply soft leather filler with a palette knife, working it into the edges and over the substrate. Use a smoothing card to level the surface, feathering edges outward for an invisible transition. Build 2-3 thin coats, drying 20-40 minutes between applications. Lightly sand with 220-grit paper between layers. Recreate the leather’s grain pattern using a gloved hand on the final layer—this step makes the difference between amateur and professional results.
Perfect Color Matching and Sealing for Invisible Repairs
Master the Color Matching Process
Test dye on a hidden chair area first and allow the test patch to dry completely—colors often shift during drying. Mix dyes as needed to achieve an exact match, documenting your successful formula for future touch-ups. Critical mistake to avoid: Applying too much dye at once creates oversaturated areas that stand out. Instead, build color gradually with multiple thin layers.
Apply Dye and Sealer Using Professional Methods
Use a slightly damp sponge for thin, even dye coats, working in small sections to maintain control. Apply 2-3 light coats rather than one heavy application, allowing complete drying between coats. Feather edges to blend with surrounding leather. Once the final dye layer dries completely, apply leather finisher in 2-3 thin coats. Avoid heavy pressure during application—let the product level naturally. Buff with a soft cloth for an authentic leather appearance that matches the chair’s original finish.
Prevent Future Damage With Smart Maintenance Habits
Establish This Simple Care Routine
Dust weekly with a soft brush attachment to prevent abrasive particles from scratching the surface. Monthly, wipe with a slightly damp cloth to remove accumulated oils. Every 3-6 months, deep clean with leather cleaner followed by conditioning. Pro tip: Condition every 6 months to prevent drying—the leading cause of cracks in quality leather chairs. Annually inspect for developing issues and touch up as needed before small problems become major repairs.
Implement Environmental Protection Strategies
Position chairs away from direct sunlight and heat sources—UV exposure causes 70% of color fading in leather furniture. Use coasters for beverages and avoid placing sharp objects on leather surfaces. Maintain 30-50% humidity levels to prevent cracking. Apply leather protector spray for spill resistance, especially on chairs used daily. During summer months, consider UV-protectant products for sun-exposed areas.
Decide When to DIY vs. Call a Professional
Know These Clear DIY Repair Boundaries
Tackle minor scratches, small tears under 2 inches, light color fading, and routine conditioning yourself. DIY saves significant money—basic repair kits cost $20-50 versus $150-500+ for professional service. Successful home repairs maintain your chair’s value while extending its lifespan by years. Red flag: If your chair has bonded leather construction, professional help is usually necessary as DIY repairs often fail on this material.
Recognize When Professional Help Is Essential
Seek expert assistance for damage exceeding 6 inches, antique or high-value pieces, structural frame damage, or complex color matching. Bonded leather repairs frequently require specialized techniques beyond DIY capabilities. If previous DIY attempts didn’t hold, professional intervention prevents further damage and wasted effort. Cost reality check: Most homeowners successfully complete basic repairs for under $50, while professional repairs range from $150-500+ depending on damage extent.
Your leather chair deserves a second chance. With these proven techniques and a weekend of careful work, you’ll transform damaged furniture into pieces that look—and feel—like new. Implement the regular maintenance habits outlined here to ensure your restored leather chair continues looking beautiful for years to come. Final tip: Document completed repairs with photos and notes—this creates your personal reference guide for future touch-ups when needed.


