
That cherished cane-bottom chair has seen better days—strands are broken, the seat sags, or your grandmother’s heirloom now resembles a spider web more than functional furniture. Before you consign it to the trash heap, know this: most cane damage is repairable with basic tools and a bit of patience. Whether you’re facing frayed strands or complete structural failure, this guide delivers exactly what you need to know to restore your cane bottom chairs to their former glory. You’ll learn to identify your specific cane failure, choose between targeted repairs or full replacement, and execute both hand-caning and cane webbing restoration with confidence.
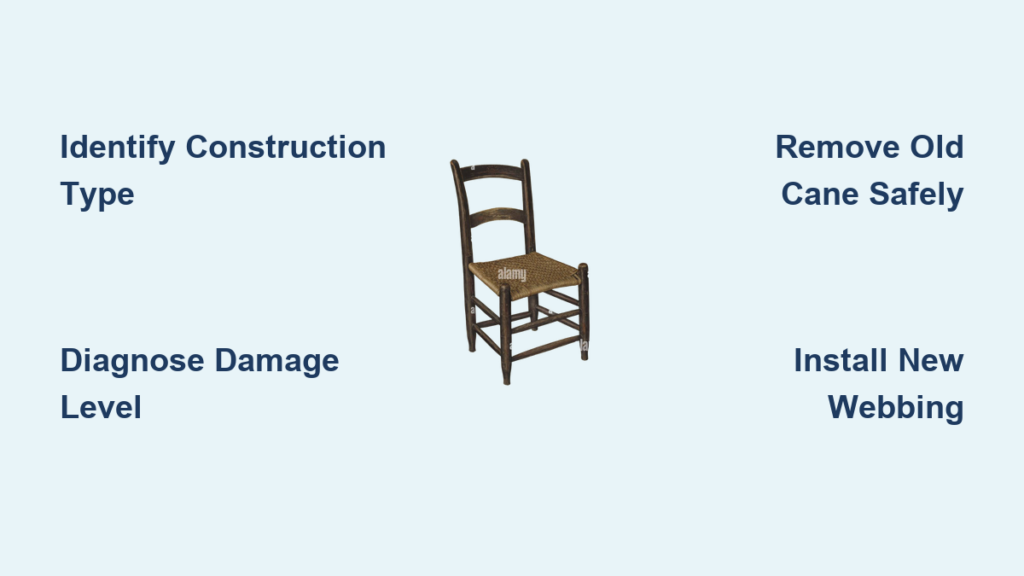
Identify Your Cane Construction Type

Traditional Hand-Caning vs. Modern Webbing
Flip your chair over to determine your repair approach—this simple inspection saves hours of wasted effort. Hand-caned chairs feature individual strands woven through drilled holes around the frame perimeter, visible as dozens of small holes spaced about 3/4 inch apart. Look for strands tied underneath the seat. Cane webbing chairs use a single pre-woven sheet pressed into a groove around the seat opening and secured with spline (a thin rope-like material).
Critical measurement tip: Hand-caned chairs have holes approximately 3/8 inch from the edge, while webbing chairs display a shallow groove about 1/4 inch deep around the entire perimeter. This distinction determines whether you’ll be weaving individual strands or installing a pre-woven sheet.
Diagnose Cane Damage Quickly

Surface-Level Issues You Can Fix Today
Fraying strands appear as fuzzy, loose fibers without actual breaks—often caused by pet claws or abrasive cleaning. These respond well to targeted repairs by weaving in replacement pieces. Discoloration ranging from golden honey to dark brown typically indicates natural aging rather than structural problems and simply needs cleaning.
Minor breaks involving one or two strands snapping while maintaining overall seat integrity can be fixed in under 30 minutes. Soak a replacement strand in warm water for 15 minutes, weave it through adjacent holes, and secure with a small knot underneath.
Structural Red Flags Needing Major Intervention
Complete breaks create holes larger than 2 inches across where multiple strands have failed—this compromises the entire weave and requires professional attention or full replacement. Frame separation shows the cane pulling away from attachment points, creating dangerous gaps that demand immediate action.
Dry rot feels brittle and crumbles when touched, indicating advanced deterioration throughout the material. Sagging beyond 1 inch when pressed signals tension loss requiring complete replacement rather than spot repair.
Essential Tools and Materials Checklist
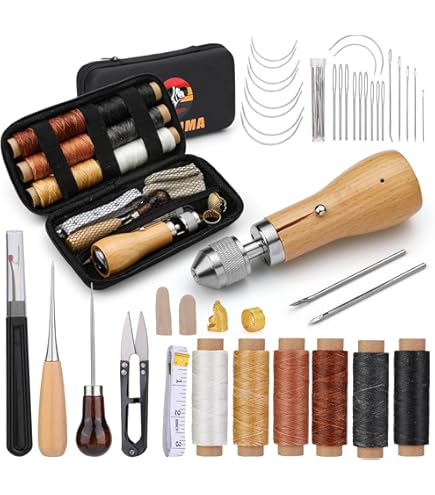
Must-Have Tools for Every Repair
- Flathead screwdriver or awl: Removes old cane and cleans holes/grooves
- Chisels: 1/4 inch and 1/2 inch for spline removal
- Utility knife: Sharp blade for clean cuts and trimming
- Needle-nose pliers: Grips old cane during removal
- Sandpaper: 120 and 220 grit for frame preparation
- Measuring tape: Critical for accurate sizing
Hand-Caning Material Kit
- Binder cane: 3-4mm width for perimeter wrapping
- Medium cane: 2.25-3mm standard width for weaving
- Pegs or golf tees: Temporarily holds strands during weaving
- Wood glue: Only if frame repairs are needed
Webbing Repair Supplies
- Pre-woven cane webbing: Chair opening plus 2 inches all around
- Spline: Width matching original groove (measure carefully)
- Glycerin: Softens cane for easier installation
- Water-resistant wood glue: Secures spline in groove
Hand-Caning Repair Step-by-Step
Remove Old Cane Safely
Step 1: Soak the old cane with warm water for 15-20 minutes—this softens the material and prevents splintering. Step 2: Cut vertical strands down the center using your utility knife to create manageable sections. Step 3: Pull horizontal strands through each hole using needle-nose pliers, working systematically from center outward.
Step 4: Clean each drilled hole with an awl, removing debris and old cane fragments. Step 5: Lightly sand the frame around holes to create smooth surfaces for new cane installation. This entire removal process typically takes 30-45 minutes for a standard chair seat.
Execute Perfect Weaving
Anchor your first strand from the back rail’s center hole to the front rail’s center hole. Maintain consistent tension—snug but not straining the frame. Count your holes: most chairs use 7-9 vertical and 7-9 horizontal strands for optimal strength.
Handle corners correctly by looping strands through adjacent holes twice—this prevents unraveling. Tie off final strands with double knots underneath, then tuck excess into adjacent holes using your awl. The standard 7-step weaving pattern creates maximum strength while maintaining traditional appearance.
Cane Webbing Restoration Process
Strip Old Webbing Clean
Soften the spline by applying warm water along the groove for 10-15 minutes. This loosens old glue and prevents frame damage. Lift the spline carefully using a chisel, working in small sections to avoid gouging the wood.
Clean the groove thoroughly—any old glue or spline remnants prevent proper new installation. Repair damaged grooves with wood filler, sanding smooth when dry. This preparation phase is crucial for successful webbing installation and typically takes 20-30 minutes.
Install New Webbing Flawlessly
Measure accurately: Add 2 inches to each chair opening dimension for proper overlap. Soak webbing in warm water with glycerin for 30 minutes until flexible. Position the webbing with the pattern running front-to-back for maximum strength.
Start spline installation at the back center, working toward the front in manageable sections. Pull webbing taut before pressing each spline section—this prevents future sagging. Make precise corner cuts using your utility knife—relief cuts prevent bunching and create clean corners. This installation process takes most DIYers 45-60 minutes per chair.
Maintain Your Cane Chairs Long-Term
Monthly Care Routine
Dust gently using a soft brush or vacuum upholstery attachment—never use harsh chemicals that dry out natural fibers. Check for new damage while cleaning; early detection prevents minor issues from becoming major repairs. This simple maintenance takes less than 5 minutes per chair.
Quarterly Prevention
Inspect all attachment points for loosening—gently press on corners and edges to test security. Apply light re-tightening to hand-caned chairs if strands feel loose. Maintain 35-55% humidity to prevent cracking; use a hygrometer to monitor your environment.
Annual Deep Care
Complete tension check across the entire seat—press firmly on multiple points to identify weak areas. Apply protective finish—light shellac or lemon oil preserves cane flexibility without altering appearance. Deep clean using mild soap solution, then dry thoroughly for 24 hours before use.
Avoid Common Repair Mistakes
Over-tightening warps frames and breaks cane strands—maintain firm but gentle tension throughout. Test tension by pressing the center; it should depress 1/2 to 3/4 inch under firm pressure. Under-soaking causes dry cane to crack during installation—ensure full flexibility before weaving.
Wrong sizing creates installation nightmares—measure existing holes or grooves precisely before ordering materials. Rushing drying time results in future sagging—allow 24-48 hours complete drying before use. Patience here prevents redoing your entire project.
Troubleshoot Post-Repair Issues
Webbing Loosens After Installation
Remove spline from affected areas and re-soak webbing. Check groove edges for rough spots that prevent proper seating—smooth them with fine sandpaper. Ensure spline width matches groove exactly; too narrow causes loosening while too wide creates bulging.
Hand-Caning Shows Gaps
Add additional strands in loose areas using the same gauge cane. Re-tension the entire seat by gently pulling individual strands. Verify consistent hole spacing—uneven drilling creates natural gaps that require strategic weaving adjustments.
Your cane bottom chair represents decades of craftsmanship worth preserving. Whether you tackle hand-caning restoration or opt for webbing replacement, the satisfaction of sitting on your own restored masterpiece far exceeds the temporary frustration of learning new skills. Start with a simple repair, build your confidence, and soon you’ll be the neighborhood expert helping friends revive their family heirlooms. Remember: every expert was once a beginner who refused to give up on that first broken chair. Your restoration journey begins with the next 30 minutes you dedicate to assessing your chair’s specific needs.


