
That favorite aluminum patio chair—the one that’s hosted countless summer barbecues and lazy Sunday mornings—has seen better days. Maybe the sling fabric is torn, the frame wobbles dangerously, or rust has started creeping along the joints. Before you drag it to the curb, know this: most aluminum patio chair problems are fixable with basic tools and a weekend’s effort. Learning how to repair aluminum patio chairs properly can save you hundreds compared to replacement costs while extending the life of quality outdoor furniture.
Whether you’re dealing with a $20 flea market find or a premium set worth restoring, this guide walks you through every repair scenario you’ll encounter. From simple tightening to complete sling replacement, you’ll learn exactly what to fix, when to DIY, and when to call in the pros. Most repairs require only basic tools you likely already own, making this one of the most cost-effective home maintenance projects you can tackle.
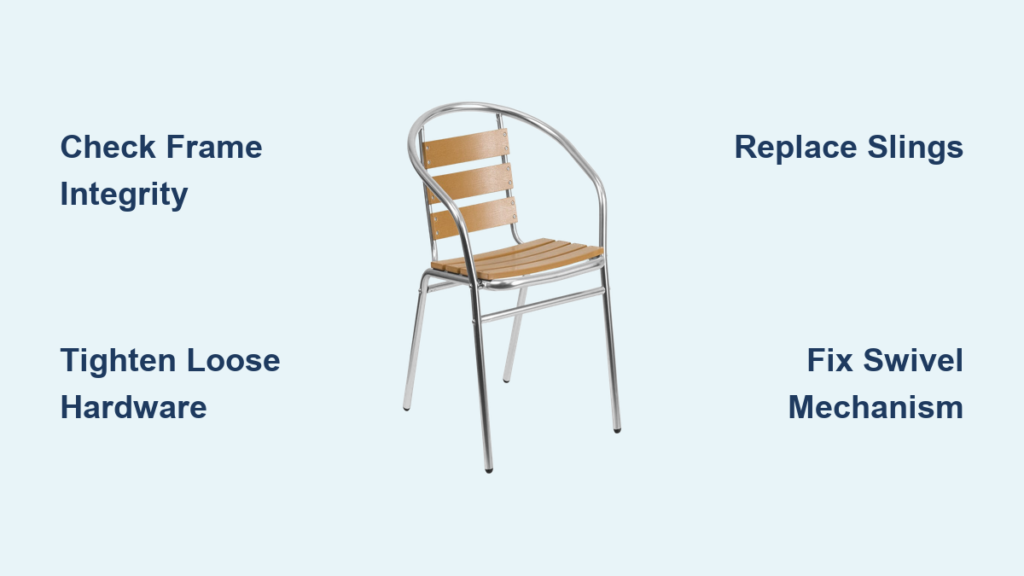
Assess Chair Damage Quickly
Start every repair with a systematic 10-minute evaluation. Flip the chair upside down and methodically check each component—this prevents overlooking small issues that become major failures later. Your assessment determines whether you’re facing a simple fix or a complex restoration project.
Key inspection points:
– Frame integrity: Press down on each leg while checking for movement at joints
– Sling condition: Look for tears, sagging, or loose rods at rail edges
– Hardware status: Test every bolt and screw for looseness or stripping
– Surface damage: Note scratches, paint chips, or corrosion spots
Identify your chair’s specific aluminum type before proceeding:
– Cast aluminum: Heavy, ornate designs with visible mold marks
– Extruded aluminum: Hollow tubes with uniform thickness
– Aluminum alloy: Lightweight mixed-material constructions
This distinction matters because cast aluminum handles repairs differently than extruded tubing. Cast pieces may require brazing rather than welding, while thin-walled extrusions often need mechanical reinforcement instead of heat-based repairs.
Fix Frame Damage Fast

Repair Minor Surface Issues
Small scratches and paint chips aren’t just cosmetic—they expose raw aluminum to oxidation. Address these immediately to prevent deterioration. For minor surface damage, follow this quick repair process:
- Sand damaged area with 220-grit sandpaper until smooth
- Clean with mild soap solution, rinse thoroughly
- Dry completely (use hair dryer for tight spaces)
- Apply manufacturer-matching touch-up paint in thin coats
For rust spots on steel hardware (common in bolts and fasteners):
– Wire brush loose particles aggressively
– Apply rust converter with small brush
– Paint over treated areas within 24 hours
– Match original color using outdoor metal paint
Strengthen Weak Joints
Wobbly chairs often result from loose fasteners rather than actual frame damage. Before assuming the worst, try this systematic tightening approach:
- Remove cushions and flip chair
- Check each bolt with socket wrench—don’t over-tighten
- Replace any stripped screws with identical thread size
- Apply thread-locking compound to frequently loosening fasteners
- Test stability by rocking chair gently
For bent frames:
– Minor bends: Use rubber mallet against wood block
– Sharp bends: May indicate metal fatigue—consider replacement
– Never heat aluminum to bend—it weakens the metal
Weld Broken Frames Safely
Aluminum welding requires specific techniques, but several DIY-friendly options exist. For brazing aluminum at home:
- Clean break area with stainless steel brush
- Heat joint with propane torch until aluminum reaches 700°F
- Apply aluminum-zinc brazing rod while continuing to heat
- Let cool naturally—don’t quench with water
- Test strength before regular use
Seek professional help for:
– Load-bearing joints (where legs meet seat)
– Multiple break points on same chair
– Cast aluminum with unknown alloy composition
– Safety-critical repairs for commercial use
Replace Slings and Mesh
Install New Mesh Slings
Mesh sling replacement transforms tired chairs into like-new seating. Most manufacturers use standard sizes, making this a straightforward weekend project.
Accurate measurement process:
– Width: Measure rail-to-rail at bolt locations (not fabric width)
– Length: Follow rail curvature from top to bottom edge
– Order: Specify exact measurements to patio furniture suppliers
– Timing: Allow 7-10 days for custom sizes
Installation technique:
1. Remove end caps and slide out old sling
2. Insert nylon rods into new sling sleeves
3. Start one side, then use spreader bar for tension
4. Reattach rails ensuring even fabric distribution
5. Replace end caps and test for proper tension
Swap Vinyl Straps Effectively
Vinyl straps deteriorate after 3-5 years of UV exposure. Replacement requires hot water soaking for flexibility but creates dramatic improvements.
Measurement guidelines:
– Single-wrap: Hole-to-hole distance plus 2 inches
– Double-wrap: Twice around frame plus 4 inches
– Order 10% extra to account for measuring errors
– Color options: Stock colors ship faster than custom
Installation sequence:
– Cut old straps carefully to avoid frame scratches
– Soak new straps in 180°F water for 5 minutes
– Work quickly while straps remain flexible
– Maintain consistent spacing between straps
– Touch up paint before installing final straps
Fix Swivel Mechanisms

Diagnose Rotation Problems
Swivel chairs develop grinding, sticking, or complete seizure due to rust accumulation. Quick assessment determines whether repair or replacement makes sense.
Mechanism evaluation:
– Excessive rust flakes indicate advanced deterioration
– Difficult rotation suggests bearing failure
– Safety concerns warrant immediate replacement
– Model numbers often stamped on mechanism base
Restore Smooth Operation
Rust removal process:
1. Remove chair from base mechanism
2. Wire brush all accessible rust areas
3. Apply rust converter to remaining corrosion
4. Lubricate with silicone spray (avoid petroleum products)
5. Test rotation before reassembly
Part replacement strategy:
– Search manufacturer diagrams for exact part numbers
– Check warranty documentation for covered repairs
– Amazon and eBay often stock discontinued parts
– Compare repair cost against new chair pricing
– Allen + Roth chairs have limited parts availability
Maintain Chairs Long-Term
Establish Cleaning Routine
Regular maintenance prevents major repairs and extends aluminum chair lifespan significantly.
Weekly cleaning protocol:
– Rinse with garden hose to remove debris
– Wash with mild dish soap using soft brush
– Pay attention to underside where dirt accumulates
– Dry thoroughly to prevent water spots
Monthly deep clean:
– Use vinegar solution for calcium buildup
– Apply vinyl cleaner to straps and slings
– Check and tighten any loose hardware
– Inspect for new damage or wear
Apply Protective Coatings
Wax application process:
– Clean chairs completely before waxing
– Use car wax or aluminum-specific polish
– Apply thin, even coat with soft cloth
– Buff thoroughly after 15-minute cure time
– Repeat every 3-4 months during use season
Storage best practices:
– Store indoors during winter months
– Use breathable covers, never plastic
– Elevate off ground to prevent moisture damage
– Remove cushions and store separately
Decide DIY vs Professional
Calculate Repair Costs
DIY budget breakdown:
– Basic supplies: $15-25 per chair
– Sling replacement: $40-80 per chair
– Paint restoration: $20-40 for multiple chairs
– Brazing torch: $50 one-time investment
Professional service costs:
– TIG welding: $75-150 per joint
– Complete restoration: $200-400 per chair
– Sling replacement: $100-200 per chair
– Mechanism repair: $50-150 per chair
Make Smart Replacement Decisions
Replace when:
– Frame has multiple stress cracks
– Repair costs exceed 60% of new chair price
– Safety mechanisms are compromised
– Parts are unavailable for older models
Restore when:
– High-quality original construction
– Sentimental or vintage value
– Matching set maintains aesthetic
– Environmental considerations favor repair
Stay Safe During Repairs
Protect Yourself Properly
Essential safety gear:
– Safety glasses for all cutting/grinding work
– Heat-resistant gloves for brazing/welding
– Dust mask when sanding painted surfaces
– Long sleeves to prevent metal splinters
Chemical safety protocol:
– Work in well-ventilated areas only
– Test cleaners on hidden spots first
– Dispose of chemical waste responsibly
– Keep water nearby for accidental spills
Test Repairs Thoroughly
Weight testing procedure:
– Gradually apply weight over 30 seconds
– Check for any movement at repair sites
– Test for 3-5 minutes before regular use
– Inspect again after first week of use
Your aluminum patio chairs represent a significant investment in outdoor comfort. With these repair techniques, you can restore them to full functionality for a fraction of replacement cost. Start with simple tightening and cleaning—most chairs improve dramatically with basic maintenance. For structural issues, weigh repair costs against replacement, but remember: a well-executed repair often lasts as long as the original construction.
Take photos before disassembly, work methodically, and don’t rush the process. Your revived chairs will provide seasons of comfortable seating, proving that quality aluminum furniture truly can last a lifetime with proper care and occasional repairs. Mastering how to repair aluminum patio chairs not only saves money but also reduces waste, making your outdoor space both economical and environmentally friendly.


