
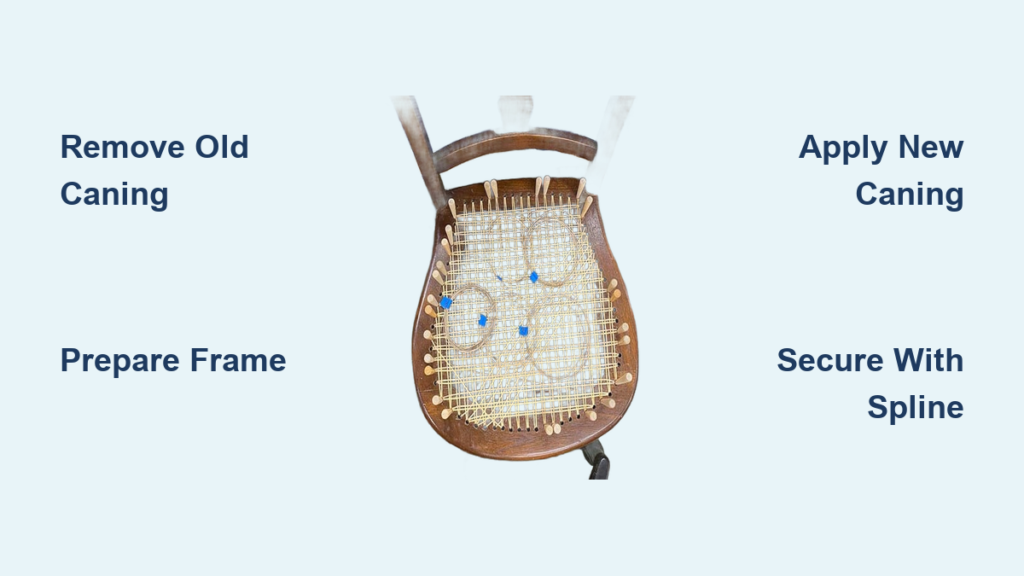
Are you tired of looking at your old, worn-out chairs with broken caning? Recaning a chair can be a daunting task, but with the right tools and a bit of patience, you can restore your favorite piece of furniture to its former glory. In this comprehensive guide, we’ll walk you through the process of recaning a chair, from preparation to completion.
Introduction to Recaning Chairs
Recaning a chair involves replacing the old, damaged caning with new material. This process requires some skill and attention to detail, but it’s a great way to give new life to an old chair. Before we dive into the step-by-step guide, let’s take a look at the materials and tools you’ll need to get started.
Materials Needed
- New caning material (available in various widths and patterns)
- Caning pegs or spline
- Caning glue
- Chair frame (with old caning removed)
- Measuring tape
- Pencil and marker
- Safety glasses and gloves
Tools Needed
- Caning tool or spline roller
- Hammer
- Chisel or screwdriver
- Pliers
- Clamps
- Utility knife or scissors
Removing the Old Caning
Before you can start recaning your chair, you need to remove the old caning. This can be a bit of a challenge, but it’s essential to get the old material out of the way.
Step 1: Remove the Seat
Start by removing the seat from the chair frame. This will give you access to the old caning. Use a screwdriver or chisel to remove any screws or nails holding the seat in place.
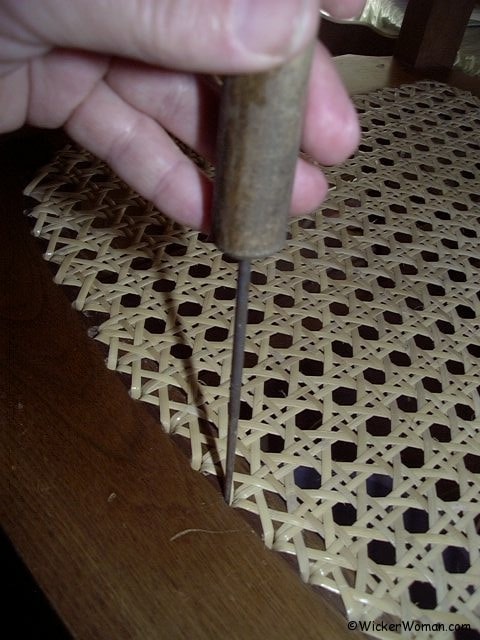
Step 2: Remove the Old Caning
Use a utility knife or scissors to cut the old caning into manageable sections. Then, use a chisel or screwdriver to pry the old caning out of the chair frame. Be careful not to damage the frame or any surrounding wood.
Preparing the Chair Frame
Once the old caning is removed, you need to prepare the chair frame for the new caning.
Step 1: Clean the Frame
Use a soft brush or cloth to remove any dirt, dust, or debris from the chair frame. This will ensure a smooth surface for the new caning.
Step 2: Measure and Mark the Frame
Use a measuring tape and pencil to measure and mark the areas where the new caning will go. Make sure to take into account the width and pattern of the new caning material.
Applying the New Caning
Now it’s time to apply the new caning to the chair frame.
Step 1: Cut the New Caning
Use a utility knife or scissors to cut the new caning material to the correct length. Make sure to leave a little extra material at each end to allow for trimming.
Step 2: Apply the Caning Glue
Apply a small amount of caning glue to the back of the new caning material. This will help secure the caning to the chair frame.
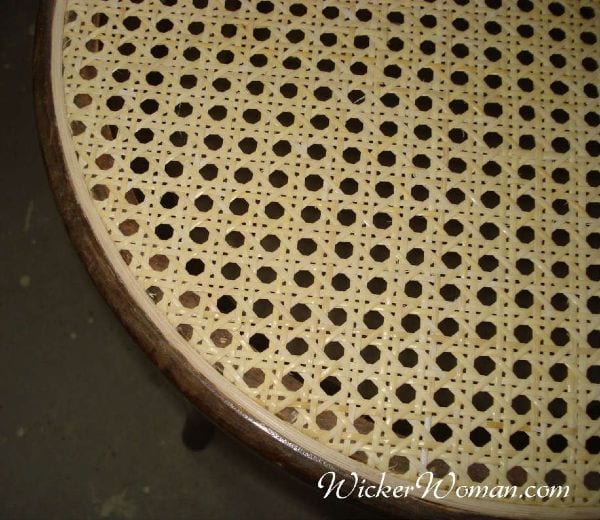
Step 3: Attach the New Caning
Use a caning tool or spline roller to attach the new caning to the chair frame. Start at the center and work your way outwards, making sure to keep the caning tight and evenly spaced.
Securing the New Caning
Once the new caning is attached, you need to secure it to the chair frame.
Step 1: Apply Caning Pegs or Spline
Use caning pegs or spline to secure the new caning to the chair frame. Make sure to space the pegs or spline evenly apart to ensure a tight and secure fit.
Step 2: Trim the Excess
Use a utility knife or scissors to trim any excess caning material. Make sure to leave a little extra material at each end to allow for finishing.
Finishing Touches

The final step is to add any finishing touches to your newly recaned chair.
Step 1: Apply a Finish
Apply a finish, such as varnish or polyurethane, to protect the new caning and chair frame.
Step 2: Reattach the Seat
Reattach the seat to the chair frame using screws or nails.
Tips and Tricks
- Use a caning tool or spline roller to ensure a tight and even fit.
- Apply caning glue to the back of the new caning material to secure it to the chair frame.
- Use caning pegs or spline to secure the new caning to the chair frame.
- Trim any excess caning material to ensure a clean finish.
Common Mistakes to Avoid
- Not removing all of the old caning material before applying the new caning.
- Not measuring and marking the chair frame correctly.
- Not applying enough caning glue to secure the new caning.
- Not trimming the excess caning material.
Conclusion
Recaning a chair can be a challenging but rewarding project. With the right tools and a bit of patience, you can restore your favorite piece of furniture to its former glory. Remember to take your time, measure carefully, and apply the new caning material with precision. If you’re not comfortable with this project, consider seeking the help of a professional. Happy recaning!
FAQ
Q: What type of caning material should I use?
A: The type of caning material you should use depends on the style and design of your chair. Common types of caning material include rattan, wicker, and seagrass.
Q: How long does it take to recane a chair?
A: The time it takes to recane a chair depends on the complexity of the project and the individual’s level of experience. On average, it can take anywhere from a few hours to several days to complete.
Q: Can I recane a chair myself?
A: Yes, you can recane a chair yourself with the right tools and a bit of patience. However, if you’re not comfortable with the project, it’s recommended to seek the help of a professional.
Q: How much does it cost to recane a chair?
A: The cost of recaning a chair depends on the type of caning material, the complexity of the project, and the individual’s level of experience. On average, it can cost anywhere from $50 to $500 or more to recane a chair.
Pro Tips
- Use a caning tool or spline roller to ensure a tight and even fit.
- Apply caning glue to the back of the new caning material to secure it to the chair frame.
- Use caning pegs or spline to secure the new caning to the chair frame.
- Trim any excess caning material to ensure a clean finish.
- Consider using a caning kit, which includes pre-cut caning material and instructions, to make the project easier and more convenient.
Alternative Solutions
If you’re not comfortable with recaning a chair yourself, consider seeking the help of a professional. You can also consider using a caning kit, which includes pre-cut caning material and instructions, to make the project easier and more convenient. Additionally, you can consider replacing the chair altogether if the damage is extensive or the chair is no longer functional.


