
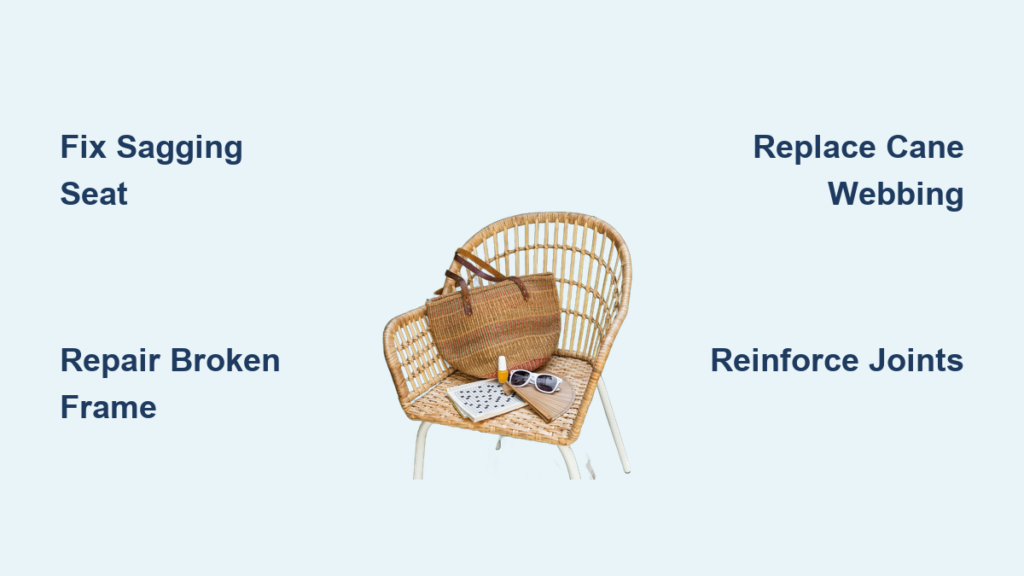
That sagging seat on your favorite chair isn’t just uncomfortable—it’s a safety hazard waiting to happen. Whether it’s Great-Grandma’s heirloom rocker or your go-to patio seat, woven chairs face constant stress from weight, weather, and time. The good news? Most repairs cost under $75 and take just a weekend to complete. This guide walks you through everything from diagnosing damage to executing professional-quality repairs for how to fix woven chairs, even if you’ve never picked up a weaving tool before.
Spot Structural and Weaving Damage Quickly
Find Frame Weakness Before It Fails
Push down firmly on your chair seat while checking the frame joints. Cracked rails appear as visible splits in the wood, while loose joints create wobbling or creaking sounds when you shift your weight. Look underneath for missing screws or corroded brackets—these often hide beneath decorative trim. If your chair rocks on flat ground, you’ve likely got warped frame rails that need straightening before you can properly fix woven chairs.
Detect Weaving Failures Early
Frayed cane appears as fuzzy, broken strands that snag clothing, while sagging webbing creates visible dips when you sit. Brittle reed snaps when bent gently—test this by applying light pressure to suspect areas. For outdoor chairs, UV damage manifests as chalky, faded surfaces that crumble to touch. Mold spots appear as dark patches—usually green or black—often accompanied by musty odors that signal moisture problems.
Gather Essential Repair Tools and Materials
Build Your Woven Chair Repair Kit
Your basic toolkit needs a flathead screwdriver, Phillips head, needle-nose pliers, utility knife, hammer, and clamps. Weaving essentials like a caning awl help thread materials precisely, while webbing stretchers maintain proper tension. Don’t forget measuring tools—a tape measure and pencil ensure accurate cuts. Invest $50-100 in quality tools that’ll handle multiple repairs, saving you from costly professional services.
Select the Right Replacement Materials
Cane webbing comes in standard 18″, 24″, and 36″ widths—measure your seat opening, then add 2 inches all around. Reed spline sizes range from 5.5mm to 10.5mm; test fit in your chair’s groove before purchasing. For outdoor chairs, choose synthetic alternatives like polypropylene webbing that resist moisture and UV damage better than natural materials. Jute webbing provides traditional support but requires more frequent replacement in harsh conditions.
Fix Broken Chair Frames Before Weaving
Repair Split Rails Properly
Begin by disassembling loose joints using a heat gun at 150-200°F for 5-10 minutes to soften old glue. Clean surfaces with denatured alcohol and a wire brush until wood appears fresh. Apply fresh Titebond III wood glue liberally to both surfaces, then reassemble and clamp with bar clamps for 48 hours—minimum 24 hours for basic cure. Pro tip: Drill pilot holes and add wood screws for extra reinforcement in high-stress areas.
Strengthen Weak Joints Permanently
For stripped screw holes, drill out the damage, glue in matching dowels, and re-drill after 24 hours. Install L-shaped brackets at stress points using stainless steel screws to prevent future failures. For invisible strengthening, inject wood epoxy into hairline cracks—this creates a bond stronger than the original wood. Warning: Don’t skip the 24-hour cure time; rushing this step causes premature failure.
Master Traditional Hand Caning in 7 Steps
Prepare the Frame for Professional Results
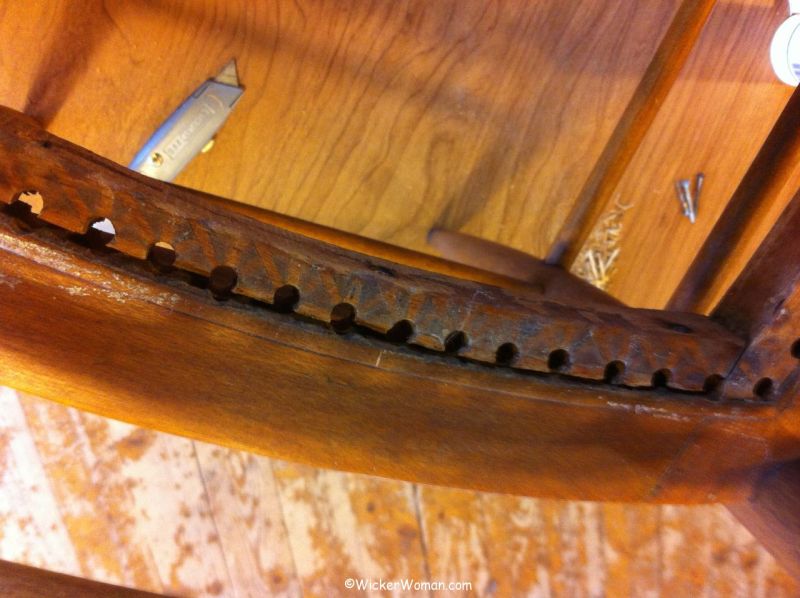
Remove old cane using a utility knife and pliers—cut flush with the frame surface. Clean thoroughly by sanding rough edges with 220-grit paper, then apply Danish oil or matching stain to exposed wood. Measure accurately—add 2 inches to each dimension when ordering replacement cane. Critical step: Soak cane in warm water for 30-45 minutes to make it pliable before weaving.
Execute the Classic Weaving Pattern
Start at center back, threading cane from underside up through holes for your vertical foundation. Maintain spacing of 3/4 inch between holes for traditional patterns. Weave horizontal strands over/under verticals at 90-degree angles, pulling taut but not tight enough to warp the frame. Complete with diagonal layers creating the classic herringbone pattern, finishing with 3mm binder cane secured by pegs every 2-3 holes.
Install Pre-Woven Cane Seats Correctly

Prep the Groove for Seamless Installation
Remove old spline using a utility knife and chisel to clean the groove completely. Test fit reed spline—it should fit snugly without forcing. Sizes from 5.5mm to 10.5mm accommodate different groove widths, so match precisely. Clean surface with a wire brush to remove old adhesive residue for better bonding—this prevents future separation.
Follow the Proper Installation Sequence
Submerge pre-woven cane in warm water for 30-45 minutes until pliable. Center the pattern with your chair frame for professional appearance. Secure gradually by installing spline starting at back center, using wooden wedges to press firmly into the groove. Overlap spline ends by 1 inch, trim excess cane 1/2 inch beyond groove, and clean glue squeeze-out immediately. Allow 24 hours for complete adhesive set before use.
Replace Webbing Like a Professional
Install Traditional Jute Webbing Properly
Remove old webbing completely before starting fresh. Install front-to-back strips first using a webbing stretcher for proper tension—critical step: maintain 2-inch spacing between strips. Weave side-to-side strips over/under existing webbing following a crisscross pattern. Secure ends by double-folding for reinforcement and stapling with 1/4″ or 3/8″ heavy-duty staples. Test tension by pressing firmly—you should feel slight give but no excessive sagging.
Upgrade to Synthetic Webbing for Outdoor Chairs
For patio furniture, choose polypropylene webbing that resists moisture and UV damage. Use stainless steel staples to prevent rust stains—this small detail extends your repair’s lifespan significantly. Apply UV-resistant treatment annually, and replace every 3-5 years for outdoor chairs. Pro tip: Install slightly tighter than jute webbing, as synthetic materials stretch less over time.
Repair Synthetic Wicker Strands Effectively
Replace Broken PVC/Rattan Strands
Cut out damaged sections 3 inches beyond breaks using sharp scissors—this provides enough length for secure weaving. Prep replacement strands by soaking PVC/rattan in warm water 10-15 minutes for flexibility. Weave following pattern exactly—match the original weave direction and secure ends by tucking under 3-4 crossing strands. Heat set the repair using a low-heat setting on your heat gun to lock the shape permanently.
Achieve Invisible Color Matching
Use furniture markers in multiple shades—layer colors to match depth and variation. Apply markers in thin layers, allowing each to dry before adding the next. For best results, test your color mix on an inconspicuous area first. Final touch: Apply a clear UV-resistant sealant over the repair to prevent future fading and maintain consistent appearance.
Protect Your Repairs for Long-Term Results
Maintain Natural Materials Properly
Apply tung oil annually with a lint-free cloth—2-3 thin coats provide superior protection without buildup. Control humidity by storing chairs in 40-60% humidity environments to prevent cracking or mold. For mold prevention, mix a 1:1 vinegar/water solution for cleaning—dry completely in sunlight afterward. Never use harsh chemicals that strip natural oils from cane and rattan.
Extend Synthetic Material Lifespan
Apply UV-protective spray quarterly to outdoor furniture—this simple step extends your repair’s life by 3-5 years. Store chairs under cover when not in use, or use breathable furniture covers that prevent moisture buildup. Annual maintenance: Clean with mild soap solution, rinse thoroughly, and dry completely before storage. Warning: Avoid direct heat sources that accelerate plastic degradation.
Most woven chair repairs succeed on the first attempt with proper preparation. Start with simpler projects like webbing replacement before tackling complex hand caning. Your repaired chair will provide decades of service—often outlasting the original construction quality when you know how to fix woven chairs correctly. Remember that patience with tension control and proper material selection makes the difference between a temporary patch and a lasting restoration.


