
Your favorite patio chair has seen better days—faded fabric flaps in the breeze, the frame wobbles ominously, and you’re eyeing expensive replacements. Before you toss that faithful companion, know this: how to fix sling chairs is simpler than you think, with most repairs requiring basic tools and costing a fraction of replacement. This guide walks you through diagnosing and repairing everything from torn fabric to corroded frames, potentially saving hundreds while restoring your outdoor seating to like-new condition.
Whether you’re dealing with a poolside lounger or a folding camp chair, these proven techniques work across all sling chair styles. You’ll learn to assess damage accurately, source the right materials, and execute repairs that last for seasons to come. Stop searching for temporary fixes—let’s dive into permanent solutions that get your chairs back in action fast.
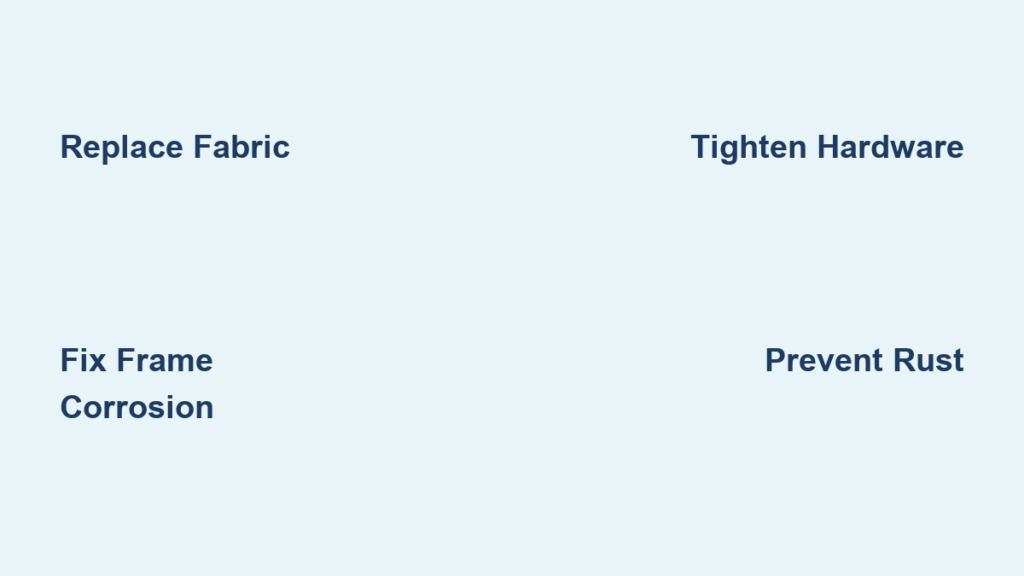
Diagnosing Sling Chair Fabric Failures
Spotting Irreparable Fabric Damage
Start your repair by examining the sling material under bright light. Rips at frame contact points signal critical failure—press the fabric where it wraps around rails; if fibers separate easily, replacement is essential. UV degradation appears as chalky residue when rubbed and noticeably faded top surfaces, while mold growth shows as dark, smearable spots with a musty odor. Sagging that persists after pressing indicates stretched fibers beyond recovery—your fingers should sink no more than half an inch on healthy fabric.
Critical Frame Weakness Indicators
Flip your chair upside-down and test stability by wiggling each leg joint—any movement means loose connections compromising safety. Aluminum frames develop white oxidation powder that masks deeper corrosion, while steel frames show flaking rust revealing pitted metal underneath. Shine a flashlight on welded joints; hairline cracks often hide where tubes meet. Document all findings with photos before disassembly—this prevents mistakes during reassembly and helps identify recurring stress points.
Essential Repair Tools and Materials

Must-Have Toolkit for Quick Fixes
Gather these before starting: Phillips screwdriver for frame screws, 4-6mm hex keys covering most brands, rubber mallet for gentle part persuasion, and needle-nose pliers for tight hardware. Add a 10-foot measuring tape for accurate cuts and a rotary cutter for clean fabric edges. This basic kit handles 80% of sling chair repairs without specialty purchases.
Smart Replacement Component Choices
Prioritize sling fabric matching original weight (1-3 lbs per linear yard) with UV resistance rated 1000+ hours. For rails, select 1/4″ or 5/16″ aluminum rods sized precisely to your frame channels. Always upgrade hardware to stainless steel 304-grade screws—they prevent future corrosion that plagues original components. Rubber end caps must fit rail diameter snugly; test-fit before installation to avoid tension issues later.
Fabric Replacement Without Professional Help
Removing Worn Fabric Safely
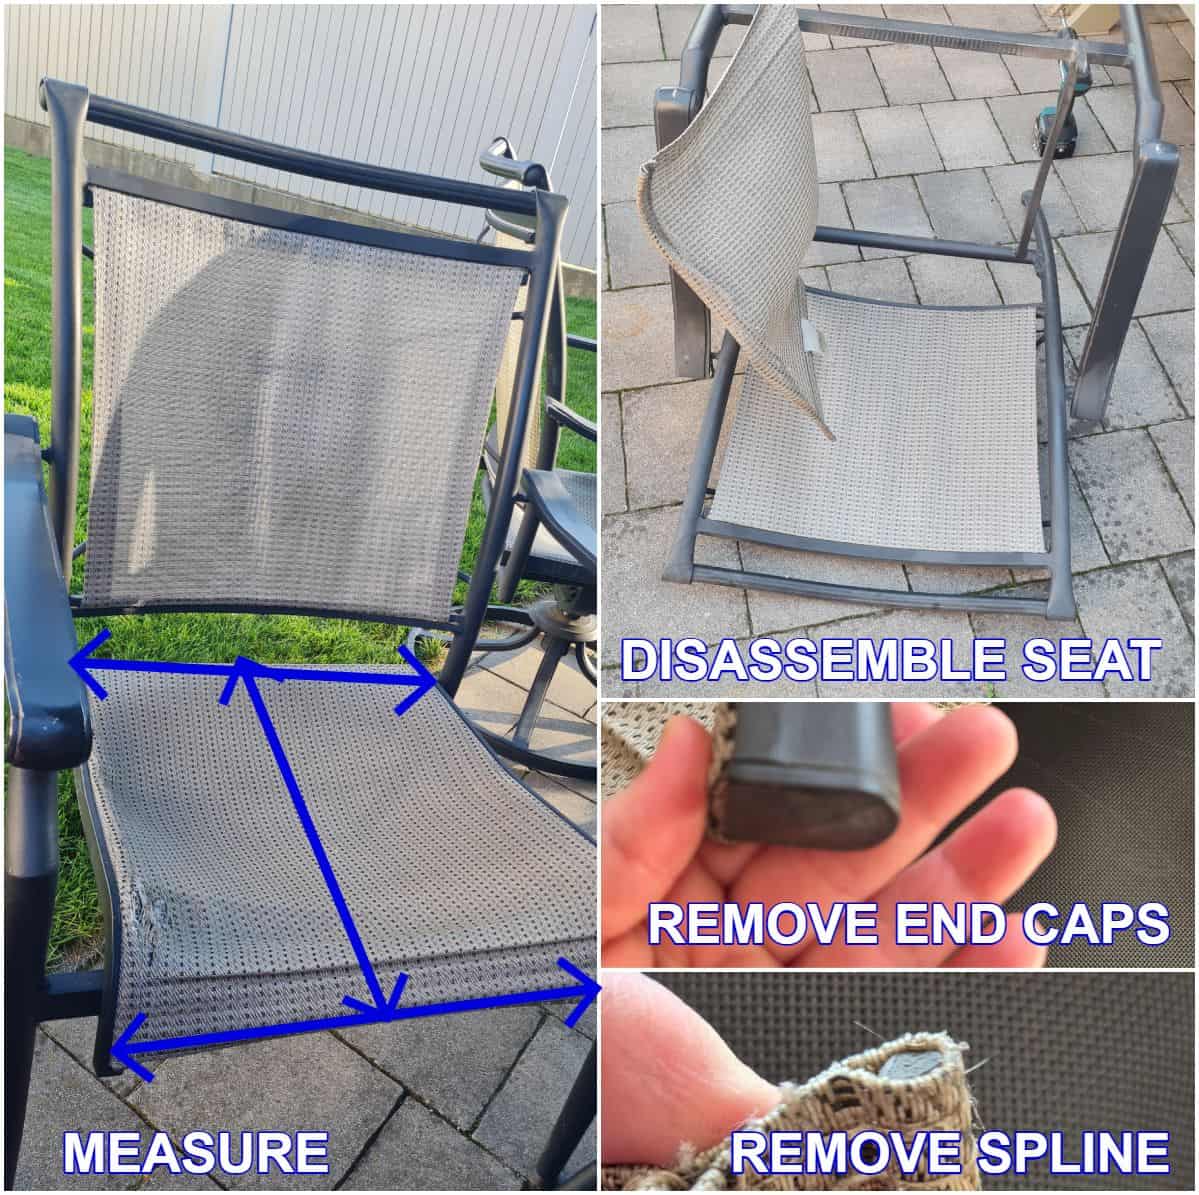
Position the chair upside-down and pry off end caps with a flathead screwdriver—keep them in a container to prevent loss. Slide rails out of fabric channels slowly to avoid creating new tears. Take photos showing original fabric orientation; these become your reassembly blueprint. Clean frame channels thoroughly with mild detergent and a soft brush to remove grime that blocks proper rail seating.
Measuring for Perfect Replacement Fabric
Lay the old fabric flat as your template. Measure width between inside channel edges and length from top to bottom rail grooves. Add 1-2% to length for polyester stretch during installation. If using patterned fabric, account for design alignment at seams. Mark rail insertion points exactly 1″ from each end using fabric chalk—this precision prevents diagonal wrinkles after installation.
Installing New Fabric Tautness
Cut replacement material using your old sling as a guide. Insert rails through fabric channels, starting at the top groove. Work the fabric into frame channels evenly with your rubber mallet—this step often requires a second person maintaining tension. Stretch the bottom rail firmly before seating it fully; test tautness by pressing the center—it should rebound like a trampoline without seam stress. Install end caps to lock tension permanently.
Restoring Corroded Frames Permanently
Aluminum Frame Revival Steps
Remove oxidation using aluminum cleaner and 0000 steel wool, working with the metal grain. For dents, place wooden blocks on both sides and tap gently with your mallet. Structural cracks require TIG welding—seek professional help here. Finish by applying automotive clear coat to prevent future corrosion; this creates a transparent shield against moisture and UV damage.
Steel Frame Rust Elimination
Scrape loose rust with a wire brush, then apply naval jelly to stubborn areas for 15 minutes before rinsing. Prime immediately with zinc-chromate primer—it bonds chemically to bare metal. Match paint using automotive touch-up pens for small areas or professional powder coating for full frames. Seal with UV-resistant clear coat to extend your refinishing results by 2-3 years.
Preventing Hardware Failures Long-Term
Corrosion-Proofing Connections
Replace all hardware with 316-grade stainless steel in coastal areas—its molybdenum content resists salt air. Apply anti-seize compound to threads before assembly; this prevents galling during future maintenance. Use Nylock nuts at vibration points and nylon washers between dissimilar metals to stop galvanic corrosion—the silent killer of outdoor furniture.
Folding Mechanism Smooth Operation
Replace worn pivot bushings by measuring inner/outer diameters precisely—marine suppliers often carry universal sizes. Lubricate quarterly with silicone spray only; petroleum products attract grit that accelerates wear. Inspect hinge pins for pitting—if they wiggle excessively, replace with exact matches. Test folding action before declaring the repair complete; it should move smoothly without catching.
Advanced Fixes for Severe Damage

Custom Fabric Solutions When Parts Are Obsolete
Create patterns from your chair dimensions using heavy paper when replacements are unavailable. Source marine-grade fabrics like Sunbrella through boating suppliers—they offer superior UV resistance. Sew double-fold hems with UV-resistant thread, then load-test to 250 lbs before installation. This ensures safety while allowing color customization unavailable in stock options.
Structural Reinforcement Tactics
Add steel plates to stress points using pop rivets—position them under the frame for invisibility. Reinforce cracked welds with marine epoxy for non-structural areas. Install triangular steel gussets at weak joints to increase weight capacity by 40%. For folding chairs, add stainless steel cables between key points to prevent wobble during use.
Seasonal Maintenance That Prevents Repairs
Year-Round Care Protocol
Spring: Deep clean with mild detergent, inspect for winter damage, and lubricate moving parts. Apply 303 Aerospace Protectant to fabric surfaces. Summer: Rinse weekly with fresh water and tighten bolts monthly. Store in shade when unused. Fall: Complete drying before storage—elevate chairs off damp ground using breathable covers that prevent moisture buildup.
Winter Storage That Preserves Fabric
Never store sling chairs while damp—mold develops within 72 hours. Wipe frames with paste wax for aluminum or rust inhibitor for steel. Store vertically if possible to maintain fabric tension. For outdoor storage, use breathable cotton covers (not plastic) that allow moisture escape while blocking debris. This simple routine extends sling life by 3-5 years.
Fixing Post-Repair Problems Fast
Eliminating Fabric Wrinkles Immediately
Diagonal wrinkles mean uneven cutting—re-measure and re-cut with a square template. General wrinkling indicates insufficient tension; remove and reinstall with greater stretch, especially at the bottom rail. Always install fabric between 60-80°F—cold temperatures cause shrinkage that creates wrinkles as materials warm.
Solving Hardware Mismatch Headaches
Thread pitch errors (SAE vs. metric) cause stripped holes—verify specifications with a thread gauge. Rail diameter mismatches create slack; measure original rails with calipers and replace as a set. Test end cap fit by pressing rails through caps before final assembly. When frame grooves are damaged, wrap rails with thin rubber tubing to fill gaps temporarily.
Repair vs. Replace Decision Guide
When Fixes Save Real Money
Fabric replacement costs $25-75 in materials versus $150+ for new chairs. Hardware refresh ($10-30) prevents catastrophic failure. Frame repair ($50-150) extends life of quality aluminum chairs significantly. Professional service ($100-300) remains cheaper than high-end replacements for vintage or designer pieces with sentimental value.
Signs Replacement Is Smarter
Choose new chairs when frame damage exceeds 30% of the structure, multiple components fail simultaneously, or repair costs hit 50% of a new chair’s price. Obsolete hardware that’s unavailable forces replacement—check manufacturer websites for discontinued parts first. For mass-market chairs under $100, replacement often makes financial sense versus extensive repairs.
Your sling chairs represent significant outdoor comfort investment. With these techniques, you’ve transformed a potential disposal problem into a satisfying restoration project that extends furniture life for years. Document repairs with photos and notes—this information proves invaluable for future maintenance and helps track what works best for your specific chair models.
Remember: the best repair prevents problems. Schedule seasonal maintenance, address issues promptly, and your restored sling chairs will provide comfortable seating long after factory chairs have been replaced. Master how to fix sling chairs once, and you’ll enjoy reliable outdoor relaxation for seasons to come—without breaking the bank.


