
Nothing transforms outdoor living spaces quite like clean, vibrant wicker chairs—but years of dust, pollen, and weather exposure can leave your favorite seating looking dull and gray. If you’ve ever tried wiping down your wicker furniture only to find dirt stubbornly clinging in every crevice, you’re not alone. Properly cleaning wicker chairs requires specific techniques tailored to your furniture’s material type. This guide delivers actionable methods to restore both natural and synthetic wicker chairs safely, helping you reclaim their original beauty without causing damage.
Many homeowners mistakenly treat all wicker the same, only to discover their cleaning attempts have left fibers weakened or finishes ruined. Whether you’re dealing with a cherished heirloom rocking chair or modern patio furniture, understanding the right approach prevents costly mistakes. By the end of this guide, you’ll confidently identify your wicker type, select appropriate cleaning solutions, and implement techniques that extend your furniture’s lifespan while maintaining its structural integrity.
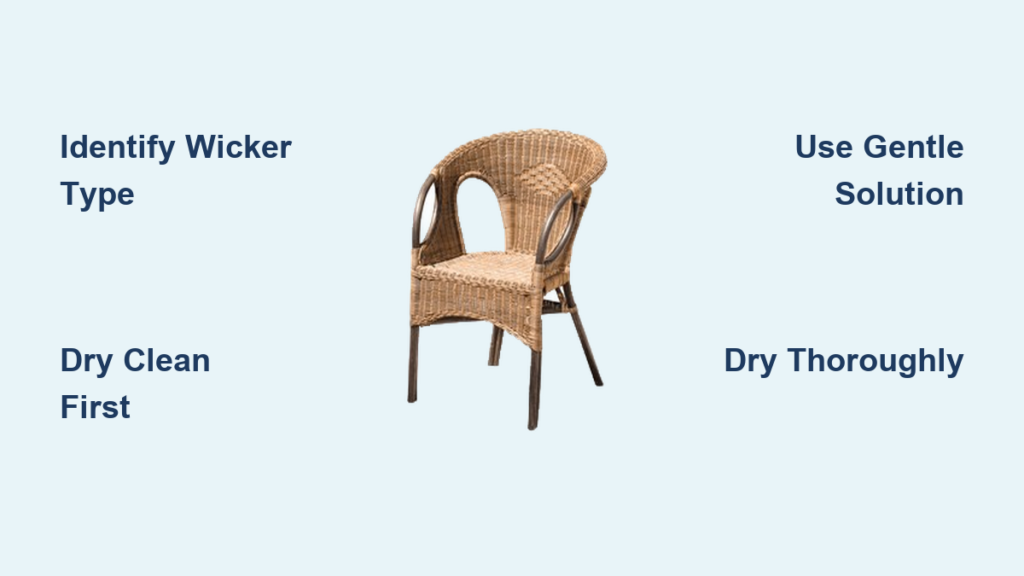
Identify Your Wicker Type Before Cleaning
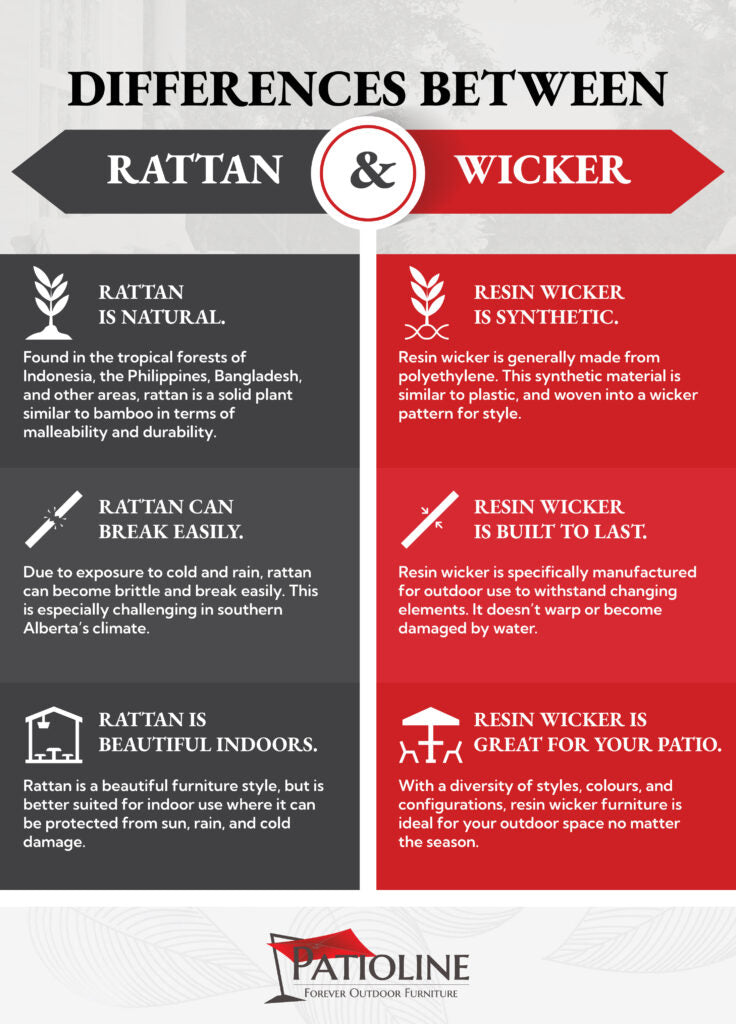
Natural wicker reveals itself through visible grain patterns, slight color variations between strands, and a more flexible feel when pressed gently. This organic material—typically made from rattan, bamboo, or willow—demands careful handling as excessive moisture causes fibers to swell and potentially unravel. Synthetic wicker, constructed from resin or polyethylene, displays uniform coloring, rigid structure, and often has a subtle plastic-like sheen. Recognizing these differences before cleaning prevents irreversible damage to your investment.
How to Spot Problem Areas Before Wet Cleaning
Inspect your chair thoroughly for loose weaving, broken strands, or mold growth—these require attention before introducing moisture. Run your fingers along the frame to detect weakened areas where strands may separate when wet. Pay special attention to seat joints and armrest connections where stress concentrates. If you notice green or black spots indicating mold, mark these areas for targeted treatment. For valuable antiques, consult a professional before proceeding with any cleaning method.
Essential Supplies Checklist for Effective Cleaning
:max_bytes(150000):strip_icc()/SPR-how-to-clean-wicker-baskets-6823342-tools-9164-d4e208bb73ff48efba1639502289ef06.jpg)
Natural Wicker Toolkit Must-Haves
Gather these specific items before starting: soft natural-bristle brush (never synthetic bristles), white vinegar, mild dish soap without additives, multiple microfiber cloths, and an old toothbrush for intricate patterns. Avoid steam cleaners, pressure washers, and harsh chemicals—these break down delicate natural fibers. Keep a fan nearby to accelerate drying, as natural wicker requires complete moisture removal to prevent mold growth between strands.
Synthetic Wicker Cleaning Arsenal
For resin or polyethylene wicker, add a synthetic-bristle scrub brush, garden hose with adjustable nozzle, baking soda for tough stains, and a bucket for mixing solutions. Outdoor synthetic pieces can handle more aggressive cleaning, but still avoid high-pressure settings that might force water into structural joints. A UV protectant spray becomes essential after cleaning to maintain color vibrancy against sun exposure.
Dry Cleaning Removes 80% of Surface Dirt
Start every cleaning session with thorough dry removal—this prevents grinding dirt deeper into the weave during wet cleaning. Vacuum systematically using a brush attachment on low suction, working from top to bottom in sections. Target crevices with the crevice tool, paying special attention to seat joints where crumbs accumulate. Vacuum both sides of woven surfaces to dislodge trapped debris.
Master the Brush Technique for Deep Dust Removal
Always move with the weave direction using light pressure—let the bristles do the work rather than forcing dirt. Tap your brush gently against your palm periodically to release accumulated dust. Switch to a soft toothbrush for intricate patterns and tight corners where vacuum attachments can’t reach. For stubborn debris in hard-to-reach spaces, use compressed air held 6-8 inches away with short bursts to avoid moisture buildup from condensation.
Natural Wicker Cleaning Protocol: Gentle Yet Effective
Mix the perfect solution: Combine 1/4 cup mild dish soap with 1 gallon warm (not hot) water in a bucket. Hot water causes natural fibers to swell and distort permanently. Dip a microfiber cloth into the solution, wring until barely damp—not dripping—and test on an inconspicuous area first. Never saturate natural wicker; excess moisture leads to warping and mold growth between strands.
Step-by-Step Natural Wicker Cleaning Process
- Wipe along the weave direction using your damp cloth—never scrub against the grain
- For stubborn spots, use a soft toothbrush with minimal pressure
- Immediately follow with a clean, dry cloth to absorb moisture
- Work in small sections, allowing each area to dry completely before moving on
- Rinse with a separate cloth lightly dampened with clean water to remove soap residue
Drying is critical: Position chairs in well-ventilated shade—not direct sunlight—to dry for 24-48 hours. Elevate slightly to promote air circulation beneath seat surfaces. Rushing this process invites mold growth in hidden crevices where moisture lingers.
Synthetic Wicker Deep Cleaning Method: Powerful Results
Create a stronger cleaning solution with 1/3 cup dish soap and 1 gallon warm water, adding 1/2 cup white vinegar for outdoor furniture. Apply this mixture with a soft brush or sponge, scrubbing textured surfaces with circular motions to dislodge embedded dirt. Unlike natural wicker, synthetic materials tolerate more aggressive cleaning—use a garden hose on gentle spray for rinsing, increasing pressure only for stubborn areas.
Accelerate Drying Without Damage
Wipe excess water with clean towels immediately after rinsing, then air dry in shaded area. Position chairs to promote drainage—tilt seats forward slightly and elevate legs if possible. Synthetic wicker dries much faster than natural, typically within 4-6 hours, but complete drying prevents water spots and maintains structural integrity. Fans safely accelerate drying without risking fiber damage.
Targeted Stain Removal Techniques That Work
Eliminate Organic Stains in 20 Minutes
For food spills, grass marks, or beverage stains, create a paste with baking soda and water. Apply to the stained area and let sit 15-20 minutes before gently scrubbing with a soft brush. The mild abrasiveness lifts stains without damaging fibers. Rinse thoroughly with a damp cloth and dry completely—leftover moisture attracts more dirt.
Mold and Mildew Emergency Protocol
Natural wicker: Mix equal parts white vinegar and water in a spray bottle. Apply to affected areas, let sit 10 minutes, then gently scrub with a soft brush. Rinse with clean water and dry in sunlight if possible—UV rays help kill remaining spores. Synthetic wicker: Use a stronger 2:1 vinegar solution or commercial mold remover safe for synthetic materials. Never combine vinegar with bleach—it creates toxic fumes.
Outdoor vs Indoor Wicker Care Differences You Must Know
Outdoor furniture requires monthly cleaning due to environmental exposure—pollen, bird droppings, and UV damage accumulate rapidly. During each cleaning session, check for spider webs and insect nests in hidden crevices. Inspect for UV damage indicated by fading or brittle fibers, and use furniture covers between uses to minimize exposure.
Indoor pieces focus on prevention: weekly dusting prevents deep buildup in weave patterns. Avoid furniture polish on natural wicker—it attracts more dust. Position chairs away from heating vents that dry out fibers, and control humidity levels to prevent mold growth in hidden areas.
Prevent Future Problems With Smart Maintenance
Establish a simple maintenance schedule: weekly quick dusting with a microfiber cloth, monthly thorough vacuuming of all surfaces, and seasonal deep cleaning. Apply protective treatments annually—furniture wax or lemon oil for natural wicker, UV protectant spray for synthetic pieces exposed to sun. Avoid silicone-based products on both types as they create slippery surfaces and attract dust.
Pro tip: Set calendar reminders for maintenance tasks. After deep cleaning outdoor furniture, apply a thin coat of carnauba wax to natural wicker—it repels water while nourishing fibers. For synthetic pieces, a quick spray of UV protectant after each cleaning extends color vibrancy significantly.
When Professional Help Makes Financial Sense
Consider professional cleaning for valuable antiques, extensive mold damage, or structural issues requiring restoration expertise. Professional services typically range $50-200 per piece—compare this against replacement costs before deciding. Warning signs requiring expert attention include large sections of loose or broken weaving, deep-set mold throughout the piece, structural instability when sitting, or antique finishes that could be damaged by DIY attempts.
Safety First: Critical Precautions You Can’t Skip
Always wear gloves when using cleaning solutions, work in well-ventilated areas, and use eye protection when spraying. Test all products in hidden areas first to check for adverse reactions. Never mix different cleaning chemicals—especially vinegar and bleach, which create toxic chlorine gas. Ensure complete drying to prevent hidden moisture damage, and avoid direct sunlight during wet cleaning to prevent uneven drying and potential warping.
Regular maintenance prevents the deep cleaning marathon nobody wants to tackle. Set calendar reminders for monthly quick cleans and seasonal deep treatments. Your wicker chairs will reward you with years of comfortable seating and timeless style—no more embarrassing gray grime or musty odors. Remember: proper cleaning preserves both appearance and structural integrity, turning your wicker furniture from drab to fab with minimal effort when you follow these proven techniques.


