
Your resin Adirondack chairs sit baking in the sun season after season, accumulating everything from pollen to bird droppings. While they’re designed to withstand harsh weather, neglecting proper cleaning can leave them looking dull, stained, and aged beyond their years. This comprehensive guide walks you through every technique needed to restore and maintain your chairs’ original beauty without damaging their durable surfaces.
Most homeowners don’t realize that regular maintenance of resin Adirondack chairs prevents costly replacements and extends their lifespan by years. Unlike wood furniture, these chairs won’t rot or splinter, but surface grime and oxidation can make them look prematurely aged. You’ll discover how to tackle everything from stubborn tree sap to persistent mold using household items and specialized techniques that protect your investment.
Why Your Resin Chairs Lose Their Shine Over Time
Resin Adirondack chairs develop that chalky, faded appearance primarily from UV exposure breaking down the surface polymers. The textured wood-grain pattern traps dirt particles that act like sandpaper in wind, accelerating wear. Pollen, bird droppings, and tree sap left uncleaned create acidic reactions that etch into the surface over time.
How Resin Material Reacts to Neglect
High-density polyethylene (HDPE) resin chairs resist deep staining but suffer surface oxidation when not properly maintained. The non-porous surface prevents liquids from soaking in, but allows contaminants to adhere stubbornly to the textured finish. When you ignore regular cleaning, these substances bond with the resin surface, creating that dull, grayish film that’s difficult to remove later.
Critical mistake to avoid: Using chlorine bleach on resin chairs—it breaks down UV stabilizers and causes premature fading. Stick to oxygen-based cleaners that lift stains without damaging the material’s protective properties.
Seasonal Damage Patterns You Should Recognize
Spring reveals winter’s toll with bird droppings that have etched into surfaces and sap that hardened over cold months. Summer brings pollen stains that turn yellow on white chairs and sunscreen residues that create sticky spots. Fall deposits leaves that trap moisture against the resin, while winter causes thermal stress that can make neglected chairs brittle.
Essential Cleaning Supplies for Different Stain Types

Your Basic Cleaning Kit for Weekly Maintenance
- Mild dish soap (phosphate-free works best to prevent residue)
- Warm water (lukewarm temperature avoids thermal shock)
- Car wash brush (soft synthetic bristles won’t scratch)
- Microfiber cloths (lint-free for streak-free drying)
- Garden hose with adjustable spray nozzle (medium pressure setting)
Pro tip: Keep a dedicated spray bottle with 1 tablespoon soap per quart of water for quick spot cleaning during outdoor gatherings—this prevents stains from setting.
Deep Cleaning Solutions for Tough Problems
- White vinegar (undiluted for mold, diluted 50/50 for general use)
- Baking soda paste (3 parts soda to 1 part water for oxidation)
- Oxygen bleach (OxiClean powder for stubborn stains)
- Magic Eraser (melamine foam for scuff marks)
- UV protectant spray (prevents future fading after cleaning)
Warning: Never use abrasive scouring pads—they leave microscopic scratches that accelerate future staining. The soft-bristled brush is your best friend for effective yet gentle cleaning.
Quick Daily Cleaning Method That Prevents Buildup
Start each cleaning session by removing loose debris with your soft-bristled brush. Work from top to bottom, paying special attention to the crevices between seat slats where pollen accumulates. For chairs under trees, use a handheld vacuum first to remove cobwebs and pollen before wet cleaning.
Mix 1 tablespoon mild dish soap per gallon of warm water. Dip your brush into the solution and work in sections, beginning at the top of the chair back. Focus extra attention on armrests and the junction where the back meets the seat—these high-contact areas collect the most grime. This method takes just 5-10 minutes per chair but prevents stubborn buildup that requires intensive treatment later.
How to Rinse Without Causing New Problems
Rinse thoroughly using medium-pressure hose spray, working from top to bottom in smooth, overlapping strokes. Pay special attention to the chair’s underside where soap residue can pool. The key is to rinse until water runs completely clear—any leftover soap attracts more dirt and creates sticky spots.
Time-saving trick: Clean chairs on your lawn to simultaneously water grass. Position chairs so runoff flows toward thirsty plants rather than paved areas where it creates slippery surfaces.
Eliminate Mold and Mildew Without Damaging Resin
Vinegar Treatment for Light Mold Growth
Mix equal parts white vinegar and warm water in a spray bottle. Saturate affected areas completely and wait 30 minutes—this dwell time allows the vinegar to penetrate mold roots. Scrub gently with your soft brush using circular motions, then rinse thoroughly. For white chairs, this method works especially well on the north-facing sides that stay shaded.
Oxygen Bleach Solution for Persistent Mold
For stubborn mold that vinegar can’t remove, mix 1 cup oxygen bleach per gallon of warm water. Apply with a sponge, let sit 15 minutes (don’t let it dry), then scrub and rinse. Never use chlorine bleach—it degrades the UV stabilizers in resin, causing accelerated fading. After cleaning, position chairs in direct sunlight to dry completely, as UV rays prevent mold regrowth.
Critical step: Always test any cleaning solution on a small, inconspicuous area first. Some colored resins may react differently to cleaning agents than white chairs.
Remove Tree Sap and Pollen Stains Effectively
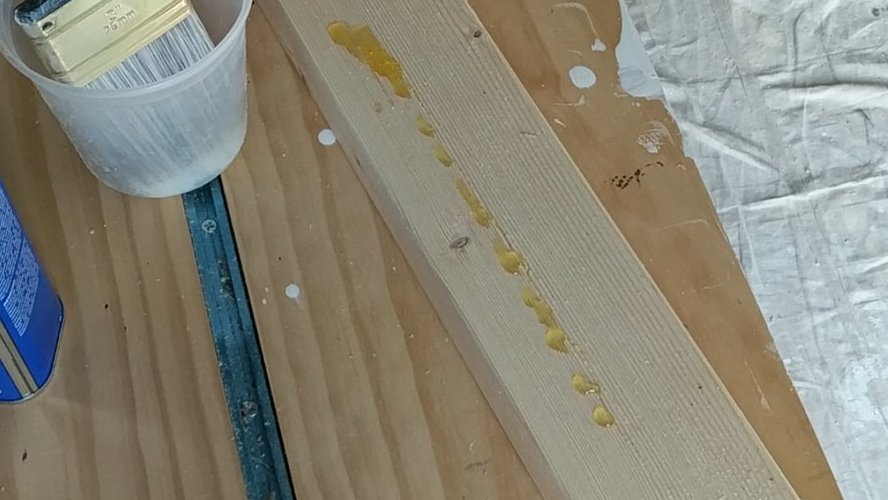
Fresh vs. Dried Sap Removal Techniques
For fresh sap, use a plastic putty knife to gently lift the bulk away. Follow with mineral spirits on a cotton cloth, working in small circular motions. For dried sap that’s hardened over winter, apply WD-40 and wait 10 minutes for it to penetrate, then gently scrape with your plastic knife. Finish by removing residue with your dish soap solution.
Pollen Stain Removal for White Chairs
Yellow pollen stains respond exceptionally well to baking soda paste (3 tablespoons to 1 tablespoon water). Apply with your soft brush, wait 20 minutes, then scrub gently before rinsing. For severe staining, repeat the process or add a small amount of oxygen bleach to the paste. This method works best when performed immediately after pollen exposure—waiting allows the acidic compounds to etch into the resin surface.
Monthly Deep Cleaning Routine for Long-Term Protection
Increase your soap concentration to 2 tablespoons per gallon for monthly deep cleaning. Focus special attention on the chair’s underside where sap, bird droppings, and spider webs accumulate unseen. Use your long-handled brush to clean between each slat, angling the bristles to reach tight spaces where moisture traps dirt.
For gray oxidation on light-colored chairs, apply baking soda paste to affected areas. Let sit 15 minutes before gentle scrubbing and thorough rinsing. This monthly ritual prevents the need for intensive restoration later and maintains your chairs’ like-new appearance throughout the season.
How to Clean Between Slats Without Scratching
Insert your soft scrub brush at a 45-degree angle between slats and pull toward you in smooth strokes. Rotate the brush to clean both sides of each slat. For tight spaces, use an old toothbrush dipped in cleaning solution. Work systematically from top to bottom, checking your progress by running a dry finger along cleaned areas to feel for residual grit.
Seasonal Care Schedule That Extends Chair Life
Spring Opening Protocol
Begin by inspecting chairs for winter damage like cracks or brittle areas. Remove protective covers and shake out debris. Perform a thorough deep clean using your monthly method. Check all hardware for rust or looseness, tightening screws as needed. Finish by applying UV protectant to all surfaces—this creates a barrier against summer sun damage.
Fall Storage Preparation Steps
Complete a thorough deep cleaning before storage. Allow chairs to dry completely for 48 hours in direct sunlight. Apply UV protectant even if storing indoors—this prevents degradation during winter months. Stack chairs carefully with a cloth between surfaces to prevent scratching, and store vertically to save space.
Prevention tip: Position chairs away from overhanging trees year-round. This simple placement strategy reduces sap, pollen, and leaf debris by up to 70%, cutting your cleaning time significantly.
Troubleshooting Common Cleaning Problems
White Residue After Cleaning
This frustrating issue indicates incomplete rinsing or hard water mineral deposits. Fix it by re-washing using distilled water for your final rinse. Dry with a microfiber cloth instead of air drying to prevent water spots. For persistent residue, wipe with a 50/50 vinegar-water solution to dissolve minerals.
Sticky Surface After UV Protection
When chairs feel sticky after applying protectant, you’ve applied too thick a coat. Clean the surface with denatured alcohol on a cotton cloth to remove excess product. Reapply using thin, even coats with 30-minute drying intervals between applications. This ensures proper curing without tackiness.
Eco-Friendly Cleaning Alternatives That Work
Replace commercial cleaners with these effective natural solutions:
– Lemon juice polish: Mix 1 part lemon juice with 2 parts olive oil for gentle shine
– Washing soda solution: Use 2 tablespoons per gallon of water for heavy cleaning
– Cornstarch paste: Apply to oil stains, let sit 30 minutes, then brush away
Water conservation tip: Clean chairs on your lawn to water grass simultaneously. Use a bucket system instead of running water continuously—this reduces water usage by up to 80% while maintaining cleaning effectiveness.
Pressure Washing Guidelines for Resin Chairs
Use pressure washing only for heavily soiled chairs or large collections. Set pressure between 800-1,200 PSI with a 25-degree fan tip—higher settings can damage the textured surface. Maintain 12-18 inches distance from the chair, working in consistent downward strokes following the grain pattern.
Critical warning: Never pressure wash cracked or brittle resin. The high pressure can force water into microfractures, accelerating deterioration. Always test on a small area first and never hold the wand in one spot for more than 2-3 seconds.
Maintenance Frequency That Prevents Major Restoration
Your ideal cleaning schedule follows this pattern:
– Daily during use: Brush off loose debris with soft brush
– Weekly: Spot clean spills immediately with soap solution
– Monthly: Complete wash and hardware inspection
– Seasonally: Deep clean and UV protectant application
– Annually: Full restoration if needed for severe oxidation
Pro tip: Keep a small spray bottle of your soap solution in your outdoor storage area. This makes spot cleaning immediate after meals or gatherings—preventing stains before they set in and saving you hours of intensive cleaning later.
Regular maintenance of your resin Adirondack chairs takes just minutes per week but prevents costly restoration or replacement. By following these specific cleaning techniques tailored to resin material, you’ll keep your outdoor seating looking vibrant and inviting for years. Start implementing these methods today, and your chairs will reward you with lasting beauty that enhances your outdoor space through every season.


