
Your favorite leather chair sees daily use—morning coffee, evening Netflix, maybe even the occasional nap. Over time, that rich, supple surface collects oils, dust, and mysterious stains that diminish its luxury feel. The good news? With the right approach, you can restore your leather chair to showroom condition without expensive professional services. This guide walks you through everything from identifying your leather type to tackling stubborn stains, all using proven techniques that protect your investment while delivering professional results.
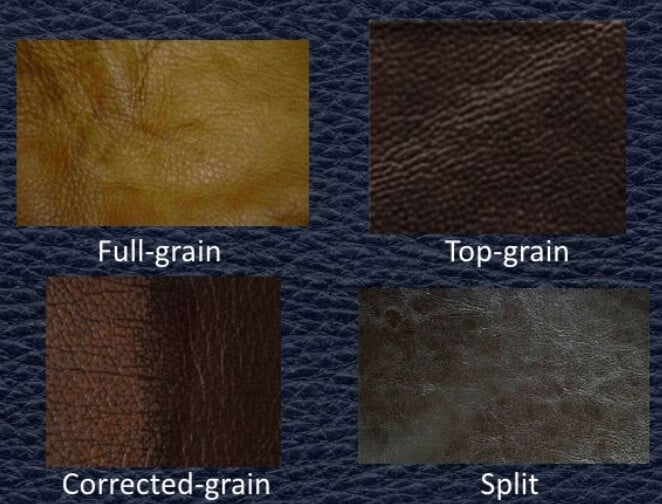
Identify Your Leather Type Before Cleaning
Water Drop Test Method
Place a single drop of water on an inconspicuous area. Watch closely:
– Absorbs quickly and darkens: Aniline leather (most delicate)
– Absorbs slowly with minimal darkening: Semi-aniline leather
– Beads up without absorption: Protected/pigmented leather (most common)
– Creates rough spot: Nubuck or suede (special handling required)
– Feels plastic-like: Bi-cast leather (easiest to clean)
Visual Inspection Clues
Run your hand across the surface. Protected leather feels slightly plastic-coated, while aniline feels buttery soft. Check seams for the leather’s original color—faded areas indicate aniline or semi-aniline types that need gentler care. This identification is crucial because using the wrong cleaning method on unprotected leather can cause permanent damage.
Essential Supplies Checklist for Leather Chair Cleaning
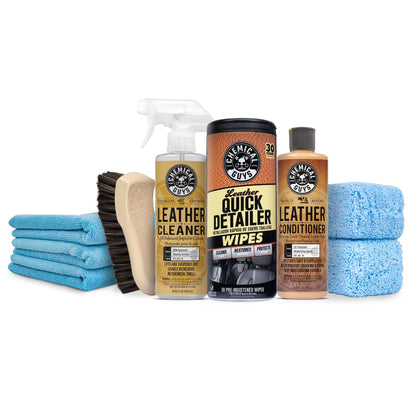
Must-Have Cleaning Tools
- pH-balanced leather cleaner (never use household cleaners)
- Distilled water (prevents mineral spots)
- White microfiber cloths (6-8 minimum, lint-free)
- Soft-bristled brush (horsehair or natural fibers)
- Cotton swabs (crevices and seams)
- Spray bottles (for solutions)
Stain-Specific Solutions
Create targeted remedies: Castile soap for mild cleaning, white vinegar (1:4 water ratio) for general stains, rubbing alcohol (only for ink after testing), cornstarch for oil absorption, and cream of tartar + lemon juice paste for dark stains. Always test solutions in hidden areas first—what works on one leather type might damage another.
Conditioning Arsenal
Stock matching products: Leather conditioner (type-specific), Mink oil (for dry, older leather), Leather protector (post-cleaning shield), and Beeswax cream (extra protection). Skipping conditioning after cleaning is the #1 mistake—it leaves leather vulnerable to cracks and stains.
Pre-Cleaning Safety Steps That Prevent Damage
Initial Assessment Protocol
Photograph your chair from multiple angles before starting. Test every product on the chair’s underside—wait 24 hours before proceeding. This creates a damage baseline and prevents costly mistakes. Check for existing cracks, fading, or loose stitching that might require professional attention before cleaning.
Environment Setup
Move your chair into a well-lit, ventilated area at 65-75°F. Avoid direct sunlight—it causes rapid drying and cracking. Ensure the space has stable humidity (40-50% ideal) and no drafts. Extreme temperatures during cleaning can warp leather permanently.
Surface Prep
Vacuum thoroughly using the soft brush attachment. Pay special attention to seams where debris accumulates, cushion edges, armrest undersides, and the back panel. This dry prep prevents grinding dirt into the leather during wet cleaning—like sweeping before mopping.
Basic Cleaning Routine for Daily Maintenance
Step 1: Dry Debris Removal
Start with a completely dry microfiber cloth. Wipe systematically with the leather’s grain pattern. For textured surfaces, use your soft brush in gentle sweeping motions. This crucial first step removes abrasive particles that could scratch during wet cleaning.
Step 2: Controlled Damp Wipe
Lightly mist a fresh cloth with distilled water—never soak it. The cloth should feel barely damp. Wipe in circular motions, focusing on high-contact areas. Change cloths frequently to avoid redistributing grime. Over-wetting causes moisture damage that takes months to appear.
Step 3: Cleaner Application
Dilute pH-balanced cleaner per instructions (typically 1:10). Apply solution to cloth, never directly on leather. Work in 2×2 foot sections with consistent pressure. The leather should feel slightly tacky but never wet—if it’s pooling, you’re using too much solution.
Step 4: Rinse Phase
Use a separate cloth dampened with clean distilled water. Wipe away all cleaner residue—leftover product attracts dirt like a magnet. Check seams by running your fingernail along them; any white residue indicates incomplete rinsing that will cause future staining.
Step 5: Air Drying
Pat dry with absorbent towels, then allow 2-4 hours of air drying. Position fans for gentle circulation, but never point them directly at the leather. Test dryness by pressing with a clean finger—no moisture should transfer. Rushing this step invites mold growth.
Stain Removal Strategies for Common Problems
Oil and Grease
Blot (never rub) fresh spills with paper towels. Cover with cornstarch overnight—it absorbs oil like magic. Brush away powder; repeat if oil remains. For stubborn stains, use a leather-specific degreaser, testing first in a hidden spot. Never apply water initially—it spreads oil deeper.
Ink Marks
Test 70% isopropyl alcohol on the chair’s underside. If safe, dab gently with a cotton swab, working from the stain’s edge toward center. Stop immediately if color transfers to your swab. Follow with conditioner to prevent drying—alcohol strips natural oils.
Dark Discoloration
Mix equal parts cream of tartar and lemon juice into a paste. Apply thinly to stained areas only—this mild bleaching action lightens dark spots. Let sit 10 minutes maximum, then wipe clean and condition thoroughly. Longer exposure risks surface damage.
Conditioning Protection Plan for Longevity

Choose Right Conditioner
Match conditioner to your leather type. Aniline leather needs lighter, oil-based conditioners, while protected leather benefits from cream formulations. When in doubt, choose a universal conditioner labeled for furniture use. Wrong products create sticky buildup that attracts more dirt.
Application Technique
Work in small sections using circular motions. Apply sparingly—leather should absorb conditioner, not feel greasy. Focus on high-wear areas: seat, armrests, headrest. After 30 minutes, buff gently with a clean cloth. Repeat if leather drinks it up quickly—thirsty leather needs extra hydration.
Professional vs DIY Decisions
Seek experts for antique pieces, extensive staining, mold issues, or delicate nubuck/suede. Basic professional cleaning costs $150-300 per chair, while full restoration runs $500-1500+. If you see color transferring during cleaning or hear cracking sounds, stop immediately—DIY could destroy your chair.
Maintenance Schedule That Prevents Major Cleaning
Daily Quick Care
Dust with dry microfiber cloth and blot spills immediately. Fluff cushions to maintain shape. This 30-second routine prevents 80% of deep cleaning needs by stopping stains before they set.
Weekly Routine
Vacuum with soft brush attachment and wipe high-contact areas. Check for new stains or damage while the chair is unoccupied. Weekly attention catches problems early when they’re easiest to fix.
Monthly Deep Check
Inspect under good lighting and test leather flexibility. Address minor issues immediately—small cracks grow fast. Document changes with photos to track deterioration patterns. This proactive approach extends chair life by years.
Your leather chair represents a significant investment in comfort and style. With consistent care using these techniques, it’ll age gracefully while maintaining its luxurious feel. Remember: gentle, regular maintenance prevents major restoration projects down the road. Condition every 6-8 months for daily-use chairs, and always test products in hidden spots—your leather’s longevity depends on these simple habits.


