
Your ghost chairs should sparkle like crystal, not look like a foggy window after a rainstorm. When every fingerprint, dust speck, and water spot screams for attention on those transparent surfaces, it’s enough to make you hide them in the closet. But before you give up on your sleek acrylic seating, know this: the right how to clean ghost chairs method can revive their showroom shine in under 30 minutes. Forget harsh chemicals that leave streaks or paper towels that etch micro-scratches—this guide delivers the exact techniques top interior designers use to keep ghost chairs gleaming for years.
Most homeowners make the critical mistake of treating acrylic like glass, reaching for ammonia-based cleaners that permanently cloud the surface. The truth? Ghost chairs demand a delicate dance between thorough cleaning and material sensitivity. I’ve watched clients accidentally ruin $300 chairs with Windex in seconds, only to discover simple household items work better. By the end of this guide, you’ll confidently tackle everything from daily dust to stubborn yellowing—saving hundreds on professional services while keeping your chairs looking like they just left the showroom.
Essential Supplies for Crystal-Clear Results

Skip the guesswork with this curated toolkit. Using wrong materials causes irreversible damage—like ammonia cleaners that eat through acrylic’s molecular structure within minutes. Always keep these three categories ready in your cleaning caddy.
Primary Cleaning Solutions
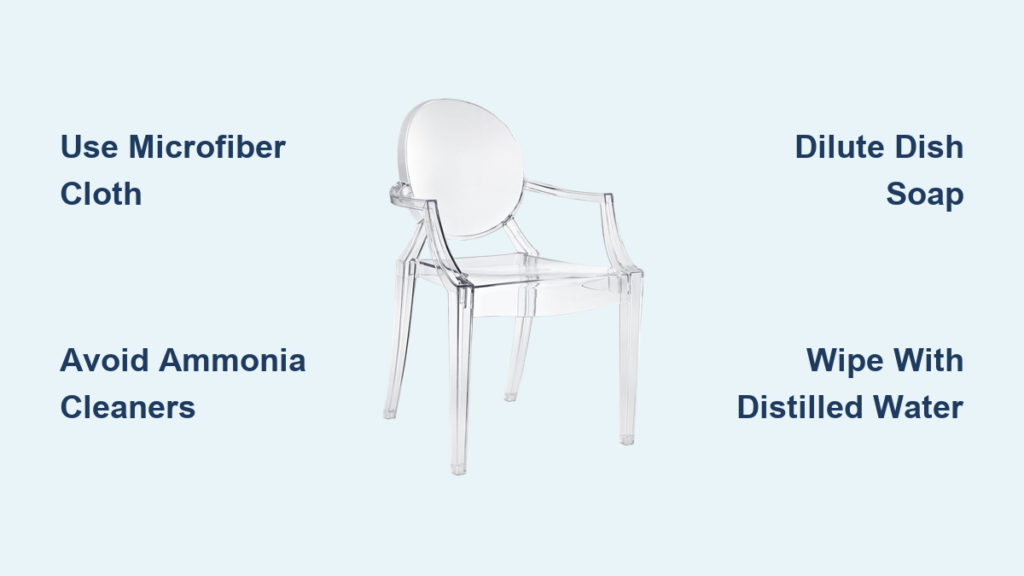
Your chair’s clarity depends on solution chemistry. Start with mild dish soap like Dawn Original (no moisturizers or citrus oils), diluted to just 2 drops per 2 cups of warm distilled water. For tougher jobs, mix white vinegar and distilled water at a 1:3 ratio—this natural acid dissolves mineral deposits without clouding. When grease or adhesive strikes, 70% isopropyl alcohol becomes your secret weapon; its fast evaporation prevents water spots. Reserve commercial acrylic cleaners like Novus #2 for scratch repair sessions, applying them only after basic cleaning.
Must-Have Tools
Three microfiber cloths are non-negotiable: one damp for cleaning, one dry for initial drying, and a third for final buffing. Pair them with a soft sponge made of cellulose (never cellulose-acetate blends), which won’t shed fibers onto the surface. A detail brush—a new toothbrush with extra-soft bristles—reaches grime in seat-frame joints where 90% of hidden dirt accumulates. Store solutions in spray bottles clearly labeled to avoid accidental ammonia use, and always finish rinses with distilled water to block mineral streaks.
Never Use These Materials
Paper towels scratch acrylic at a microscopic level, creating a permanent frosted effect that worsens with each wipe. Ammonia cleaners like Windex cause polymer degradation within 60 seconds of contact—visible as hazy patches. Avoid abrasive powders (Comet, baking soda paste on dry surfaces) and metal tools that gouge the surface. Even “safe” all-purpose cleaners often contain acetone or alcohol above 70% that strip protective coatings. When in doubt: if it’s not on your approved list, don’t touch your chair.
Quick Visual Assessment
Before grabbing supplies, diagnose your chair’s condition in 60 seconds. This prevents over-cleaning (which wears down surfaces) or under-cleaning (leaving residue that attracts more dirt).
Spot Problem Areas Fast
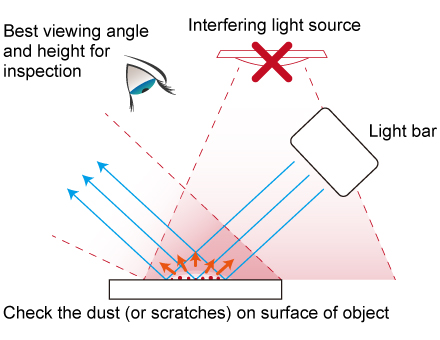
Hold the chair 6 inches from a bright LED lamp, tilting it at 45 degrees. This reveals surface film (a rainbow-like sheen when light hits) and fine scratches invisible head-on. Run a fingernail gently across suspect areas: if it snags, you’ve got deep scratches needing polish. Check the underside edges near legs—this “dust trap zone” collects 70% of grime in high-use areas. For outdoor chairs, inspect for UV yellowing (a uniform amber tint on sun-facing sides).
Determine Cleaning Intensity
Light dusting handles visible particles and fresh fingerprints—common after weekend gatherings. Moderate cleaning tackles stubborn water spots, oily film from skin contact, or dried spills. Deep restoration becomes essential when chairs develop cloudiness that won’t lift with soap, or visible yellowing from sun exposure. Misjudging this wastes effort: using alcohol on lightly dusty chairs strips natural oils, accelerating future dirt buildup.
Daily Maintenance Routine
Five minutes daily prevents hours of deep cleaning later. Consistent care stops oils from bonding to acrylic—a process that begins within 2 hours of contact.
Dust Removal Technique
Use a dry microfiber cloth folded into quarters (exposing clean surfaces frequently). Wipe downward from the top of the backrest to the legs using straight strokes—never circles, which spread dust. Focus on seat edges where crumbs gather and the curved neck area where hair oils transfer. Flip the cloth every 30 seconds; a single dirty swipe can create 50+ micro-scratches. For static-prone chairs, lightly mist the cloth with anti-static spray before dusting.
Instant Fingerprint Fix
Dampen one corner of your microfiber cloth with distilled water only—no soap needed for fresh prints. Gently rub the smudge in tight circles (2-inch diameter) for 10 seconds, applying barely enough pressure to feel the surface. Immediately dry with a second cloth using straight strokes away from the print. This two-cloth method prevents water evaporation that leaves mineral halos. Pro tip: Keep a dedicated “ghost chair cloth” in your living room for instant touch-ups after guests sit down.
Monthly Deep Cleaning Process
This 20-minute ritual removes embedded grime before it bonds permanently. Skipping monthly sessions causes film buildup that requires alcohol treatments—accelerating material aging.
Prepare Your Solution
Mix 2 drops mild dish soap into 2 cups warm distilled water in a spray bottle. In hard water areas, substitute a 1:3 vinegar-water solution to neutralize minerals. Never spray directly on chairs—acrylic’s static charge pulls droplets unevenly, causing streaks. Instead, mist the solution onto your microfiber cloth until damp (not dripping). Test on the chair’s underside first; if cloudiness appears, switch to straight distilled water.
Systematic Washing Method
Start at the top: clean the backrest with vertical strokes from headrest to seat. Move to the seat surface using small circular motions, overlapping each pass by 50%. Finish with legs using downward strokes to avoid dripping dirty water onto clean areas. Work in 6×6 inch sections, rewetting your cloth as it dries. Crucially, dry each section immediately with your second cloth—letting water sit longer than 15 seconds invites mineral deposits. Most damage happens during drying, not washing.
Detail Hidden Spots
Wrap your microfiber cloth around the detail brush to clean where the seat meets the frame—a notorious grime hotspot. Use short back-and-forth motions in crevices, changing cloth sections every 3 strokes. Flip the chair to clean the underside rim (often coated in dust after just 2 weeks). For textured surfaces, gently vibrate the brush rather than scrubbing. Rinse the brush under running water every 2 minutes to prevent redepositing dirt.
Restore Severely Cloudy Chairs

When soap fails, deploy these targeted fixes. Cloudiness usually stems from product buildup or UV damage—not surface dirt—so standard cleaning makes it worse.
Remove Stubborn Film Buildup
Combine equal parts 70% isopropyl alcohol and distilled water in a spray bottle. Spray onto your cloth (not the chair), then rub the cloudy area with firm, straight strokes for 20 seconds. Immediately buff with a dry cloth using circular motions. The alcohol dissolves oily residues without stripping acrylic, while straight strokes prevent swirl marks. For stubborn patches, repeat once—but never more, as alcohol dries out the material.
Reverse Yellowing from Sun Damage
Place chairs in indirect light (never direct sun). Soak a cloth in 3% hydrogen peroxide, wring thoroughly, and lay it over yellowed areas for 2 hours. The peroxide breaks down chromophores causing discoloration. Rinse immediately with distilled water and dry. For vintage chairs, reduce exposure to 30 minutes—older acrylic yellows faster. If no improvement after two treatments, professional UV coating is your only option.
Treat Fine Scratches
Apply Novus #2 Scratch Remover to a clean cloth and rub the scratch with medium pressure in 2-inch circles for 45 seconds. Wipe away residue with a dry cloth, then buff with a third cloth for 20 seconds. The polish fills microscopic grooves through thermal action. For deep scratches (fingernail catches), stop immediately—further rubbing widens the damage. These require professional acrylic welding.
When Professional Help Makes Sense
Know your limits to avoid costly mistakes. DIY fixes work for surface issues, but structural problems need experts.
Recognize Serious Damage
Seek help for deep cracks (over 1/16 inch wide), structural joints separating, or severe yellowing unresponsive to peroxide. Vintage Lucite chairs with original coatings also demand specialist care—amateur cleaning strips irreplaceable finishes. If your chair flexes abnormally when lifted, stop all cleaning; this indicates material fatigue requiring professional reinforcement.
Cost vs. Replacement
Professional cleaning costs $35-50 per chair—worth it for designer pieces. But refinishing exceeds $150, making replacement smarter for budget chairs. Track your maintenance: if you need alcohol treatments more than twice yearly, UV damage is advancing rapidly. Pro tip: Photograph chairs quarterly; visible yellowing progression means it’s time for professional UV-resistant recoating.
Pro Tip: Store your ghost chair cleaning kit in a labeled bin under your sink—microfiber cloths, distilled water bottle, and Novus polish. Having supplies instantly available makes quick touch-ups effortless, preventing 80% of major cleaning disasters.
Your ghost chairs’ crystal clarity isn’t magic—it’s consistent care using chemistry-safe methods. Stick to daily dusting, monthly deep cleans with distilled water, and immediate fingerprint fixes, and you’ll rarely face cloudiness or scratches. Remember: every time you grab Windex instead of microfiber, you’re trading five minutes of convenience for permanent damage. Start today with one chair, and by sunset, you’ll be staring at a reflection so clear, you’ll forget it’s acrylic.


