
That cherished leather chair—once the centerpiece of your living room—now sits neglected, its surface marred by scratches, stains, and the telltale signs of years of use. Before you consider hauling it to the curb and spending hundreds on a replacement, know this: professional-quality leather chair restoration is within your reach. This comprehensive guide walks you through every step of restoring leather chairs to their former glory, from identifying your leather type to applying the final protective coat. With proper techniques, you can extend your furniture’s lifespan by 10-15 years while saving significant money compared to replacement costs.
Whether you’re dealing with a vintage family heirloom or simply want to breathe new life into a worn office chair, you’ll discover proven restoration methods that deliver professional results. Let’s transform that tired leather into furniture you’ll be proud to showcase again.
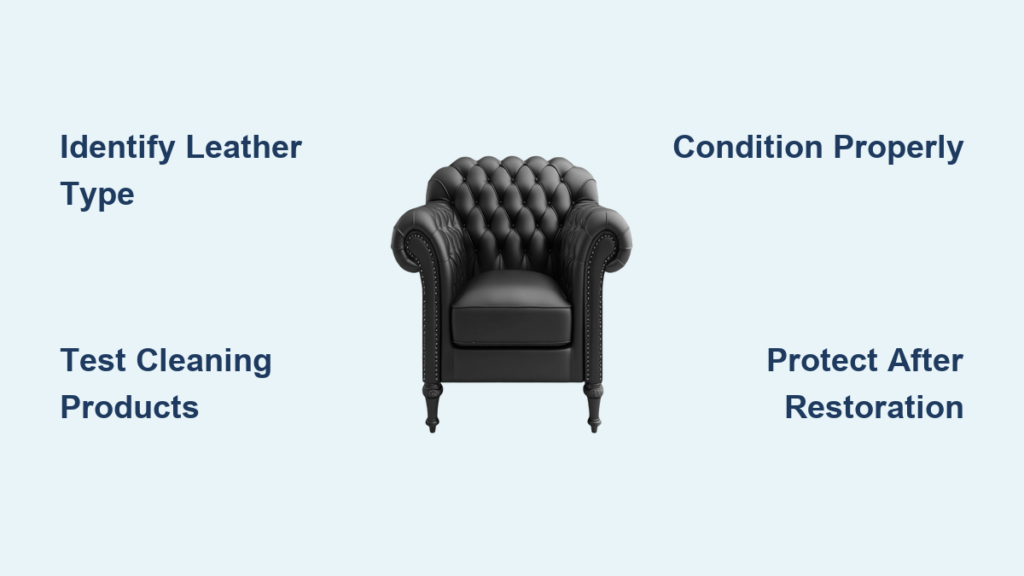
Identify Your Leather Type Before Starting Restoration
Quick Leather Recognition Tests You Can Do Today
Before touching any restoration products, determine your leather type using these simple tests. The water drop test reveals much: place a small water droplet on an inconspicuous area. Aniline leather absorbs water quickly, darkening within seconds. Semi-aniline shows slower absorption with slight darkening. Protected leather beads water on the surface without absorption.
The scratch test helps confirm your findings: gently scratch the leather with your fingernail. Aniline shows visible marks that gradually fade. Protected leather resists marking entirely. Nubuck and suede feel velvety and show distinct texture changes when rubbed. Never skip this step—applying the wrong products to your leather type can cause permanent damage during restoration.
Match Leather Type to Correct Restoration Approach
Aniline leather demands the gentlest approach—think pH-balanced cleaners and light conditioners. Semi-aniline tolerates moderate cleaning strength while requiring careful color matching. Protected leather accepts stronger cleaners and more aggressive repair techniques. Nubuck and suede require specialized brushes and dry-cleaning methods exclusively. Using the wrong products on your specific leather type is the #1 mistake DIY restorers make when restoring leather chairs.
Assess Chair Damage Like a Professional Restorer
Systematic Damage Evaluation Process
Start your restoration by documenting every imperfection. Surface dirt appears as uniform dulling across high-contact areas like armrests and headrests. Oil stains from skin contact create dark, shiny patches—particularly noticeable on lighter colors. Sun damage shows as fading, drying, and fine cracking on exposed surfaces.
Water damage manifests as dark rings or stiffness in affected areas. Scuff marks from shoes leave visible abrasions, often with transferred color. Tears and punctures require immediate marking with chalk to prevent expansion during cleaning. Take photos from multiple angles to track progress throughout the restoration process.
Critical Pre-Treatment Testing Protocol
Never skip this essential step when restoring leather chairs. Select a hidden area—beneath the seat or chair back works perfectly. Apply each planned product using cotton swabs in quarter-sized test spots. Wait 24 full hours before evaluating results. Document any color changes, texture alterations, or adverse reactions. Create a simple chart noting which products passed testing where. This testing prevents irreversible damage and saves you from costly mistakes later.
How to Deep Clean Leather Chairs Without Causing Damage
Initial Surface Preparation Steps
Begin restoration with thorough dry cleaning. Use soft-bristled brushes to lift surface debris, working in the direction of natural leather grain. Vacuum thoroughly using brush attachments, paying special attention to crevices and stitching lines where dirt accumulates. Never use stiff brushes—they can scratch delicate leather surfaces and worsen existing damage.
Effective Liquid Cleaning Without Residue
Mix pH-balanced leather cleaner according to manufacturer ratios—typically 1:10 cleaner to water. Work in small sections using microfiber cloths, applying cleaner in gentle circular motions. Rinse immediately with clean, damp cloths to prevent residue buildup. Dry thoroughly using absorbent towels, then air-dry away from direct heat sources. Never let cleaning solution dry on the surface—this creates visible residue that’s difficult to remove later.
Targeted Stain Removal Solutions
Ink stains require alcohol-based cleaners applied with cotton swabs using blotting motions—never rubbing. Oil stains respond to cornstarch application: sprinkle generously, let sit for 8 hours, then brush away. For protein stains like blood, use enzyme cleaners specifically formulated for leather, applied sparingly with cotton swabs. White leather requires extra caution—use gentle, non-bleaching cleaners to prevent yellowing.
Fix Scratches and Tears on Leather Chairs Like a Pro
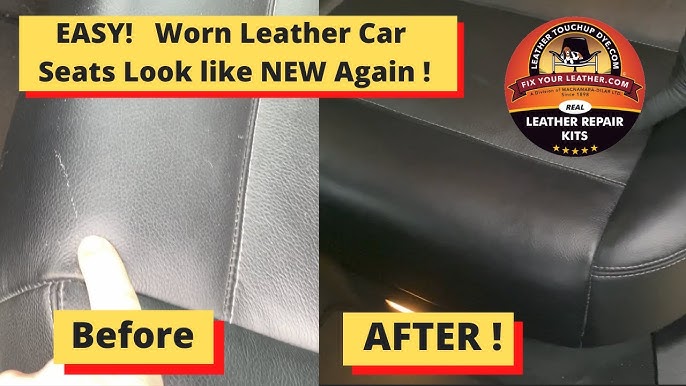
Minor Scratch Treatment That Actually Works
Light scratches often disappear with quality leather balm application. Work balm into scratches using circular motions, then buff gently. Deeper scratches require leather filler matched to your chair’s color. Apply thin layers using palette knives, allowing each layer to dry before adding the next. Sand lightly between applications using 600-grit sandpaper. For best results, build the filler slightly above the surface level, then sand down to perfectly match the surrounding area.
Tear Repair Techniques for Different Damage Levels
Assess tear severity before proceeding. Small tears under one inch respond to leather adhesive applied beneath the tear using syringes. Larger tears need sub-patches: cut leather or fabric slightly larger than damage, glue beneath using contact cement. Structural tears exceeding three inches require professional attention or complete reupholstery. For tears along seams, reinforce with leather patches applied to the underside before resewing.
Restore Suppleness: Conditioning Your Leather Chair Properly
Essential Conditioning Steps for Long-Lasting Results
Conditioning restores vital oils and maintains leather suppleness. Select conditioners based on your leather type: lighter formulations for aniline, heavier creams for protected leather. Apply using soft cloths in circular motions, ensuring complete coverage. Allow 30-60 minutes absorption before buffing excess with clean cloths. Over-conditioning creates sticky surfaces that attract dirt—apply sparingly and buff thoroughly.
Protective Coating Application That Prevents Future Damage
Apply protective treatments after complete restoration. Leather protectors create invisible barriers against future stains. UV protectants prevent sun damage and fading. Water repellents provide additional protection without affecting leather breathability. Reapply these coatings every 6-12 months depending on usage patterns. For high-traffic chairs, consider quarterly reapplication of protectants to maintain optimal defense against everyday wear.
Advanced Leather Chair Restoration Techniques
Professional-Grade Interventions for Serious Damage
For extensive restoration, consider these advanced techniques. Heat-activated repair compounds provide durable solutions for widespread cracking. Steam cleaning systems designed for leather remove deeply embedded contaminants. Leather re-graining tools restore original texture patterns on damaged areas. Color restoration requires building color gradually using alcohol-based dyes for penetration or water-based dyes for surface coating.
Structural Assessment You Should Never Skip
Don’t neglect the chair frame during restoration. Tighten all joints using appropriate screwdrivers or Allen keys. Address squeaks by applying leather-safe lubricants to metal components. Replace worn webbing or springs affecting seating comfort. Consider professional upholstery services for extensive frame repairs. A structurally sound frame is essential for your restored leather chair to maintain its value and comfort.
Troubleshooting Common Post-Restoration Problems
Fix These Issues Immediately After Restoration
Sticky surfaces indicate over-conditioning or incompatible products. Remove excess using leather degreasers and reapply sparingly. Color variations suggest inadequate surface preparation—correct through proper deglazing and consistent reapplication. Cracking after restoration indicates environmental factors—increase conditioning frequency and address humidity issues. Always test solutions on inconspicuous areas before full application.
Success Evaluation Methods That Guarantee Results
Assess restoration success through multiple criteria:
– Visual inspection: Color uniformity and surface texture
– Touch testing: Suppleness and surface feel
– Usage testing: Performance over several days
– Photo documentation: Before/after comparisons
Long-Term Maintenance Plan for Restored Chairs
Simple Habits That Extend Restoration Results
Establish these habits to minimize future restoration needs:
– Weekly: Dust with soft, dry cloths
– Monthly: Inspect for developing issues
– Quarterly: Apply leather conditioner
– Annually: Deep clean entire chair
Position leather chairs away from direct sunlight and heat sources. Maintain humidity levels between 40-60% using leather-friendly humidifiers when needed. Rotate chair positions periodically to ensure even wear patterns and sun exposure.
Your leather chair restoration journey begins now. With proper techniques, quality products, and patience, you’ll transform worn furniture into pieces that look—and feel—like new. Remember: start small, test everything, and build your skills gradually. That investment in time and materials will pay dividends every time you sink into your beautifully restored leather chair. Properly maintained, your restored leather chair will deliver comfort and style for another decade or more—proving that restoring leather chairs is one of the smartest home improvement investments you can make.


