
That familiar cracking sound followed by an unexpected drop to the ground—your favorite plastic lawn chair has finally given out during a backyard gathering. Before you add another flimsy chair to the landfill and spend $15 on a replacement, consider this: strategic repairs can often restore functionality and extend your chair’s life by multiple seasons. While plastic lawn chairs aren’t engineered for easy repair, understanding the right techniques for your specific damage type can save you money and reduce waste.
Most plastic patio chairs are molded as single, continuous units with few removable components, making repairs challenging but not impossible. The key is matching your repair method to the damage severity—cosmetic cracks require different solutions than structural breaks that compromise safety. With the right approach, you can transform that wobbly eyesore back into reliable seating that blends seamlessly with your outdoor setup.
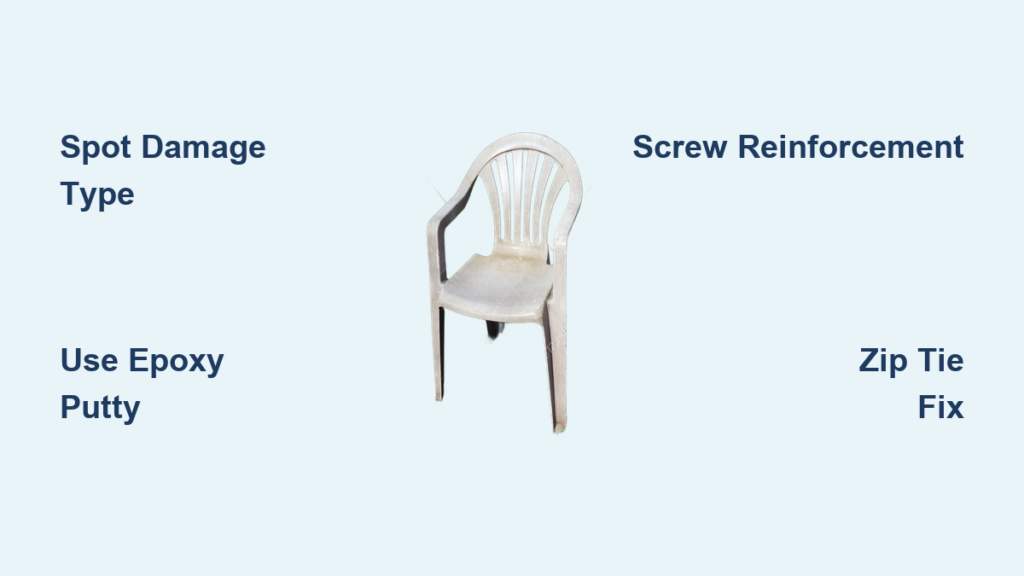
Spot Cosmetic vs Structural Damage Immediately
Recognize Surface-Level Cracks
Run your fingers along any damaged areas—shallow cracks that don’t affect stability are purely cosmetic issues. These hairline fractures typically appear in non-critical zones like the backrest center or seat edges and won’t spread under weight. Cosmetic damage mainly impacts appearance while maintaining full functionality.
Structural problems reveal themselves through these warning signs:
– Cracks running through leg joints or support brackets
– Complete breaks creating noticeable wobbling
– Visible deformation when applying body weight
– Splits extending through multiple plastic layers
Critical safety note: Never rely solely on adhesives for structural repairs. Plastic chairs can fail catastrophically under load, creating serious injury risks when adhesives bear weight they’re not designed to support.
Essential Tools for Plastic Chair Restoration

Gather these supplies based on your damage assessment:
For cosmetic fixes:
– Two-part epoxy putty (J.B. Weld or Oatey)
– Fine-grit sandpaper (220-grit)
– Plastic spray paint
– Painter’s tape
For structural repairs:
– Wood or sheet metal screws
– Drill with appropriate bits
– C-clamps or vise
– 1/2″ wooden dowels
– Nylon zip ties
Pro tip: Skip Crazy Glue and standard Gorilla Glue—they consistently fail within weeks on plastic chairs. The gel version of Gorilla Clear Glue offers slightly better results but still lacks long-term reliability for load-bearing repairs.
Epoxy Crack Repair: Step-by-Step Fix
Apply Two-Part Putty Correctly
Clean the damaged area thoroughly with soap and water, then dry completely. For cracks wider than 1/8″, epoxy putty delivers the strongest bond for both cosmetic and minor structural issues.
Follow these precise steps:
1. Mix epoxy components until uniform color appears (typically 1:1 ratio)
2. Work putty into crack from multiple angles, slightly overfilling
3. Clamp pieces together using C-clamps while epoxy sets
4. Maintain pressure for 4-6 hours until fully cured
5. Sand excess epoxy flush with surface using fine-grit paper
Expert note: Apply epoxy to the chair’s underside whenever possible—this creates invisible repairs that maintain appearance while providing structural reinforcement.
Screw-Based Bracket Repair for Broken Joints
Reinforce Critical Connection Points
When molded brackets crack at leg or back support junctions, screws create durable repairs that adhesives can’t match:
- Position broken bracket in original alignment
- Drill pilot holes through plastic bracket into support structure
- Use wood screws 1/4″ longer than bracket thickness
- Insert screws from accessible angles to avoid visible hardware
- Tighten until secure—stop immediately if plastic begins to crack
This technique also effectively tightens wobbly joints before they develop major cracks, preventing future breakage through proactive reinforcement.
Zip Tie Solutions for Long Splits
Create Invisible Support System
For splits running along seat or back surfaces where epoxy alone won’t suffice:
- Drill 3/8″ holes 2 inches from split edges
- Space holes every 6 inches along the damaged area
- Thread zip ties through opposing holes
- Tighten gradually until split closes completely
- Trim excess tie material flush with chair surface
Durability insight: Nylon zip ties typically last 1-2 seasons before UV exposure degrades them, but this provides excellent temporary reinforcement for chairs you plan to replace eventually.
Wooden Splint Reinforcement for Major Breaks

Add Hidden Structural Support
When facing significant breaks that compromise integrity:
- Cut wooden strip to span broken area plus 4 inches
- Position strip across chair back (never seating surface)
- Drill pilot holes through plastic into wood support
- Secure with screws every 2 inches along the splint
- Ensure screw tips don’t protrude through seating area
Color matching hack: Paint wooden splints the same color as your chair using plastic spray paint—this creates seamless reinforcement that preserves aesthetics while adding critical strength.
Plastic Welding for ABS Chair Repairs
Melt and Bond Permanent Fixes
Only attempt this method if your chair is ABS plastic (test with acetone—ABS softens when exposed):
- Clean repair area completely with isopropyl alcohol
- Heat soldering iron to 300-350°F
- Carefully drag iron along crack, melting plastic surfaces together
- Use metal scraper to smooth molten plastic for stronger bond
- Allow complete cooling before testing
Alternative method: For ABS chairs, pure acetone creates molecular-level bonds by dissolving plastic surfaces. Apply small amounts to crack edges, press together firmly, and allow 24-48 hours for complete evaporation before use.
Cosmetic Refinishing to Hide Repairs
Make Repairs Virtually Invisible
After epoxy cures on surface cracks:
- Sand repair area with 220-grit paper for smooth transition
- Clean dust thoroughly with damp cloth
- Apply plastic primer spray in light, even coats
- Spray paint matching original color (bring chair to store for perfect match)
- Allow 24 hours cure time before use
Spray technique: Hold can 8-10 inches from surface and use quick, sweeping motions to prevent drips and ensure even coverage.
When Replacement Outweighs Repair Costs
Economic Reality Check
Current market pricing puts repair decisions in perspective:
– Basic plastic chairs: $12-15 at hardware stores
– Premium folding models: $130+ at Costco
– Lifetime warranty chairs: $300+ investment
User wisdom: “You can buy one $300 chair once, or get $15 ones 20 times.” Factor in your time investment—premium chairs with 20-year residential warranties often justify repair attempts, while basic models rarely do.
Prevent Future Damage with Smart Habits
Extend Chair Lifespan Proactively
- Store chairs indoors during winter months
- Rotate seating positions to distribute wear
- Avoid leaving in direct sunlight when not in use
- Never exceed manufacturer’s weight ratings
- Inspect regularly for early crack development
Space-saving tip: Stack chairs vertically with padding between seats to prevent stress on legs and brackets during storage.
Final Repair Decision Guide
Repair when:
– Damage is purely cosmetic
– Chair is premium or expensive model
– Style is discontinued or sentimental
– You need temporary extension before replacement
Replace when:
– Structural damage affects safety
– Repair costs exceed 50% of replacement value
– Multiple failure points appear simultaneously
– Basic model costs less than $20
Your plastic lawn chair’s repair success depends entirely on matching the right technique to your specific damage type. While these chairs aren’t built to last forever, strategic fixes can buy you valuable time—and save you money—before replacement becomes necessary. For basic $15 chairs, replacement often makes the most sense, but for premium models or sentimental pieces, these repair techniques can extend enjoyment for seasons to come. Always prioritize safety over convenience—never use a chair with questionable structural integrity, as catastrophic failure can cause serious injury.


