
That jagged tear in your patio chair isn’t just ruining your backyard aesthetic—it’s actively inviting moisture and pests that accelerate decay. Before you condemn perfectly good furniture to the landfill, consider this: 90% of ripped patio chair repairs cost under $50 and take less than three hours with basic tools. Whether you’re facing a small puncture in a cushion or completely shredded sling fabric, this guide delivers field-tested techniques to restore your outdoor seating. You’ll discover exactly how to match materials for your specific chair type, avoid costly measurement errors, and implement professional-grade fixes that withstand sun, rain, and daily use. Let’s transform that eyesore into a conversation piece for your next cookout.
Most homeowners don’t realize ripped patio chairs often have structurally sound frames—the real savings come from replacing just the fabric components. By mastering these repair methods, you’ll extend your furniture’s lifespan by 5+ years while avoiding the $150-$300 replacement cost per chair. This isn’t about temporary patches; it’s about permanent solutions that look and function like new.
Identify Your Chair Type Before Repairing
Sling Chair Characteristics
Sling chairs feature a single continuous fabric panel stretched taut between two parallel frame rails. Look for fabric hemmed along both sides with rubber spline securing it into channels. These chairs typically disassemble by removing 4-6 screws underneath the side rails—exposing the fabric edges where tears commonly start near stress points. The frame usually shows visible channels designed to hold the spline in place.
Cushion Chair Features
Cushion chairs use padded foam inserts wrapped in outdoor fabric, often secured to metal or wooden frames with ties, Velcro, or hinges. Damage typically appears as punctures from sharp objects or burns from cigarettes. Inspect for loose stitching along seams where rips propagate fastest. Note whether cushions lift off completely or hinge at one edge—this determines your repair approach.
Strap Chair Identification
Strap chairs utilize individual vinyl or fabric strips (1-3 inches wide) woven through frame slots. Each strap attaches with rivets or screws at both ends. Single-wrap straps show visible attachment points, while double-wrap straps hide fasteners within folded fabric layers. Check for frayed edges or broken rivets—these indicate where tension failures begin.
Measure Correctly to Avoid Costly Mistakes

Sling Chair Measurements
Never remove the old sling before measuring—it provides critical tension references. Measure rail-to-rail width at three points: 2 inches below the top edge, dead center, and 2 inches above the bottom. If measurements vary more than ½ inch, record each position separately. For length, measure from the fabric’s top edge on one rail to its bottom edge on the opposite rail, then add ⅛ inch for proper channel seating. This tiny addition prevents frustrating gaps during installation.
Strap Chair Measurements
Determine your strap configuration first: single-wrap straps have exposed ends; double-wrap straps form continuous loops. For single-wrap, measure from the edge of one attachment hole around the frame to the opposite hole’s edge. Double-wrap straps require measuring the complete loop twice around the frame. Crucially, reduce final measurements by 10%—a 25-inch strap becomes 22.5 inches—to ensure proper tension when installed.
Cushion Measurements
Remove cushions completely before measuring. Record width and length from hinge point to hinge point, not outer fabric edges. Note thickness and any special contours like rounded corners. These dimensions dictate whether you can patch or must replace the entire cushion insert.
Choose Replacement Materials That Last

Best Fabric Options for Sling Chairs
Phifertex II offers commercial-grade durability with UV and mildew resistance at mid-range pricing. Sunbrella provides premium color retention backed by a 10-year warranty—ideal for high-sun areas. Budget hunters should check JoAnn Fabrics’ closeout sections for outdoor remnants at 50-70% off. Marine canvas from Sail Rite delivers extreme weather performance but costs 30% more than standard options. Always verify thread compatibility—UV-rated polyester prevents seam failure.
Strap Material Selection
Pre-cut straps with pre-attached rivets cost $3-5 each and eliminate measurement errors—perfect for beginners. Strap rolls ($1-2 per strap) become economical when replacing 10+ straps. Vinyl offers classic styling and easy cleaning; textiline provides superior breathability for hot climates. Both require identical installation techniques once cut to size.
Cushion Repair Fabrics
For minor damage, match existing fabric with outdoor upholstery remnants from FabricGuru.com ($8/yard). Marine-grade vinyl withstands heavy use but shows scratches easily. Traditional canvas duck offers good value with moderate fade resistance—best for partially shaded areas.
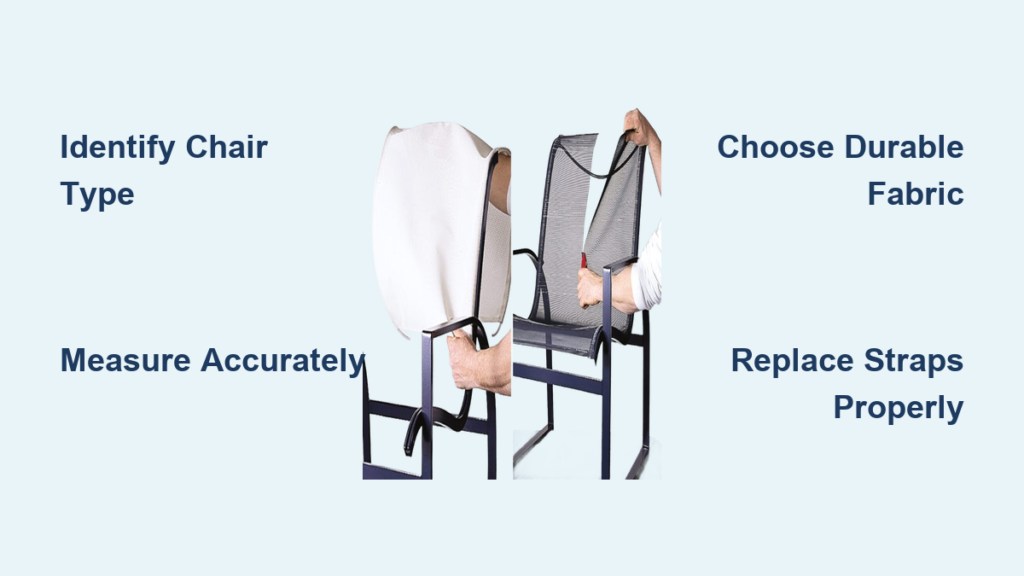
Fix Sling Chair Fabric Like a Pro
Remove Old Fabric Safely
Flip the chair upside down and locate the 4-6 hex-head screws securing side rails. Remove all screws completely before sliding rails away from the frame. The old fabric will pull out with the rubber spline still embedded. Photograph the disassembly sequence—this prevents orientation errors during reassembly.
Create Accurate Template
Lay the removed fabric flat and trace its outline onto cardboard. Mark hem lines and note where the rubber spline sat in the channel. This template ensures your new fabric replicates the exact tension points of the original design—critical for preventing future rips.
Sew New Sling Fabric
Hem both sides using UV-rated thread and a 1-inch fold, leaving top and bottom edges open for spline insertion. Test-fit the new rubber spline in the channel before sewing—too tight causes fabric bunching; too loose allows slippage. Use a spreader bar (under $10 at Harbor Freight) to maintain even tension while sewing.
Install New Sling
Coat the rubber spline with Vaseline to ease insertion through fabric channels. Work slowly around curved frame sections, alternating sides to prevent wrinkles. Once seated, reattach side rails with original screws. Press firmly along the entire fabric edge to verify secure channel seating before final tightening.
Repair Cushion Damage Permanently

Fix Minor Burns and Punctures
For holes under 2 inches, cut a fabric patch 1 inch larger than the damage on all sides. Use a half-circle upholstery needle to sew the patch invisibly over the tear, catching underlying foam with each stitch. For burns penetrating foam, inject outdoor foam filler before patching to prevent future sagging.
Replace Entire Cushions
When rips exceed 3 inches or compromise structural integrity, replace the entire cushion. Measure thickness precisely—standard ranges from 2-6 inches—and order custom replacements from outdoor furniture specialists. Avoid generic cushions; precise thickness ensures proper seating ergonomics and prevents fabric stress points.
Replace Strap Chair Straps Efficiently
Prepare Straps for Installation
Boil water in a large pot and soak vinyl straps for 3-4 minutes. Use heat-resistant gloves and tongs to handle the hot material—this pliability allows proper tensioning. Never skip this step; cold straps won’t stretch sufficiently and will sag prematurely.
Install Each Strap
Working quickly before straps cool, stretch each across the frame and align pre-punched holes with attachment points. Insert rivets while the material is hot—the cooling contraction creates perfect tension. Test by pressing down; straps should deflect only ½-¾ inch under moderate pressure. Reheat and adjust any that feel loose.
Restore Metal Frames for Longevity
Clean and Prep Aluminum Surfaces
Sand scratches with 220-grit paper following the metal grain direction. Clean with mild soap, dry thoroughly, then apply aluminum-specific touch-up paint in thin coats. Multiple light layers prevent runs and better match original finishes than single thick coats.
Treat Rust on Steel Components
Sand rusted areas to bare metal, then apply rust converter to stabilize corrosion. Once dry (typically 24 hours), paint with exterior-grade metal paint matching your chair’s color. For severe rust, replace affected components—treated steel won’t regain original strength.
Maintain Repaired Chairs Proactively
Establish Cleaning Routine
Clean monthly with mild dish soap and water, rinsing thoroughly to prevent soap residue buildup. Use vinyl-specific cleaners with UV protection for straps and slings. Never use pressure washers—they can dislodge new fabric or damage fresh seams. For stubborn mildew, mix 1 cup vinegar with 1 gallon water.
Proper Storage Practices
Store chairs upright in dry, covered areas during winter. Use breathable cotton covers—not plastic tarps—to prevent moisture trapping. Elevate legs slightly off concrete to avoid water pooling. For steel frames, place silica gel packets inside storage covers to absorb humidity.
Budget Your Repair Project Smartly
Material Cost Breakdown
Sling fabric replacement costs $15-50 per chair (discount remnants vs. Sunbrella). Strap replacement runs $10-30 per chair using pre-cut options. Cushion repairs range from $5 for patches to $75 for custom replacements. Essential tools (spreader bar, heat gloves) represent a one-time $40 investment covering multiple projects.
Schedule Repairs Strategically
Complete repairs in early spring before heavy use. Shop end-of-season sales (September-October) for 40-60% fabric discounts. If outsourcing, schedule in fall/winter when pros offer 25-30% off-season rates. Winter provides ideal time for complex projects without summer deadline pressure.
Final Note: Your repaired patio chairs will deliver years of reliable service when using these proven techniques. Start with one chair to perfect your method, then restore your entire set. Remember: consistent maintenance prevents future rips—clean monthly and store properly during off-seasons. With under $50 and a few hours’ effort, you’ve saved quality furniture from landfills while creating backyard seating you’ll proudly show off all season long.


