
That wobble in your favorite lounge chair? The vinyl straps that crack when you sit down? Or maybe your mesh sling has turned into a hammock after one too many summers. Don’t replace it yet—most outdoor patio chair problems can be fixed in under two hours for less than $20. This hands-on guide reveals exactly how to repair outdoor patio chairs with aluminum frames, sagging slings, brittle straps, and worn cushions. You’ll learn professional techniques for measuring replacement parts, executing precise repairs, and preventing future damage—all using basic tools you likely own. By the end, you’ll transform weathered furniture into patio-ready pieces that look and function like new.
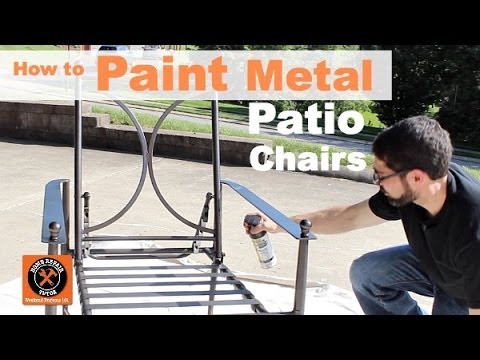
Fix Aluminum Frame Damage
Touch-Up Scratches Fast
Surface scratches compromise your chair’s weather resistance and aesthetics. Start by sanding the affected area with 320–400-grit sandpaper until edges feather smoothly into the surrounding metal—this prevents paint from pooling. Wash thoroughly with mild dish soap to remove dust and oils, then dry completely. Apply two thin coats of exterior-grade aluminum paint using a small brush, waiting 30 minutes between coats. Critical tip: Never apply thick paint layers that trap moisture against the metal. Most touch-ups dry to the touch in under an hour, letting you return chairs to your patio the same day.
Eliminate Rust on Hardware
While aluminum frames resist corrosion, steel bolts and screws won’t. Remove rusty hardware using pliers or a wrench, then scrub aggressively with a wire brush or 120-grit sandpaper until bare metal shows. Immediately apply rust converter according to product instructions—it chemically transforms rust into a stable, paintable surface. Once cured, seal with matching exterior metal paint. Pro move: Replace all steel hardware with stainless steel equivalents ($1–3 per piece) during reassembly. This prevents recurring rust and saves you from repeating this repair every season.
Full Frame Repaint Guide
- Disassemble: Remove all slings, straps, and cushions.
- Sand thoroughly: Use 150–220-grit paper across the entire frame to create “tooth” for primer adhesion.
- Degrease: Wash with TSP cleaner, rinse well, and air-dry 24 hours.
- Prime: Spray aluminum-bonding primer in thin, even coats—hold can 12 inches from surface.
- Paint: Apply 2–3 light coats of exterior enamel, waiting 15 minutes between coats.
- Cure: Allow 48 hours before reassembly for maximum durability.
Avoid this mistake: Skipping the degreasing step causes premature paint peeling. Hang small parts from wires during painting for drip-free coverage on all angles.
Replace Mesh Slings Correctly
Measure While Old Sling Is Still On
Accurate measurements prevent costly ordering errors. With the old sling still mounted, measure rail width center-to-center at three points: 2 inches from the top, middle, and bottom. Average these measurements—but if any differs by more than ½ inch, order the largest dimension. For length, measure along the rail face from top to bottom edge, adding ⅛ inch for installation wiggle room. Don’t skip: Note rod diameter using a drill-bit gauge—standard sizes are 7/32″ or ¼”. Most suppliers require all three measurements for proper fit.
Remove Old Sling in Minutes
Flip the chair upside-down on a protected work surface. Gently pry off end caps using a flathead screwdriver wrapped in tape to avoid scratching. Remove spreader bars or bolts compressing the frame rails. Slide the old sling and its nylon rods straight out of the tracks—never force it, as bent rails complicate reassembly. Keep reusable rods if undamaged; new slings often include rods, but matching originals ensures consistent tension.
Install New Sling Like a Pro
Insert new nylon rods into the sling’s hemmed channels. Slide one rod into its rail track, then carefully flex the opposite rail outward to snap the second rod into place. Reinstall spreader bars to restore proper frame width before tapping end caps back on. Test tension: A properly installed sling should produce a drum-like sound when tapped. If it sags, remove and reposition the rods slightly tighter—this takes practice but becomes intuitive after your first repair.
Renew Vinyl Straps at Home
Pre-Cut vs. Roll: Choose Wisely
- Pre-cut straps: Ideal for beginners or replacing 1–5 straps. Costs $1–4 per strap but requires no cutting or hole-punching.
- Strap roll: More economical for full chairs ($0.60–$1/ft). Demands precise measuring, cutting, and punching 1/8-inch holes ½ inch from ends.
Time-saver: For first-timers, pre-cut straps reduce frustration. Seasoned DIYers save 30% using rolls for multiple chairs.
Measure for Perfect Tension
Identify your chair’s wrap style first:
– Single wrap: Ends visible; measure hole-to-hole path once.
– Double wrap: Hidden under second layer; measure path twice.
Calculate strap length by recording the path measurement, then subtracting 10% (e.g., 25″ path = 22.5″ strap). Critical: Skipping the 10% reduction causes loose, sagging straps after installation.
Heat-and-Stretch Installation

- Boil water in a large pot outdoors (away from kids/pets).
- Submerge straps 3–4 minutes until pliable.
- Using heat-resistant gloves and tongs, remove one strap and shake off excess water.
- Stretch across the frame while hot, inserting rivets into holes before it cools.
- Work quickly—straps stiffen within 30 seconds.
Safety note: Always wear eye protection during this step. Cooling vinyl contracts to perfect tension as it dries.
Repair Cushion Damage

Decide: Patch or Replace
Small burns or punctures with intact foam? Patch it. Cut a Sunbrella fabric swatch 1–2 inches larger than the damage. Using a curved upholstery needle and UV-resistant thread, hand-stitch the patch over the flaw in a tight whipstitch pattern. For foam damage, insert a replacement foam plug before patching the cover. Save money: Patching costs under $5 versus $25+ for new cushions—ideal for minor seasonal wear.
Order New Cushions Smart
Measure width, length, and thickness seam-to-seam—not including decorative borders. Note hinge style (e.g., button tufting, knife-edge). Send your old cushion to custom shops as a template for flawless fit. Pro tip: Order Sunbrella fabric cushions—they resist fading 3x longer than standard polyester. Budget $25–$150 per set based on thickness and fabric grade.
Master Routine Maintenance
Quick Clean Schedule
- Frames: Monthly scrub with soft brush, mild soap, and water. Rinse thoroughly.
- Vinyl straps: Quarterly cleaning with vinyl-specific UV-protectant cleaner.
- Cushions: Spot-clean stains immediately; deep clean before storage.
Never use: Abrasive pads or bleach—they accelerate material breakdown.
Seasonal Storage Rules
Store chairs indoors during winter if possible. For outdoor storage, use breathable canvas covers (never plastic) and elevate legs 2–4 inches off wet surfaces with wood blocks. Stack chairs vertically to save space, but avoid placing straps or slings under heavy weight. Key insight: Moisture trapped under non-breathable covers causes 80% of off-season damage.
Spring Hardware Check
Before summer entertaining, inspect every bolt and rivet. Tighten loose fasteners with a 1/4-turn—overtightening strips threads. Replace stripped hardware with identical stainless steel parts. Apply removable thread-locker on frequently loosening bolts to withstand wind vibration. Prevent wobble: This 10-minute check extends chair life by years.
Troubleshoot Common Issues
| Symptom | Quick Fix |
|---|---|
| Wobbly legs | Tighten bolts; straighten minor bends with padded vise jaws |
| Sagging sling | Replace fabric—stretching won’t restore tension |
| Popping straps | Re-heat and reinstall with correct 10% length reduction |
| White oxidation | Clean with 50/50 vinegar-water; buff with automotive wax |
When to Call Pros
For cracked welds, severely bent tubing, or factory-match powder coating, seek professional help. Search “outdoor furniture repair near me” and verify the shop specializes in aluminum restoration and sling replacement. Request before/after photos of similar projects—reputable shops like Brown Jordan-certified technicians charge $75–$150/hour but deliver factory-quality results you can’t achieve DIY. Red flag: Avoid shops that pressure you into full replacements—most structural issues are repairable.
Your repaired patio chairs will withstand seasons of use while saving you hundreds versus new furniture. Start with the simplest fix this weekend—like touching up scratches or tightening bolts—and you’ll gain confidence for bigger projects. Consistent maintenance prevents 90% of major failures, so add these quick checks to your seasonal routine. Soon, you’ll be relaxing on like-new chairs, proud you rescued them from the landfill. Grab your work gloves and reclaim your outdoor oasis today.


