
Your favorite leather chair shouldn’t bear the scars of daily life—whether from playful pets, accidental key scrapes, or everyday wear. Those unsightly marks don’t have to be permanent eyesores on your investment piece. The good news? Most leather chair scratches can be fixed with the right approach, whether you’re dealing with barely-there surface lines or deeper gouges that catch your fingernail. This guide reveals exactly how to fix scratches on leather chairs using proven methods that match your specific damage level and leather type.
From quick household fixes using items already in your bathroom cabinet to professional-grade repairs for severe damage, you’ll discover the most effective techniques without wasting time on methods that don’t work. By the end, you’ll transform those imperfections into barely noticeable memories while implementing prevention strategies that keep your leather looking flawless for years.
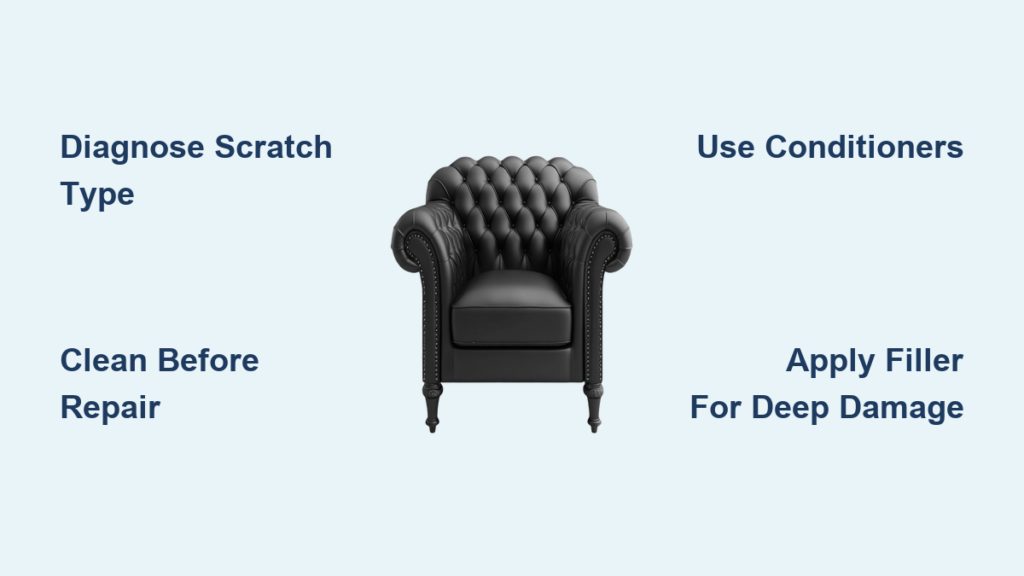
Diagnose Your Scratch Severity Before Repairing
Spot Light vs. Medium vs. Deep Damage
Before grabbing any repair product, correctly identify your scratch type—this determines your entire repair approach. Light surface scratches appear as faint lines visible mainly when light hits at an angle; they feel completely smooth when you run your finger across them. Medium scratches show visible color differences without special lighting and create slight indentations you can feel. Deep scratches or gouges feature rough edges, obvious tears, or actual missing leather that creates significant depressions where your fingernail catches.
Critical Test Area Protocol
Never skip this step: Test all treatments on a hidden area first—try underneath the cushion or along the back of your chair. Leather responds uniquely based on tanning processes, dye lots, and protective finishes. A treatment that works perfectly on one chair might discolor another. This 5-minute test saves hours of regret later when you accidentally create more visible damage.
Prepare the Damaged Area Properly
Essential Cleaning Before Any Repair
Start by removing all debris with a soft brush or vacuum’s upholstery attachment—loose particles will interfere with repair products. Next, clean the area with a barely damp cloth using pH-neutral leather cleaner or mild soap solution. Crucial detail: Never soak the leather—excess moisture breaks down protective sealants. Allow the area to air dry completely (minimum 2 hours) before assessment. Never use heat sources like hairdryers, which can cause additional cracking.
Accurate Color Matching Techniques
Once clean and dry, assess the exact leather color under natural light. For medium to deep scratches requiring color correction, match products to your chair’s specific shade. Hold potential matches against the leather in different lighting conditions—what looks perfect in your kitchen might appear wrong in living room lighting. When in doubt, purchase multiple shades and test them on your hidden test area.
Repair Light Surface Scratches With Household Items
Olive Oil Revival Method
For faint scratches barely visible to the eye, reach for plant-based oils already in your kitchen. Dab a minimal amount of olive or coconut oil on a soft microfiber cloth and rub into the scratch following the leather’s natural grain direction. Continue massaging until the oil fully absorbs (about 2 minutes), then vigorously buff with a clean, dry cloth. This technique moisturizes dried leather while helping scratches blend naturally into the surrounding surface—most visible results appear within 24 hours.
Professional Conditioner Application
High-quality leather conditioners like Chamberlain’s Leather Milk provide superior results for light damage. Apply a pea-sized amount to a soft cloth, working it into the scratch using small circular motions. Allow 10-15 minutes for complete absorption before buffing with a clean cloth. This dual-action method repairs existing scratches while preventing future damage through improved moisture retention—ideal for monthly maintenance.
Fix Medium Scratches With Targeted Techniques

Vinegar and Shoe Polish Restoration
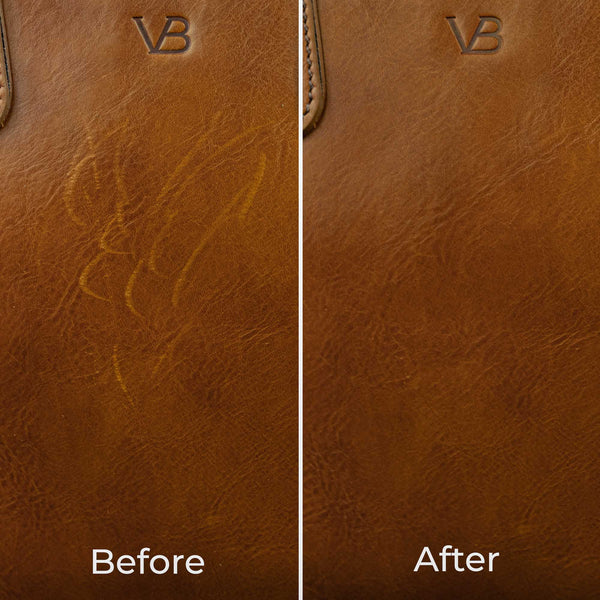
For scratches revealing lighter leather underneath, combine distilled white vinegar with colorless shoe polish. First, clean the area and let dry completely. Apply vinegar with a clean cloth, then wait 30+ minutes for complete drying. Next, apply a thin layer of shoe polish, carefully blending the edges into surrounding leather using a soft toothbrush. For stubborn areas, add a single drop of olive oil to the polish before application—this creates a smoother finish that better matches original texture.
Precise Color Matching Solutions
When scratches show significant color differences, try these professional color-correction methods:
– Colored pencils: Match chair color exactly, then gently shade the scratch
– Fabric markers: Ideal for light-colored leather touch-ups
– Traditional cake shoe polish: Provides the most authentic color match for brown leathers
– Leather dye pens: Allow the most accurate color correction for deeper medium scratches
Pro tip: Always treat a slightly larger area than just the scratch for seamless blending—this creates a gradual transition rather than an obvious repair spot.
Restore Deep Scratches and Gouges Professionally
Leather Repair Kit Step-by-Step Process
For obvious tears or missing leather sections, a comprehensive leather repair kit delivers professional results. Thoroughly clean the damaged area, removing all debris. Use the included spatula to apply leather filler, carefully smoothing it level with the surface. Allow 2-24 hours drying time based on product specifications (check manufacturer instructions). Apply color-matched dye in thin layers, waiting 15-30 minutes between coats—multiple light applications create better color matching than single heavy coats. Finish with leather sealant for long-lasting protection against future damage.
When DIY Becomes Impossible
Stop immediately if your scratch exceeds 1/8 inch depth or shows structural leather damage. Attempting DIY repairs on severe damage often spreads the tear or creates discoloration that’s harder to fix later. Professional consultation becomes essential for antique pieces, high-value furniture, or when multiple scratches create pattern wear across large areas.
Prevent Future Scratches Proactively
Daily Protection Routine That Works
Implement these simple habits to protect your leather chairs:
– Weekly dusting: Removes abrasive particles that create micro-scratches
– Monthly conditioning: Maintains proper moisture levels preventing brittleness
– Strategic positioning: Keep chairs at least 3 feet from direct sunlight and heat sources
– Pet management: Regular nail trimming reduces accidental scratching by 90%
Environmental Controls Matter Most
Maintain 30-50% relative humidity in rooms with leather furniture—too dry causes cracking, while excessive moisture breaks down protective finishes. Use blinds or curtains during peak UV hours (10am-4pm) to prevent sun damage that weakens leather’s surface. During winter months, place leather chairs away from heating vents that create rapid drying cycles.
Troubleshoot Common Repair Mistakes
Fixing Color Mismatch Disasters
When touch-up colors don’t blend perfectly, extend treatment into a larger area for a gradual transition. If you’ve created a dark spot from over-application, absorb excess product with cornstarch—let it sit for 2 hours, then brush off completely. Prevention is better: always test color matching on hidden areas first and apply products sparingly.
When Scratches Persist After Treatment
If scratches remain visible after 2-3 repair attempts, reassess whether you’re treating actual leather damage versus finish damage. True leather damage requires filler compounds, while finish damage often responds to conditioning alone. When in doubt, consult a professional—most reputable leather repair specialists offer free initial assessments.
Final Note: Knowing how to fix scratches on leather chairs transforms frustrating damage into simple maintenance tasks. Start with the least invasive method matching your scratch severity, and remember—patience during the repair process yields dramatically better results than rushing through steps. By implementing the prevention strategies outlined here, you’ll protect your leather investment while keeping it looking flawless for years. For deep damage exceeding 1/8 inch or structural issues, professional help remains the smartest choice to preserve your furniture’s value and appearance.


