
Stained, frayed, or outdated dining chair seats instantly drag down your entire dining space. But replacing the whole set costs hundreds—when reupholstering dining room chairs yourself takes just one weekend and costs under $30 per seat. You’ll breathe new life into solid hardwood frames, reduce landfill waste, and create custom seating that perfectly matches your style. Whether you inherited grandmother’s heirloom chairs or just hate your current fabric, this beginner-friendly project delivers professional results with basic tools.
Most dining chairs feature detachable seats held by 4-6 screws—making them the perfect starting point for first-time upholsterers. Skip the intimidating fully upholstered chairs with backs and arms; focus on seat-only reupholstery to master core techniques. By Sunday evening, you’ll have stunning chairs that look custom-made for your space.
Why Dining Chair Fabric Fails in Sunlight (And How to Prevent It)
South-facing dining rooms expose seats to relentless UV damage, especially with dark-colored fabrics. Sunlight bleaches dyes unevenly within months, leaving obvious fade lines where chair legs cast shadows. Solution-dyed acrylics like Sunbrella resist fading 5x longer than standard fabrics because color permeates every fiber—not just the surface.
Fix sun damage before it ruins your project:
– Choose lighter neutrals or muted tones that hide gradual fading
– Install UV-blocking window film on large dining room windows
– Rotate chairs every 3-4 months to distribute sun exposure evenly
– Pro Tip: Test fabric fade resistance by placing a swatch under a glass book for 30 days—compare to uncovered section
Calculate Exact Fabric Yardage (No Guesswork)
Miscalculated fabric wastes money and ruins pattern alignment. Follow this precise method for flawless results:
- Remove seat cushion and measure length/width in inches (round up to nearest inch)
- Add 4″ to both dimensions for stapling clearance
- Multiply adjusted measurements (e.g., 18″x16″ seat → 22″x20″ = 440 sq in)
- Convert to yards based on fabric width:
– 45″ wide fabric: Divide total sq in by 63 (440 ÷ 63 = 7 yards)
– 60″ wide fabric: Divide by 45 (440 ÷ 45 = 9.8 yards) - Add 20% buffer for pattern matching errors
Critical mistake to avoid: Forgetting to account for pattern repeats. Large florals or geometrics may require extra yardage—always buy swatches first to test repeat alignment across multiple seats.
Install High-Density Foam Without Shifting

Flattened foam creates uncomfortable, lumpy seats that defeat your reupholstery effort. Replace degraded padding with 2-3″ high-density foam cut precisely to your seat base:
- Trace old foam onto new sheet using permanent marker
- Cut with electric carving knife (or serrated bread knife) for clean edges
- Lightly mist plywood base with spray adhesive—wait 60 seconds
- Press foam firmly into place, starting from center outward
Why 45° beveled edges matter: Sanding or trimming foam tops at a 45-degree angle creates a softer seat profile that won’t cut through fabric at corners. Skip this step, and you’ll see permanent creases forming within weeks.
Master Corner Pleats in 3 Simple Steps
Bunched fabric at corners ruins an otherwise professional finish. This technique creates crisp, symmetrical folds every time:
- Pull corner fabric center toward seat middle and staple
- Fold left flap toward center and staple securely
- Fold right flap over left flap to form hidden pleat and staple
Troubleshooting tip: If fabric wrinkles after stapling, remove last 3 staples and re-pull with needle-nose pliers. Maintain consistent tension—too loose causes sagging; too tight stretches fabric fibers. Always check pleats from seat front before final stapling.
Stop Fabric Wrinkles Before Stapling
Wrinkles hide until you flip the chair upright—then ruin your project. Prevent this with the “two-finger tautness test”:
- After stapling center points (front/back/left/right), press fabric flat with palm
- Slide two fingers under fabric near staple line—if it lifts easily, fabric’s too loose
- Re-pull until fabric feels drum-tight but doesn’t distort pattern
Pro shortcut: Staple within 2″ of corners first, leaving excess fabric. Complete all corner pleats before trimming excess—this gives you wiggle room for adjustments.
Essential Tools Under $100 (Skip the Fancy Gear)
You don’t need industrial equipment for seat-only projects. Invest in these non-negotiable tools:
- Manual staple gun ($25): Perfect for 1-4 chairs (use ½” upholstery staples)
- Tack puller ($12): Removes old staples without gouging wood
- Electric carving knife ($30): Cuts foam cleaner than utility knives
- Upholstery scissors ($15): Handles thick fabrics without fraying
Skip these “professional” tools: Pneumatic staplers (overkill for seats), industrial sewing machines (not needed for simple covers), or foam rasps (bevel edges with sandpaper instead).
Fix Squeaky Chairs During Reupholstery
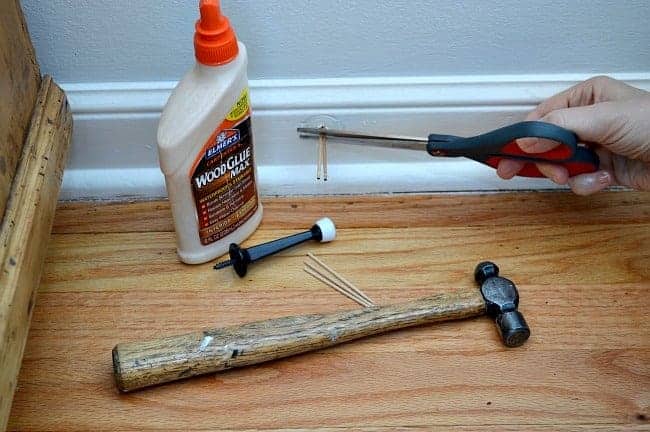
That annoying creak isn’t just loose fabric—it’s often seat screws working against rails. Eliminate noise permanently:
- Before reattaching seat, tighten all frame screws with flathead screwdriver
- Apply wood glue to stripped screw holes, insert toothpicks, then redrill
- Hand-start new screws to avoid cross-threading
- Confirm seat sits perfectly flush against rails before final tightening
Warning: Forcing misaligned seats creates stress cracks in wood frames. If seats wobble after tightening, sand contact points with 120-grit paper.
When to Skip DIY and Hire a Pro
Reupholster dining room chairs yourself unless you face these red flags:
- Tufted seats requiring precise button placement
- Welted edges demanding perfect seam alignment
- 6+ chairs needing identical pattern matching
- Vintage frames with fragile webbing
Smart compromise: Remove old fabric and foam yourself (saves 60% of labor cost), then hire a pro for final fabric installation. You’ll pay $80-$150 per chair instead of $250+.
Extend Fabric Life With Daily Maintenance
New upholstery won’t last without proper care. Implement these habits immediately:
- Blot spills within 60 seconds using microfiber cloth (never rub!)
- Apply Scotchgard after first week—renew annually in high-traffic homes
- Ban bare legs from velvet or silk seats (oils accelerate wear)
- Vacuum weekly with upholstery brush attachment to prevent grit abrasion
Critical oversight: Ignoring hardware checks. Wood expands/contracts seasonally—tighten seat screws every 6 months to prevent wobbling.
Real Cost Breakdown Per Chair

| Item | DIY Cost | Professional Cost |
|---|---|---|
| Fabric (½ yard) | $12-$25 | $40-$80 |
| Foam (2″ high-density) | $8 | $25 |
| Batting & Staples | $3 | $15 |
| Labor | $0 | $200-$500 |
| Total | $23-$36 | $280-$620 |
Reupholstering dining room chairs pays for itself after 2-3 years compared to replacements. Solid hardwood frames from the 1950s-80s often outlast modern particleboard sets—making this project both budget-smart and eco-conscious.
Transform your dining space this weekend with custom seats that reflect your style. With precise foam installation, crisp corner pleats, and fade-resistant fabric, you’ll create heirloom-quality pieces that outlast store-bought sets. The next time coffee spills or kids scuff your chairs, you’ll know exactly how to refresh them—no professional help required. Grab those staple guns and reclaim your dining room!


