
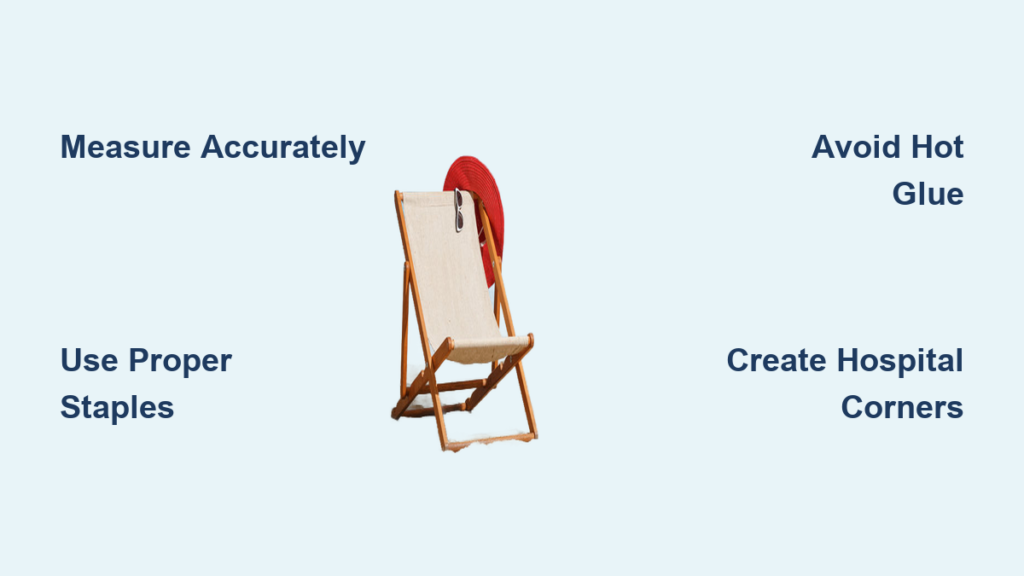
That moment when you spot your weather-beaten deck chairs while prepping for a barbecue—it stings. Sun-bleached fabric, frayed edges, and stubborn stains make your patio feel tired. But before you cart those solid-frame chairs to the curb or drop $400 on replacements, consider this: You can revive them yourself using professional-grade outdoor fabric for under $50. This guide delivers the exact process for reupholstering deck chairs—no sewing machine required for most models—and transforms eyesores into conversation starters by Sunday afternoon.
Forget intimidating tutorials. With the right techniques, even beginners achieve crisp hospital corners and taut fabric that withstands wind, rain, and UV rays. You’ll learn to calculate fabric precisely, avoid the hot glue gun trap professionals warn about, and spot the staple placement mistake that ruins 80% of DIY attempts. Let’s turn your patio frustration into pride.
Why Skip Professional Deck Chair Reupholstery
Paying $200-$400 per chair for reupholstery hurts when the frame’s still sound. That’s 2-4 times the cost of new department store chairs! Professionals charge premium rates for fabric sourcing and labor—but you control both. When you reupholster deck chairs yourself, you select from hundreds of designer outdoor fabrics in colors matching your personality, not a manufacturer’s outdated palette. Plus, the satisfaction of hearing “Did you really do that yourself?” after guests sink into your revitalized seating? That’s the real ROI.
Measure Deck Chair Pads for Perfect Fabric Fit
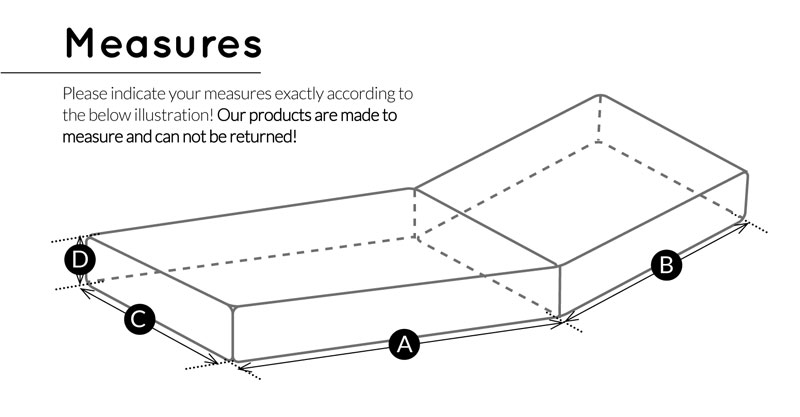
Calculate Yardage Without Guesswork
Grab your tape measure before buying fabric—this step prevents costly mistakes. For standard sling-style deck chair pads:
– Length: Measure front-to-back edge (e.g., 18 inches)
– Width: Measure side-to-side (e.g., 16 inches)
– Add 3 inches to all sides for stapling clearance (18″ → 24″, 16″ → 22″)
Pro Tip: Always buy 1 extra yard. Outdoor fabric frays easily during cutting, and leftovers make matching throw pillows. For striped or floral patterns, add 20% more fabric to align repeats—measure the pattern’s vertical repeat (e.g., 12-inch floral motif) and add that to your total length.
Deck Chair Reupholstery Toolkit: Skip the Hot Glue Gun
Must-Have Supplies
- Outdoor fabric (UV/mold-resistant, e.g., Phifer Slingable)
- 1/4″ staples & heavy-duty staple gun (8-10 gauge)
- Sharp fabric scissors (not household shears)
- Disappearing ink marker
- Pliers for staple removal
Why Sewing Isn’t Always Necessary
Most deck chair pads use stapled fabric—not sewn cushions. Skip the sewing machine unless recovering thick foam cushions. Crucially: Never use hot glue. As Phifer’s experts confirm, outdoor temperature swings and moisture degrade glue bonds within months, leaving stiff, yellowed residue on fabric. Staples provide secure, weatherproof attachment that lasts years.
Remove Old Deck Chair Fabric Without Damage
Safe Staple Extraction
- Flip chair upside down on a towel-covered work surface
- Locate the staple line along the frame’s edge
- Insert pliers under staple crown and pull straight up
- Drop staples into a jar—prevents painful floor accidents
- Preserve one intact fabric piece as your cutting pattern
Critical Step: Take 3 reference photos before removal. Deck chair fabric often has hidden folds or tension points that look confusing mid-project. A quick glance at these images prevents misalignment.
Cut Fabric Like a Pro: Avoid Pattern-Matching Disasters
Positioning Directional Prints
Lay fabric wrong-side up on a flat floor (not a table—fabric slips). For stripes or plaids:
– Align pattern vertically with chair’s front edge
– Pin pattern pieces to maintain consistent direction
– Add 3-inch margins for stapling (measured from frame edge)
Mistake Alert: Cutting fabric with the pattern upside-down on backrests ruins the look. Hold your reference photo against the fabric before cutting—this takes 10 seconds but saves hours of rework.
Staple Gun Technique for Wrinkle-Free Deck Chairs
Step-by-Step Fabric Attachment
- Center chair pad on fabric wrong-side up
- Pull fabric taut over front edge and staple center point
- Move to back edge, pull firmly, and staple center
- Work toward sides in 3-inch increments, alternating sides
- Never stretch fabric—pull snug but not tight (prevents tearing)
Hospital Corners That Impress

Create clean corners like gift-wrapping:
– Pull side fabric over corner at 45-degree angle
– Fold excess fabric inward to form a crisp triangle
– Staple twice through the fold (no loose flaps)
– Check alignment by sight—corners should mirror each other
Time Saver: Work with a partner. One person pulls fabric taut while the other staples—cuts project time in half and ensures even tension.
Fix Common Deck Chair Reupholstery Mistakes
The 3 Fatal Errors Beginners Make
- Staples too close to edge: Causes fabric tears. Always staple ½ inch from edge minimum.
- Ignoring fabric grain: Outdoor fabric has a “right way” to face—test drape direction on scrap first.
- Skipping pre-washing: Some fabrics shrink 5% after first rain. Pre-wash and dry before cutting.
Pro Insight: If fabric puckers after stapling, remove 2-3 staples and re-pull tighter. Never add staples over existing holes—they’ll rip out faster.
Choose Weatherproof Fabric That Lasts

Decode Outdoor Fabric Labels
Not all “outdoor” fabrics perform equally. For deck chairs exposed to sun and rain:
– Must-haves: UVGuard treatment (prevents fading), Microban® antimicrobial (stops mildew)
– Weight: 10-12 oz/yd² for chair pads (lighter = less durable)
– Weave: Tight basketweave (e.g., Phifer Slingable) blocks water better than loose knits
Color Hack: Medium-toned fabrics (terracotta, sage) hide stains better than white but stay cooler than black. Avoid dark blues—they fade fastest in direct sun.
Maintain Your Reupholstered Deck Chairs
Extend Lifespan by 3+ Years
- Weekly: Brush off debris with soft bristle brush
- Monthly: Clean with 1:10 vinegar/water solution (no bleach!)
- Off-season: Store indoors during snow/freezing temps
- Spot clean: Blot spills immediately—never rub
Critical Tip: Never pressure-wash reupholstered chairs. High water force degrades fabric coatings. A garden hose on gentle spray is sufficient.
Weekend Timeline: Reupholster 4 Chairs in 1 Day
- 8:00 AM: Remove old fabric from all chairs (45 mins)
- 9:00 AM: Measure and cut fabric (60 mins)
- 10:30 AM: Staple pads (25 mins per chair)
- 1:00 PM: Final tension checks and trimming (20 mins)
Realistic Expectation: Your first chair takes 90 minutes. By the fourth, you’ll finish in 45 minutes. Total cost: $45 in fabric vs. $800+ for professional reupholstery.
Your deck chairs are ready for summer. That crisp, taut fabric you installed this weekend will withstand pool parties, sudden downpours, and relentless sun—proving DIY reupholstering beats replacement every time. The next time you spot faded sling chairs at a garage sale, you’ll see potential, not trash. Grab leftover fabric to make matching seat cushions for your porch swing, and watch how quickly this skill transforms your entire outdoor space. The satisfaction of creating durable, beautiful seating with your own hands? That’s the kind of pride no store-bought patio set can deliver.


