
That thrift store bamboo chair with the peeling pinkish finish isn’t destined for landfill—it’s a designer piece waiting for your touch. When paint chips within weeks or pools in rattan crevices, it’s not your fault. Bamboo’s hollow poles and curved rattan elements create unique painting challenges that standard furniture techniques can’t solve. But armed with the right approach, you’ll achieve smooth, lasting results that make strangers ask, “Where did you get that?”
This guide reveals professional secrets for painting bamboo chairs that survive daily use and weather changes. You’ll learn why most DIYers fail at the prep stage, how to choose between spray paint and professional sprayers, and the exact sanding sequence that prevents paint from peeling off rattan curves. Whether reviving a $5 thrift find or upgrading patio furniture, these steps deliver flawless finishes every time.
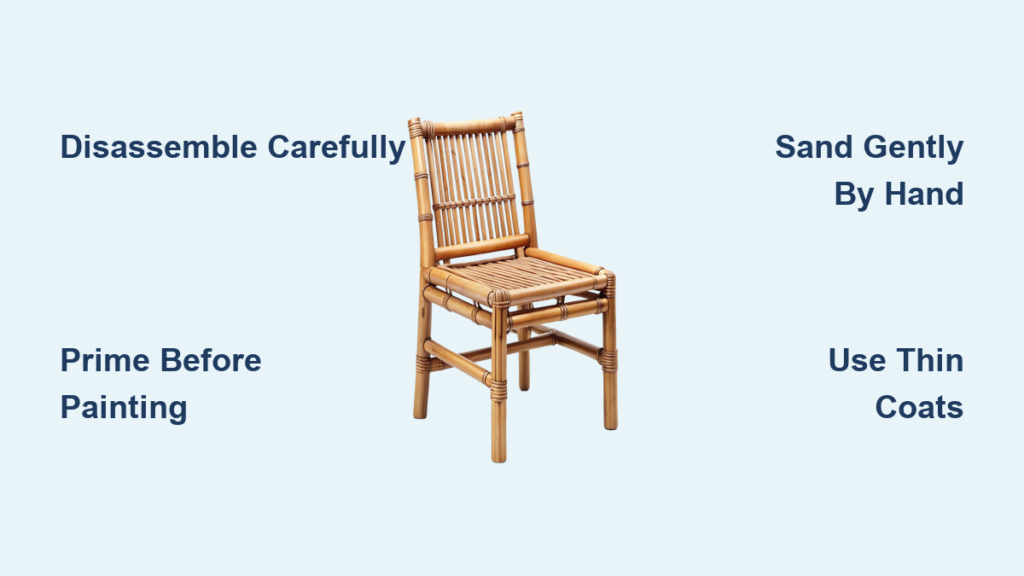
Spot Pink Glow & Structural Cracks Before Painting
Before touching paint, diagnose your chair’s specific condition. Vintage bamboo develops that distinctive pinkish hue from decades of light exposure, while newer pieces often have creamy finishes or dark oak stains. But color matters less than structural integrity—those hollow poles crack easily at connection points where rattan meets bamboo.
Critical inspection checklist:
– Test joint stability by gently wiggling armrests and seat frames
– Identify finish types: Glossy polyurethane resists paint; chalky pink requires sealing
– Document hardware patterns with photos before disassembly
Skip this step, and you’ll face wobbly chairs or paint peeling at weak joints within months. That seemingly minor crack in the backrest pole? It’ll expand under paint stress during humidity changes.
Disassemble Without Losing a Single Screw
Remove all cushions completely—unscrew every fastener and store screws in labeled containers. Bamboo chairs use unique connection systems; a single missing screw pattern ruins reassembly. Photograph each step as you work, especially for curved rattan sections where pieces interlock unexpectedly.
Pro tip: Place screws on magnetic trays before transferring to zip-lock bags marked “backrest,” “seat frame,” etc. Those tiny fasteners vanish faster than you can say “frustrated DIYer.”
Clean & Prep Bamboo Without Causing Swelling
Degrease with TSP—But Never Saturate
Bamboo traps decades of furniture polish and skin oils in its fibers. Mix TSP solution per instructions and scrub with a soft-bristled brush, working in 6-inch sections. Immediately wipe residue with barely-damp microfiber cloth—never let water pool in hollow bamboo poles. Saturation causes swelling that cracks paint within days.
Allow 48 hours drying time in low-humidity conditions. Rushing this step guarantees peeling paint, especially on vintage pieces with porous finishes.
Sanding That Preserves Rattan Curves

Use 150-grit sandpaper by hand only—electric sanders vibrate fragile rattan until it shatters. Sand in circular motions with feather-light pressure, focusing on:
– High-contact areas like armrests where paint fails first
– Connection points between bamboo poles and rattan
– Any glossy or chipped sections needing complete finish removal
After priming, switch to 220-grit for final smoothing. Sand just enough to remove raised primer bumps—over-sanding exposes bare bamboo that absorbs paint unevenly.
Dust Removal Sequence for Flawless Adhesion
Microscopic dust causes orange-peel texture on painted bamboo. Follow this exact sequence:
1. Brush loose particles with soft hand brush
2. Vacuum crevices using brush attachment
3. Wipe with barely-damp microfiber cloth
4. Air dry 2 hours before priming
Skip any step, and paint will adhere to dust instead of bamboo—guaranteeing early chipping.
Choose Between Spray Paint & Professional Sprayers
Spray Paint: Budget-Friendly for Single Chairs
Best for: Beginners or one-off projects under $35
Critical supplies:
– Oil-based spray primer (Kilz Interior/Exterior)
– Rustoleum Universal Advanced enamel spray paint
– High-gloss finish for maximum durability
Pro technique:
– Shake can 30 seconds minimum
– Hold 7 inches from surface
– Apply 3 thin coats (not 1 thick coat)
– Wait 35 minutes between coats
This method fails when painters skip primer or rush drying times—causing runs in rattan curves.
Paint Sprayer: Worth the Investment for Multiple Chairs
Best for: Creating matching sets or professional results
The Wagner FLEXiO 4000 with detail nozzle handles bamboo’s texture flawlessly. Key settings:
– Vertical pattern for straight bamboo poles
– Round pattern for tight rattan corners
– 50% material flow for thin, even coats
Superior paint options:
– Sherwin-Williams All Surface Enamel (built-in primer)
– High-gloss lacquer for weather resistance
Sprayers save 40% time on complex pieces and prevent the pooling that ruins spray-painted rattan.
Why Brush Painting Fails on Bamboo
Traditional brushes leave streaks and drips in rattan crevices. If you must brush, use 1/8-inch foam rollers for flat sections and expect triple the time. But skip brushing rattan curves entirely—thin sprayer coats are the only solution for smooth coverage.
Apply Paint Without Runs or Bleed-Through

Prime to Block Pinkish Stain Bleed-Through
Yellow bleed-through? Vintage bamboo’s pinkish glow contains stains that repel paint. Apply shellac-based BIN primer first—it seals discoloration better than oil-based primers.
Flawless priming steps:
1. Test spray on cardboard
2. Apply ultra-thin coat 7 inches from surface
3. Wait 45 minutes (not 30!) before recoating
4. Lightly sand bumps with 220-grit
Rushing priming causes the #1 failure: uneven color showing through paint.
Build Coverage in Thin, Strategic Coats
First coat will look patchy—this is normal. Second coat achieves 80% coverage. Third coat delivers uniform color. Critical rules:
– Shake paint 30+ seconds
– Maintain exact 7-inch distance
– Overlap each pass by 50%
– Never spray downward on rattan (causes drips)
Fix uneven coverage by adjusting distance—not adding thicker coats. Too close = runs; too far = dry spray.
Skip Polyurethane (Unless Outdoors)
High-gloss enamel paint provides sufficient indoor protection. Only add polyurethane for outdoor chairs after 14 days curing:
1. Lightly scuff-sand with 320-grit
2. Apply exterior-grade spray poly
3. Focus on high-wear areas like armrests
Adding polyurethane too soon traps solvents that cause bubbling.
Reupholster Cushions to Complete Your Transformation
Replace 50-Year-Old Foam with High-Density Upgrades
That flattened cushion from the 70s ruins seating comfort. Cut 2-inch high-density foam using the wood seat platform as your template. Fabric selection secrets:
– Indoor chairs: Medium-weight linen (hides minor paint flaws)
– Outdoor use: Sunbrella fabric (resists fading)
– Statement pieces: Bold patterns balanced against solid chair color
Professional Stapling for Crisp Corners
Center fabric patterns before securing. Tack the midpoint of each side first, pulling fabric taut but not stretched. Fold corners like gift-wrapping for clean edges. Staple spacing:
– Straight sections: 1.5 inches apart
– Curved edges: 1 inch apart
– Corners: Double staples at fold points
Loose fabric shifts during use, creating unsightly wrinkles.
Fix Peeling Paint & Uneven Coverage Now
Stop Paint from Peeling at Joints
Peeling at rattan-bamboo connections? You didn’t sand joints thoroughly. Disassemble, sand connection points with 150-grit, and reapply primer. Critical: Mask off adjacent sections to avoid overspray on finished areas.
Eliminate Orange-Peel Texture
Dust contamination causes bumpy finishes. Fix immediately while paint is semi-cured:
1. Lightly sand with 320-grit
2. Wipe with tack cloth
3. Apply ultra-thin topcoat
Waiting lets texture harden, requiring complete repaint.
Tone Down Harsh Colors Without Starting Over
Overwhelming bright paint? Create a gel stain wash: Mix 50/50 gel stain and mineral spirits. Wipe over surface with lint-free cloth, removing excess after 90 seconds. This technique mutes colors while preserving texture—perfect for salvaging “too bold” experiments.
Maintain Painted Bamboo Chairs for 5+ Years
Critical First 72-Hour Cure Period
Wait 48 hours before reassembly to prevent hardware marring. Avoid heavy use for 7 days—bamboo paint cures slower than solid wood. First-week care:
– Dust with microfiber cloth only
– Wipe spills immediately with damp cloth
– Keep away from direct heat sources
Skipping cure time causes permanent fingerprint marks.
Long-Term Protection Schedule
| Use Case | Cleaning Frequency | Touch-Up Timing | Expected Lifespan |
|---|---|---|---|
| Indoor dining | Weekly dusting | Every 2 years | 8-10 years |
| Covered patio | Bi-weekly wiping | Annually | 4-5 years |
| Full sun exposure | Monthly deep clean | Every 6 months | 2-3 years |
Pro maintenance: Store leftover paint in glass jars (not original cans) for perfect touch-up matches.
Budget Breakdown: $75 Chair to Designer Piece

Real cost analysis:
– Thrift store chair: $8
– Wagner sprayer system (reusable): $60
– Primer + paint (3 coats): $18
– Foam + Sunbrella fabric: $22
– Total investment: $108 (vs. $300+ retail)
Sourcing secrets: Visit estate sales on Tuesday mornings—they clear unsold Sunday items. Search Facebook Marketplace for “chinoiserie chair” (broader results than “bamboo”). Always inspect for structural cracks before buying—never pay more than $15 for repairable vintage pieces.
Your newly painted bamboo chair now withstands daily use while turning heads. Whether you chose high-gloss white for timeless versatility or a custom aqua statement, you’ve mastered techniques most painters never learn. The secret wasn’t fancy tools—it was respecting bamboo’s unique structure at every step. Now refinish that second chair; your matching set awaits.


