
Picture this: You found the perfect vintage chair at a flea market, but the seat is broken beyond repair. Rather than settling for an ugly cushion or paying hundreds for professional restoration, imagine transforming it yourself with beautiful hand-woven seating that matches your home perfectly. Chair seat weaving isn’t just a practical repair skill—it’s the gateway to creating custom furniture that tells your unique story.
Whether you’re restoring a family heirloom or crafting a one-of-a-kind piece, this guide will walk you through every step of weaving chair seats like a pro. You’ll learn multiple techniques, from traditional rush weaving to modern cord patterns, with clear instructions that eliminate guesswork and frustration. How to weave seat for chairs successfully begins with understanding your options and selecting the right method for your project.
Rush Seat Weaving: The Beginner-Friendly Technique
Essential Tools for Rush Weaving Success
Before starting, gather these critical items:
– Pre-twisted natural rush (2-lb coil for most seats)
– Warm water bowl (100°F maximum)
– Staple gun with 1/4″ staples
– Sharp scissors or utility knife
– Hand clamps for tension control
– Measuring tape for accurate cuts
Critical warning: Never substitute boiling water for soaking—excessive heat damages natural fibers and creates weak spots in your weave.
Perfect Soaking Technique for Rush Material
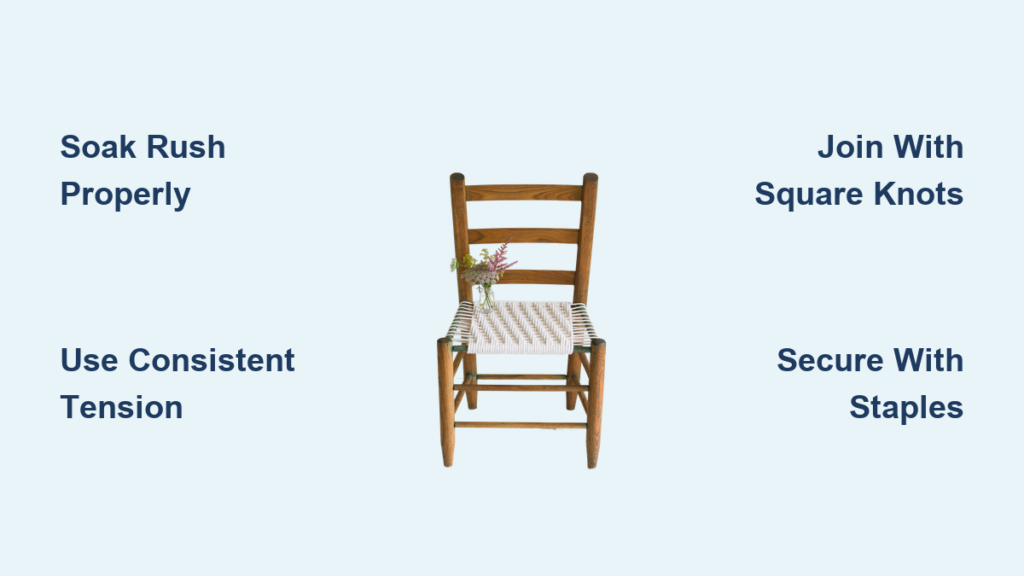
Soak your rush for exactly 5-10 minutes in warm water. This transforms brittle material into a pliable state ideal for weaving. After soaking, swing the coil downward like a lasso to remove excess water—this prevents dripping while you work. Paper fiber rush requires no soaking, making it ideal for beginners tackling their first project.
Step-by-Step Rush Weaving Process

Begin by stapling the rush to the inside of the left rail near the back leg. Bring the rush over the front rail, wrap completely around it, then pull up through the seat center to establish your first strand. Create sharp 90° angles by pinching corners while pulling tight—this prevents rounded, sloppy corners that scream amateur work.
Master the two-corner method by working adjacent corners simultaneously. Initially weave loosely—this feels counterintuitive but prevents distortion when you tighten later. After establishing all corners, systematically return to each section and pull tight, starting from your original staple point.
Pro tip: Always maintain consistent tension as you weave. Too loose creates a wobbly seat; too tight warps the frame. Practice on scrap material first to develop your tension control.
Seamless Rush Joining Technique
When your rush runs short, join new pieces using square knots positioned on the seat’s underside. These hidden knots maintain the clean appearance of your finished weave. Always join where the rush crosses inside the frame, never on top where knots would be visible. Plan your joins strategically—fewer knots mean stronger construction. A standard dining chair seat typically requires only 2-3 joins using a full 2-lb coil.
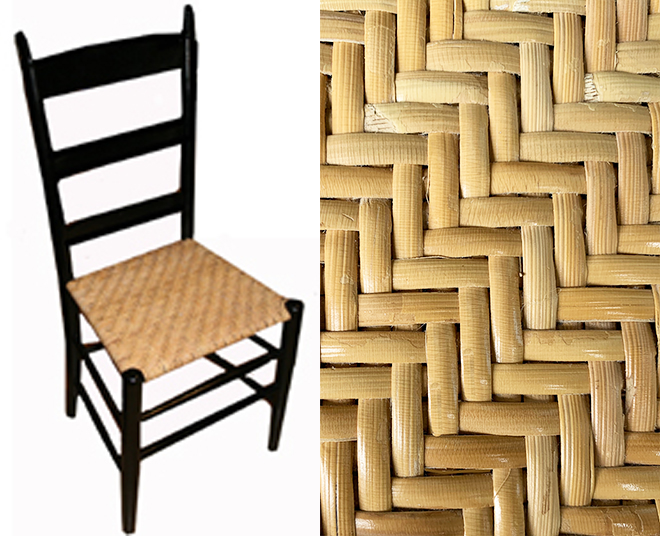
Cane Webbing Installation for Grooved Frames
When Cane Webbing Beats Hand Weaving
Cane webbing works best for chairs with a groove around the seat perimeter rather than drilled holes. This pressed cane method, invented in the 1870s, creates the classic octagonal pattern without the time-intensive hand weaving process. If your chair has a continuous groove instead of individual holes, skip hand caning and choose this method.
Professional Cane Webbing Installation Steps
Measure your seat groove precisely, adding 1/2″ on all sides for proper fit. Soak the pre-woven cane sheet for 30 minutes to increase flexibility. Press the cane into the groove using a wooden wedge, then secure with reed spline and wood glue.
Critical step: Work from the center outward to prevent wrinkles. Use a spline roller to ensure the cane seats completely in the groove, creating a drum-tight finish. Trim excess cane with a sharp utility knife held at a 45° angle—this creates a clean edge that won’t fray over time.
Splint Seat Patterns: From Simple to Sophisticated
Choosing the Right Splint Material for Your Project
Select from three primary materials based on your skill level and desired look:
– Ash splints: Light color, excellent flexibility—best for beginners
– Oak splints: Strongest option, slightly stiffer—ideal for high-use chairs
– Hickory splints: Medium flexibility with attractive grain—perfect for decorative pieces
Herringbone Twill Pattern: Professional Results Made Simple
Create sophisticated 3×3 or 4×4 herringbone patterns by weaving over three strands, then under three. This pattern appears complex but follows a simple repeating sequence. The reverse side naturally forms a 5×5 pattern, providing extra strength.
Pro technique: Alternate starting directions every other row to create the distinctive chevron effect. This prevents the pattern from skewing over time and gives your work that professional finish.
Danish Modern Cord Weaving for Mid-Century Pieces
Authentic Danish Cord Installation Method
Danish Modern cord uses 2-ply laced cord specifically designed for mid-century furniture. This material loops around “L” shaped nails on the inner framework, creating the distinctive basket weave pattern popularized by designers like Hans Wegner and Arne Jacobsen.
Begin at the center back rail, securing the cord with a simple knot around the first nail. Loop forward and backward in pairs, maintaining consistent tension. The pattern requires 2-3 passes before the basket weave becomes visible. Design note: Danish cord typically uses natural tan color, but black cord creates dramatic contrast on light wood frames.
Troubleshooting Common Weaving Problems
Fixing Loose Weaves Without Starting Over
Over time, natural materials relax and loosen. Tighten rush seats by spraying lightly with water, then clamping overnight. This causes the fibers to contract, restoring original tension. For severe loosening, consider adding a reinforcing layer of thin cord underneath the existing weave.
Repairing Broken Strands Like a Professional
Replace individual cane strands by removing the damaged section and weaving in new material. Match the original gauge exactly—mismatched thickness creates visible irregularities. Always work from the seat’s underside to maintain a clean appearance on top.
Preventing Future Damage with Simple Maintenance
Apply a light coat of sanding sealer to natural rush seats. This invisible protection prevents staining and extends lifespan without changing the material’s appearance. Reapply annually for maximum protection. For outdoor chairs, choose paracord instead of natural materials—it withstands weather extremes while maintaining tension.
Project Planning Made Simple
Exact Material Calculations for Flawless Results
Rush seats:
– Small side chair: 1.5 lbs
– Standard dining chair: 2 lbs
– Rocker: 3 lbs
Cane webbing:
– Measure seat opening plus 1″ on all sides
– Add 10% extra for trimming and mistakes
Splint material:
– 1″ wide splints: 3 yards per average seat
– 1/2″ wide splints: 5 yards per average seat
Realistic Time Estimates for Your Schedule
Beginner projects:
– Rush seat: 4-6 hours
– Cane webbing: 2-3 hours
– Splint weave: 3-4 hours
Advanced patterns:
– Danish cord: 6-8 hours
– Herringbone splint: 5-7 hours
– Fancy cane patterns: 8-12 hours
Long-Term Seat Care Strategies
Paper Rush Preservation Secrets
Paper fibre rush requires minimal maintenance—avoid excessive moisture and clean with a dry cloth. With proper care, expect 50+ years of service. The material actually improves in appearance as it develops a warm patina. Never use chemical cleaners—they break down the paper fibers over time.
Seasonal Adjustments for Natural Materials
Both paper and natural rush expand and contract with humidity changes. Expect slight loosening during humid summers and tightening in dry winters. These changes are normal and don’t affect structural integrity. If significant loosening occurs, use the water-spray method mentioned earlier to restore tension.
Transforming chairs through seat weaving connects you to centuries of craftsmanship while solving modern furniture challenges. Start with rush weaving for your first project—the forgiving material and straightforward technique build confidence quickly. As your skills develop, explore Danish cord or advanced cane patterns to create truly unique pieces.
Remember that perfect tension comes with practice. Your third chair will look significantly better than your first, and that’s exactly how mastery develops. Each project teaches new techniques while creating functional art for your home. Ready to begin? Choose a simple chair with good bones and start with the rush method. Within a weekend, you’ll have a professionally woven seat that transforms both the chair and your space.


