
Your dining chairs bear the battle scars of family dinners—coffee rings from rushed mornings, frayed edges from toddler kicks, fabric patterns screaming “2005.” Instead of sinking $400 into replacements that might not match your table height or style, grab your staple gun. In one weekend, you can reupholster dining room chairs to look like custom boutique pieces using thrifted frames and fabric you love. This guide delivers exact measurements, pro techniques for crisp corners, and cost-saving hacks so you’ll achieve results that make guests ask, “Where did you get those?”
Skip $400 New Chairs: Why Reupholstering Wins
Reupholstering dining room chairs saves solid frames from ending up in landfills while putting you in control of color and texture. A set of four sturdy thrift-store chairs plus new fabric costs $80–$120—far less than one mid-range new chair. You preserve furniture already sized for your table height and room layout, avoiding the “will this fit?” gamble. For heirloom pieces, swapping fabric revives sentimental value without altering the frame’s craftsmanship. Best of all, when trends change or stains strike, you can refresh seats again using the same skills.
Grab These 7 Must-Have Tools Before Starting

Don’t waste hours hunting for supplies mid-project. Gather these essentials first:
| Tool | Critical Function | Pro Tip |
|---|---|---|
| Upholstery staple remover | Lifts old staples cleanly | Use needle-nose pliers to extract stubborn bits |
| Electric carving knife | Slices foam smoothly | Replace blade if foam tears |
| Fabric shears (8″) | Cuts heavy fabric straight | Never cut paper with these—dull blades ruin fabric |
| Pneumatic stapler | Secures layers fast | Set compressor to 70 PSI for firm grip |
| Spray adhesive | Bonds foam to wood base | Mist lightly—too much causes slippage |
| Iron | Removes fabric wrinkles | Iron before cutting to prevent distorted patterns |
| Cambric dust cover (optional) | Creates pro underside finish | Staple edges folded under for clean look |
Materials Checklist: 2–3″ high-density foam (1.8–2.2 lb density), polyester batting, upholstery fabric (15,000+ double rubs), ¼–½″ staples.
Set Up Your Workshop for Zero Mistakes
Skip frustration with a strategic workspace. Work on sawhorses or a table at waist height—bending over causes back strain and uneven stapling. Cover the floor with canvas drop cloths to catch flying staples. Non-negotiable safety step: Wear impact-rated goggles. Staples ricochet at high speed, and one slip could cause eye injury. Keep kids and pets out of the room. If using pneumatic tools, test your compressor at 70 PSI before starting—too high bursts staples, too low causes jams.
Stop Guessing Yardage: The 4-Step Math That Works Every Time
Buying too little fabric forces reordering; too much wastes money. Calculate precisely:
- Remove the seat and measure wood-to-wood across the cushion profile (e.g., 18″ x 16″).
- Add 4–6″ to each dimension for wrap allowance (add 1–2″ more if replacing foam).
- Convert to square inches: (18″ + 5″) x (16″ + 5″) = 23″ x 21″ = 483 in².
- Divide by fabric width: For 54″-wide fabric, 483 ÷ 81 = 0.6 yd. Add 20% for pattern matching → buy 0.75 yd per seat.
Pro Tip: For busy patterns, add 30% extra. Lay fabric face-down on a light-colored surface to spot missed wrinkles before cutting.
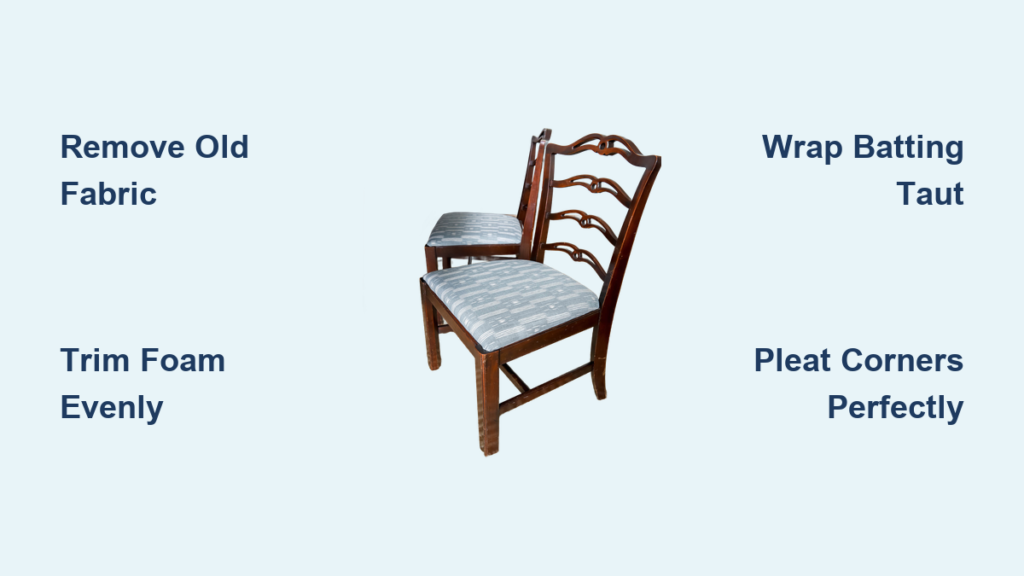
Strip Old Fabric Without Damaging Frames
Never rip fabric blindly—you’ll splinter wood and leave staple fragments. Start by flipping the chair and removing seat screws (store in labeled containers). Use an upholstery staple remover to pry up old staples, working from the center outward. For stubborn bits, grip with needle-nose pliers. Peel away fabric, batting, and foam in layers. Critical step: Save the old fabric as a template for cutting new material. If the wood base has residue, scrape gently with a putty knife—never sand, which weakens the frame.
Build Like a Pro: Foam, Batting & Fabric Layering Secrets
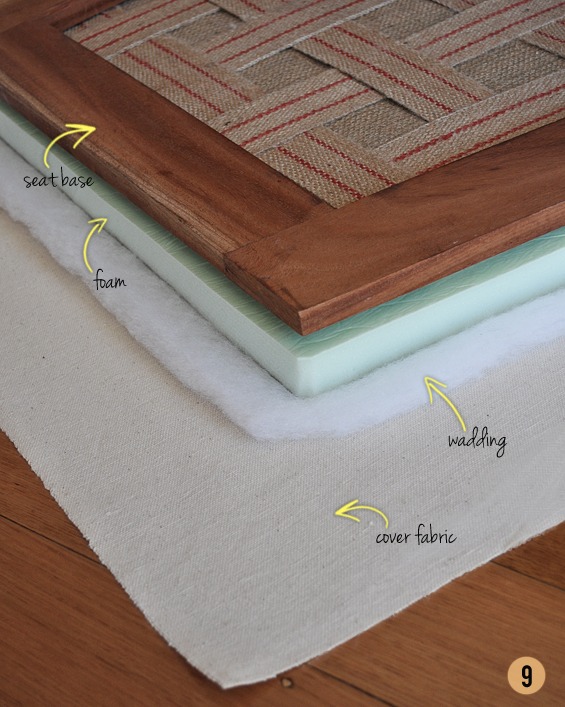
Install Foam Flawlessly in 3 Moves
- Spray light adhesive mist on the wood base—skip heavy coating that creates soggy foam.
- Center new foam and press firmly until bonded.
- Trim edges flush using an electric carving knife (pull toward you for smooth cuts).
Wrap Batting for Rounded Edges
Place the seat foam-side down on batting. Pull batting taut to the underside and staple the center of the top edge first. Repeat for bottom edge, then sides. Miter corners: Pull the batting midpoint toward the seat center, fold left and right sides inward like an envelope, and staple. Trim excess batting 1″ from staples.
Pleat Corners Perfectly: The 3-Fold Method That Looks Expensive
Avoid messy bunches that ruin your finish. After stapling center edges:
- Pull the midpoint of the excess fabric toward the seat center and staple once.
- Fold the left flap over this first fold and staple.
- Fold the right flap over both layers and staple again.
- Repeat for all corners.
Warning: Don’t pull fabric too tight—this distorts patterns and causes wrinkles. Check the front surface after each staple.
Finish Undersides Like a Furniture Store
Trim excess fabric to ½–1″ beyond staples. For a factory look, staple cambric dust cover: fold edges under ½″ before stapling to hide raw fabric. Why this matters: Dust covers prevent batting from sagging and stop crumbs from embedding in the foam. Skip this step, and your seats will look DIY—not designer.
Reattach Seats Without Stripping Screws
Align screw holes carefully before driving screws. Place the seat on the frame and insert one screw loosely to test positioning. If it binds, adjust slightly—forcing misaligned holes strips the wood. Drive screws until snug, not tight. Overtightening cracks the wood or pops fresh staples. Test stability by gently rocking the seat; if loose, add washers under screws.
Upgrade Options: When to Add Welting or Replace Webbing
Add Welting for Designer Flair
Sew bias tape around ⅜″ cotton cord to create piping. Position the welting along the seat edge before stapling fabric, trapping the cord’s flange under the new fabric. This adds a tailored border that hides imperfect corners.
Replace Saggy Webbing
If your seat base uses jute webbing, stretch new webbing diagonally across the frame. Use a webbing stretcher tool to tighten it until a coin can’t slide through. Staple every 2–3″ with ½″ staples—loose webbing causes uneven cushioning.
Keep Your Seats Looking New: 4 Maintenance Hacks
- Blot spills immediately with a white cloth and mild cleaner—never rub, which grinds stains deeper.
- Apply Scotchgard after reupholstering; let cure 24 hours before use to repel future spills.
- Rotate chairs monthly to distribute wear evenly—sunlight fades one side faster.
- Check staples annually by running your hand under the seat; restaple any loose fabric before it tears.
DIY vs Pro: When to Call a Specialist
| Factor | DIY Reupholstering | Professional Service |
|---|---|---|
| Cost | $20–60 per chair (materials) | $200–500 per chair |
| Time | 1–3 hours per chair (first attempt) | 6+ chairs/day |
| Best For | Thrifted sets, small batches, creative control | Antiques, structural repairs, 8+ chair sets |
| Risk | Minor imperfections | Paying for over-engineered solutions |
Choose DIY if: You have 3–6 chairs, enjoy hands-on projects, and want exact fabric matching. Call a pro if: Frames are antique (pre-1940), webbing is broken, or you need perfect uniformity for a large dining set.
Your dining chairs now showcase your style—not outdated patterns or coffee stains. By mastering how to upholster dining room chairs, you’ve gained a skill that saves money, reduces waste, and lets you refresh seats whenever inspiration strikes. Next time a spill happens, you won’t dread replacement costs. You’ll smile, grab your staple gun, and transform that chair in an afternoon. Start with one thrifted seat this weekend—your custom dining suite begins now.


