
Refinishing antique chairs can be a rewarding and cost-effective way to restore these beautiful pieces of furniture to their former glory. However, it requires patience, attention to detail, and the right techniques to achieve professional-looking results. If you’re looking to refinish your antique chair but don’t know where to start, you’re in the right place. In this comprehensive guide, we’ll walk you through the step-by-step process of refinishing antique chairs, from preparation to completion.
Introduction to Antique Chair Refinishing
Before diving into the refinishing process, it’s essential to understand the importance of preserving the chair’s history and integrity. Antique chairs are not only valuable for their monetary worth but also for their historical significance and sentimental value. When refinishing an antique chair, it’s crucial to strike a balance between restoring its original beauty and preserving its character.
Common Mistakes to Avoid When Refinishing Antique Chairs
Before we begin, let’s discuss some common mistakes to avoid when refinishing antique chairs:
- Stripping too much of the original finish: This can damage the wood and remove valuable patina.
- Using the wrong type of finish: Applying a modern finish to an antique chair can alter its appearance and devalue it.
- Not testing the finish: Failing to test the finish on a small, inconspicuous area can result in an uneven or unwanted finish.
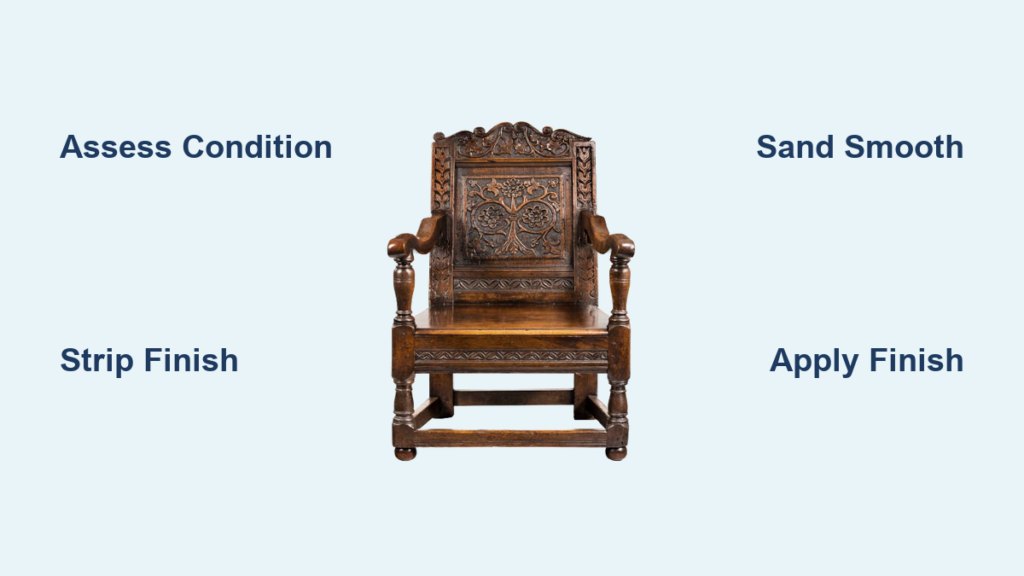
Step-by-Step Guide to Refinishing Antique Chairs
Preparation
Refinishing an antique chair requires careful preparation to ensure a successful outcome. Here are the steps to follow:
- Assess the chair’s condition: Inspect the chair for any damage, wear, or tear. Check for loose joints, cracks, or broken parts.
- Clean the chair: Use a soft-bristled brush to remove any dirt, dust, or debris from the chair’s surface.
- Remove hardware: Take out any hardware, such as screws, nails, or upholstery tacks, to prevent damage during the refinishing process.
- Disassemble the chair: If possible, disassemble the chair to refinish each component separately.
Stripping the Old Finish
Stripping the old finish is a crucial step in refinishing an antique chair. Here’s how to do it:
- Choose a stripping method: You can use a chemical stripper, a heat gun, or a combination of both.
- Apply the stripper: Follow the manufacturer’s instructions to apply the stripper to the chair’s surface.
- Scrape off the old finish: Use a scraper or a putty knife to remove the old finish.
- Neutralize the wood: Use a wood neutralizer to remove any remaining stripper residue.
Sanding and Smoothing
Sanding and smoothing are essential steps in preparing the wood for the new finish. Here’s how to do it:
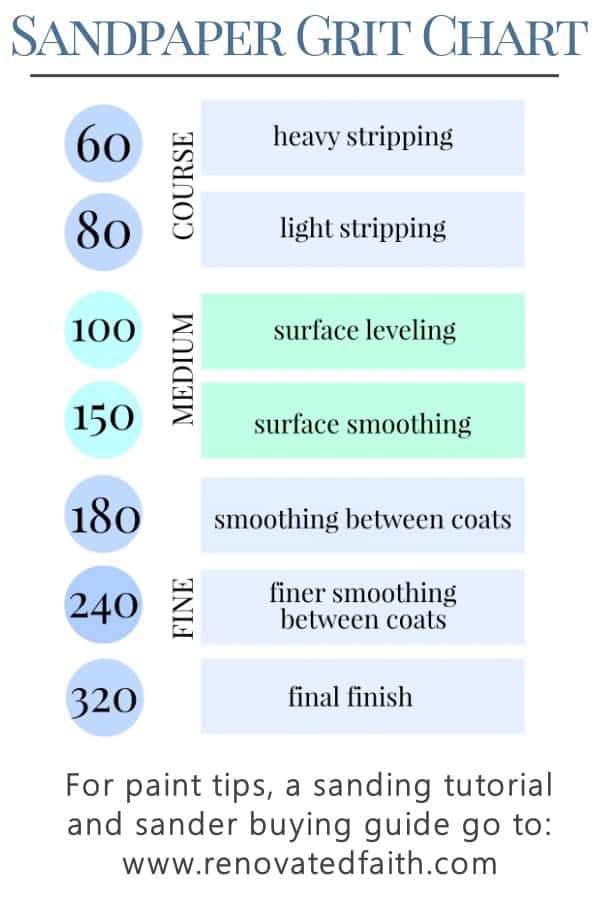
- Coarse sanding: Use a coarse-grit sandpaper (about 80-100 grit) to sand the entire chair.
- Fine sanding: Switch to a fine-grit sandpaper (about 120-150 grit) for a smoother finish.
- Smoothing: Use a sanding block or a flat surface to smooth out any imperfections.
Applying the New Finish

Applying the new finish is the final step in refinishing an antique chair. Here’s how to do it:
- Choose a finish: Select a finish that matches the chair’s original finish or a finish that complements its style.
- Apply a primer: If necessary, apply a primer to the wood to ensure better adhesion and coverage.
- Apply the finish: Follow the manufacturer’s instructions to apply the finish to the chair’s surface.
- Apply additional coats: Depending on the finish, you may need to apply additional coats to achieve the desired color and sheen.
Tips and Tricks for Refinishing Antique Chairs
Here are some tips and tricks to keep in mind when refinishing antique chairs:
- Use a test patch: Always test the finish on a small, inconspicuous area before applying it to the entire chair.
- Work in a well-ventilated area: Refinishing can be a messy and smelly process, so make sure you’re working in a well-ventilated area.
- Use protective gear: Wear protective gear, such as gloves and safety glasses, to prevent injury.
- Be patient: Refinishing an antique chair can be a time-consuming process, so be patient and don’t rush it.
Common Problems and Solutions
Here are some common problems and solutions you may encounter when refinishing antique chairs:
- Uneven finish: If the finish is uneven, try applying additional coats or using a different finish.
- Stains or discoloration: If you notice stains or discoloration, try using a wood stain or a finish that matches the chair’s original color.
- Dust or debris: If you notice dust or debris on the finish, try using a soft-bristled brush or a clean cloth to remove it.
Conclusion
Refinishing an antique chair can be a rewarding and challenging project. By following the steps outlined in this guide, you can restore your antique chair to its former glory and preserve its history and integrity. Remember to be patient, work carefully, and use the right techniques to achieve professional-looking results. If you’re unsure about any aspect of the process, consider consulting a professional restorer or seeking guidance from online resources.
Get Your Antique Chair Refinished Today
Now that you’ve read this comprehensive guide, you’re ready to start refinishing your antique chair. Remember to take your time, work carefully, and enjoy the process of restoring your chair to its former beauty. If you have any questions or need further guidance, don’t hesitate to ask. Happy refinishing!
Have you refinished an antique chair before? Share your experience in the comments below to help other readers!


