
Reupholstering and recushioning chairs can be a daunting task, especially for those without prior experience in furniture restoration. However, with the right tools, materials, and a bit of patience, you can breathe new life into your old, worn-out chairs. In this comprehensive guide, we will walk you through the step-by-step process of how to recushion chairs, focusing on reupholstery as an integral part of the process.
Introduction to Chair Recushioning and Reupholstery
If you’re reading this, chances are you’re frustrated with the state of your chairs. Perhaps the cushions are flat, the fabric is torn, or the overall look is just outdated. Before you consider replacing them, know that recushioning and reupholstering can be a cost-effective and rewarding DIY project. This guide will provide you with the quick fix solutions you need to get started, along with in-depth explanations and multiple approaches to tackle different aspects of the project.
Common Causes of Worn-Out Chairs
Understanding the Need for Recushioning
- Flat Cushions: Over time, the foam inside chair cushions can break down, leading to a flat, uncomfortable sitting surface.
- Torn Fabric: Wear and tear can cause the upholstery fabric to rip or fray, exposing the underlying material.
- Outdated Designs: Sometimes, the issue isn’t with the functionality but with the aesthetic appeal of the chair.
Materials and Tools Needed
To recushion and reupholster your chairs, you’ll need the following materials and tools:
| Item | Quantity | Specifications |
|---|---|---|
| Foam Cushioning | Varies | High-density foam for durability |
| Upholstery Fabric | Enough to cover the chair | Choose a durable, stain-resistant material |
| Batting | Optional | For added comfort and smoothness |
| Staple Gun | 1 | Heavy-duty for securing fabric |
| Scissors | 1 | Sharp, heavy-duty scissors for cutting fabric |
| Measuring Tape | 1 | For accurate measurements |
| Sewing Machine | Optional | For sewing seams or creating piping |
Step-by-Step Guide to Recushioning Chairs
Phase 1: Preparation
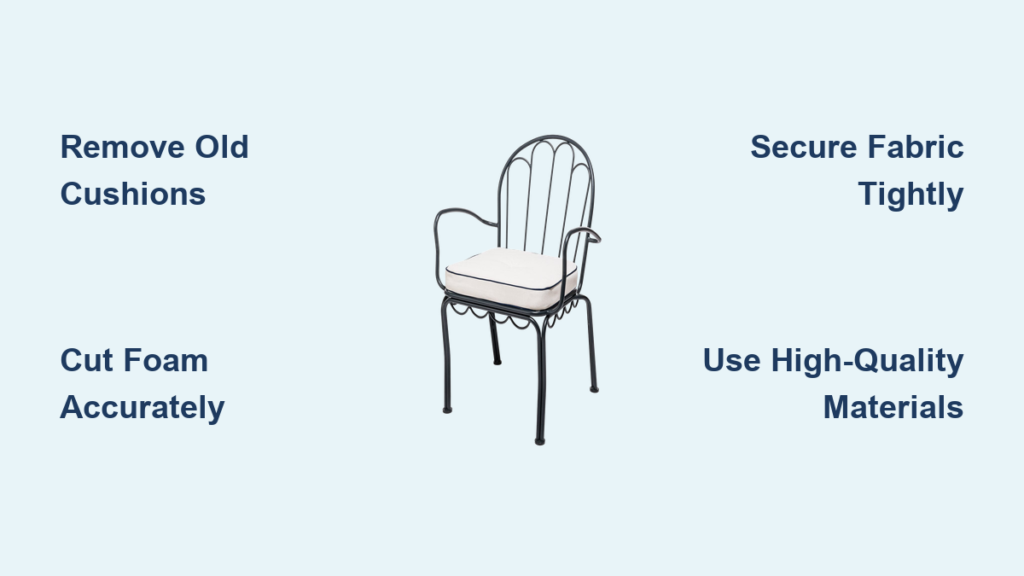
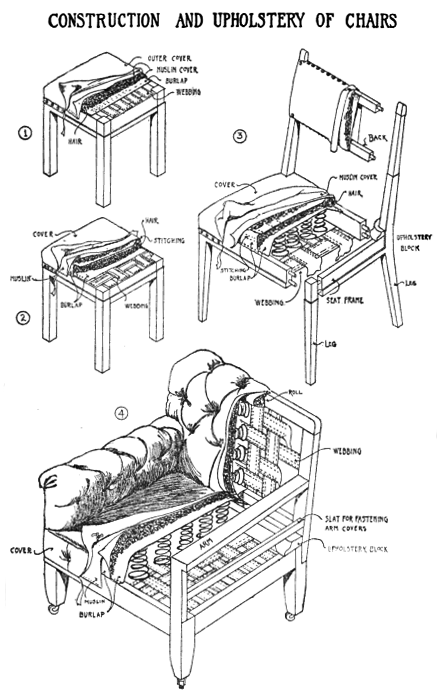
- Remove the Old Cushioning and Upholstery: Start by taking off the old cushions and upholstery. This may involve removing screws, staples, or adhesive. Be careful not to damage the chair frame.
- Inspect and Clean the Frame: Once the old materials are removed, inspect the chair frame for any damage. Clean it thoroughly to ensure a good base for your new cushioning and upholstery.
Phase 2: Measuring and Cutting the Foam
- Measure the Chair Seat and Back: Take precise measurements of the seat and back of the chair to determine how much foam you’ll need.
- Cut the Foam: Use a serrated knife or an electric carving knife to cut the foam to the correct size. It’s better to cut the foam slightly larger and then trim it down for a perfect fit.
Phase 3: Adding the New Cushioning
- Apply Batting (Optional): If you’re using batting for extra comfort, cut it to size and place it over the foam.
- Secure the Foam: Place the foam onto the chair frame. You may need to use adhesive or staples to keep it in place, depending on the chair’s design.
Phase 4: Reupholstering
- Cut the Upholstery Fabric: Using your measurements, cut the upholstery fabric, leaving enough extra around the edges for stapling.
- Staple the Fabric: Starting from the center and working your way outwards, staple the fabric to the chair frame. Make sure it’s tight and even.
- Add any Decorative Elements: If your design includes piping, tufting, or other decorative elements, now is the time to add them.
Pro Tips for a Professional Finish
- Use High-Quality Materials: The durability and look of your finished chair depend heavily on the materials you choose.
- Take Your Time: Rushing through the process can lead to mistakes. Take your time, especially when cutting and stapling.
- Consider Professional Help: If you’re not comfortable with certain aspects, like sewing or complex reupholstery patterns, consider seeking professional help.
Troubleshooting Common Issues

- Loose Fabric: If the fabric starts to loosen over time, you may need to tighten the staples or add more.
- Incorrect Foam Size: If the foam is too small, it may not provide adequate support. If it’s too large, it may be uncomfortable.
- Fabric Tears: Small tears can be repaired with fabric glue or by reupholstering the affected area.
FAQ
Q: How often should I recushion my chairs?
A: The frequency depends on usage. Heavy-use chairs may need recushioning every 5-7 years, while less used chairs can go 10-15 years.
Q: Can I use any type of fabric for reupholstery?
A: No, choose fabrics that are durable and suitable for upholstery. Consider factors like stain resistance, colorfastness, and texture.
Q: Is it cheaper to recushion and reupholster myself or hire a professional?
A: DIY projects can be cost-effective, especially for simple jobs. However, complex projects or those requiring specialized skills may be more cost-effective when done professionally.
Conclusion
Get Your Chairs Looking and Feeling New Again
Recushioning and reupholstering your chairs is a rewarding DIY project that can extend the life of your furniture and update your home’s decor. By following this guide, you’ve learned how to tackle the project step by step, from removing the old cushioning and upholstery to adding the new foam and fabric. Remember, patience and attention to detail are key to achieving a professional finish.
Have you successfully recushioned and reupholstered your chairs? Share your experience and any tips you might have in the comments below!


