
Are you tired of looking at your worn-out retro vinyl chairs, wishing you could restore them to their former glory? The good news is that recovering them is a feasible DIY project that can breathe new life into your vintage furniture. In this comprehensive guide, we’ll walk you through the steps to recover your retro vinyl chairs, from preparation to the final touches.
Introduction to Recovering Retro Vinyl Chairs
Retro vinyl chairs are not just pieces of furniture; they’re often nostalgic reminders of past decades. However, over time, the vinyl can crack, fade, or tear, diminishing their aesthetic appeal. Before diving into the recovery process, it’s essential to understand that the success of your project depends on the condition of the chair’s frame and the quality of the new vinyl you choose. If your chair’s structure is sound, and you’re ready to give it a new look, you’re in the right place.
This guide will cover everything you need to know to recover your retro vinyl chairs successfully. We’ll discuss the tools and materials needed, the step-by-step process of removing the old vinyl and applying the new one, and provide tips on how to choose the perfect vinyl for your project. By the end of this article, you’ll be equipped with the knowledge to transform your retro vinyl chairs into stunning pieces that will be the envy of any room.
Common Issues with Retro Vinyl Chairs
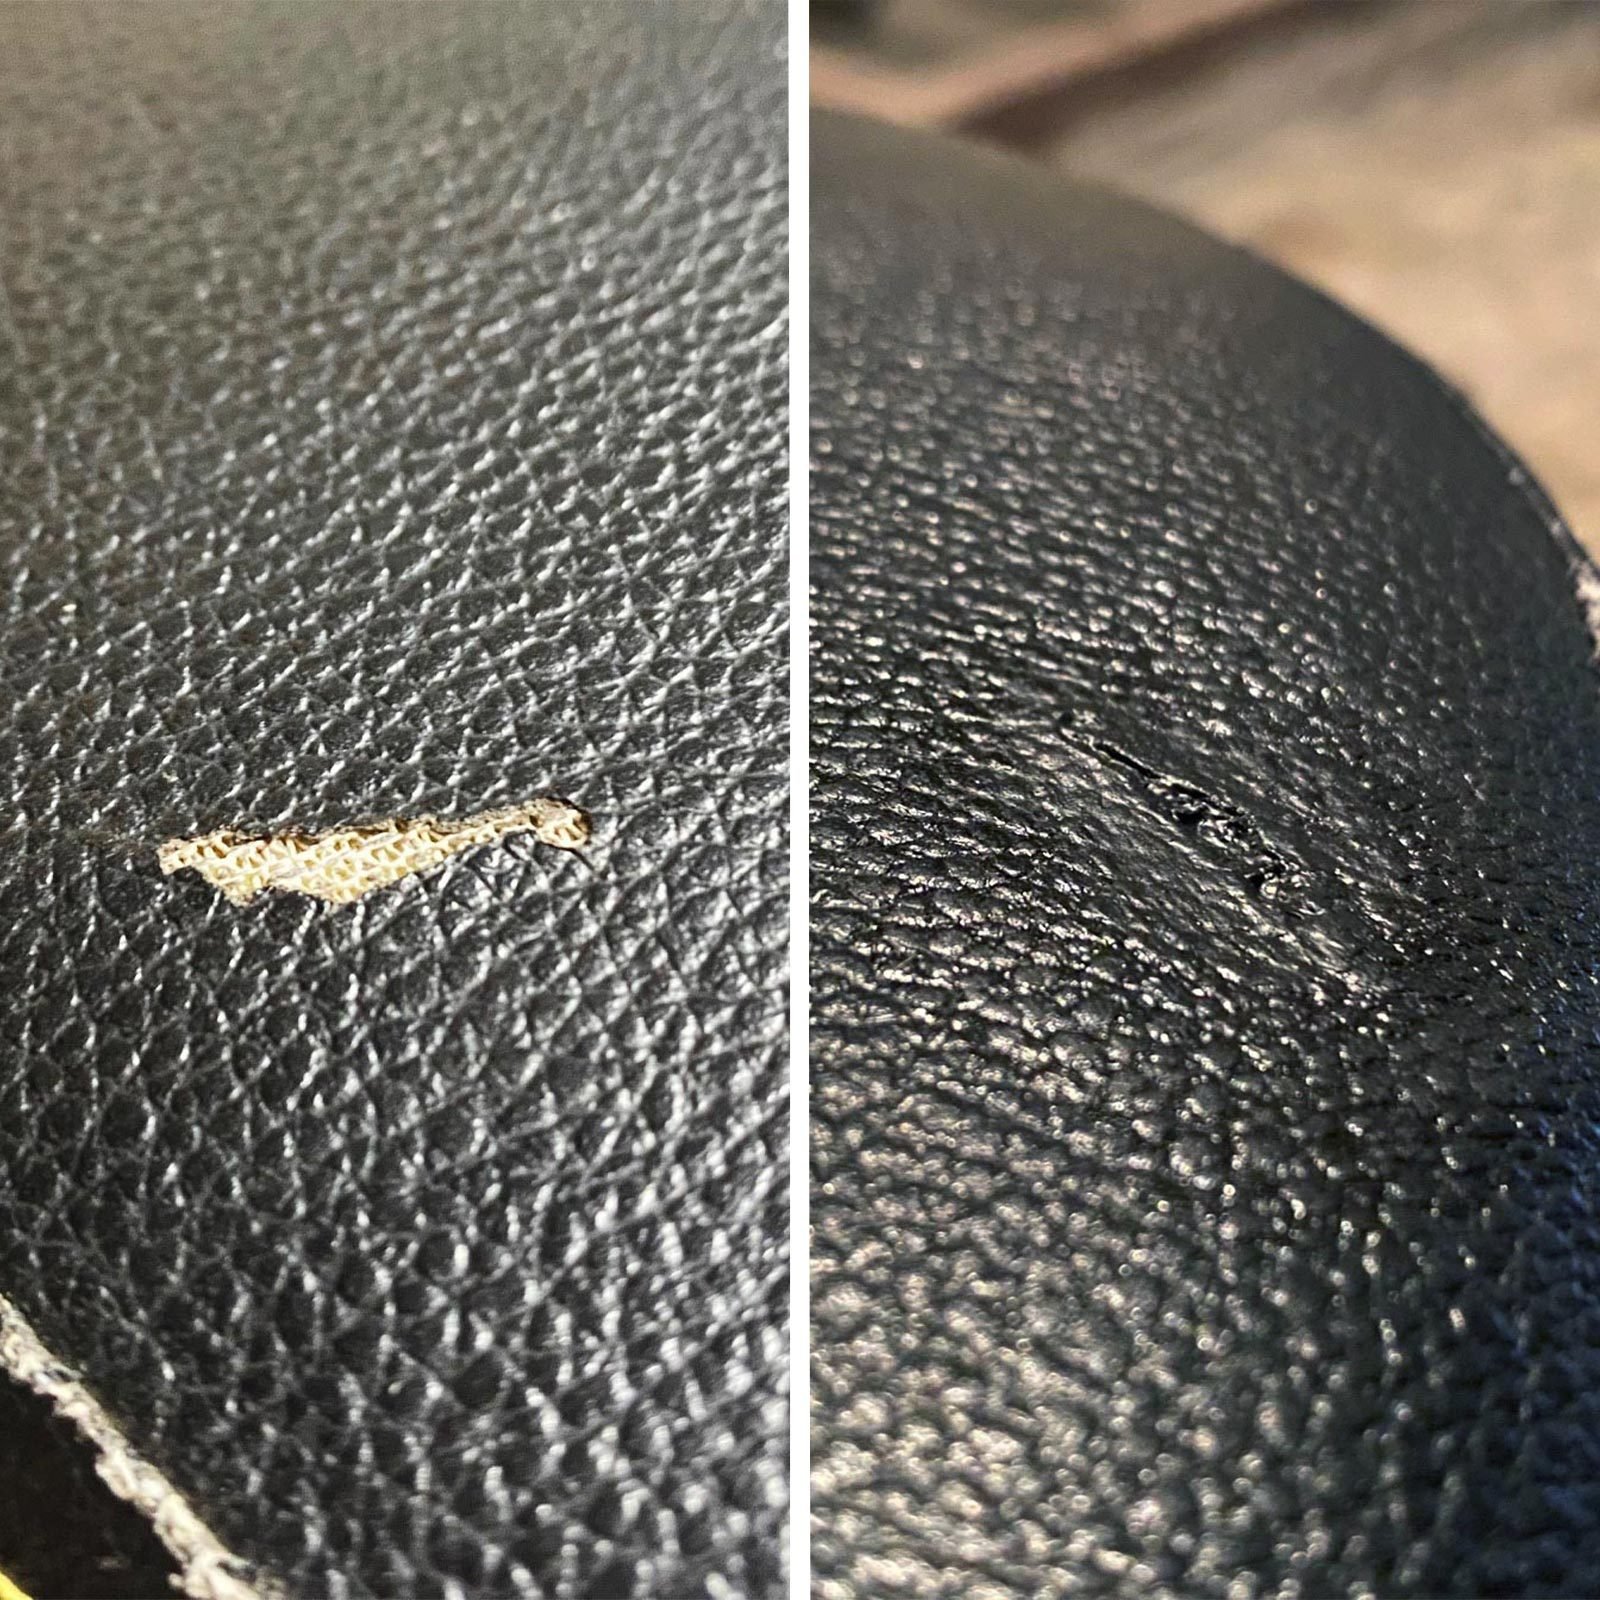
Before starting the recovery process, it’s crucial to identify the common issues your retro vinyl chairs might be facing. These include:
- Cracking and Fading: Over time, vinyl can dry out and crack, especially when exposed to sunlight.
- Tears and Holes: Accidental scratches or sharp objects can cause tears and holes in the vinyl.
- Loose Seams: The seams where the vinyl is stitched can come undone, leading to further damage.
Understanding these issues will help you prepare for the recovery process and ensure that you address all the problems your chairs might have.
Materials and Tools Needed
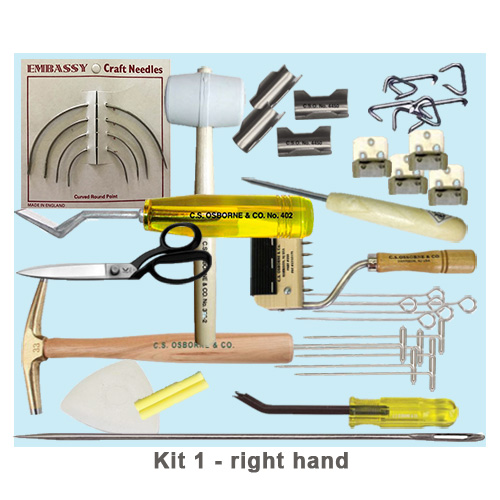
To recover your retro vinyl chairs, you’ll need the following materials and tools:
| Item | Quantity | Specifications |
|---|---|---|
| New Vinyl | Enough to cover the chair | Choose a vinyl that matches your desired color and durability |
| Foam (if necessary) | Depending on the chair’s condition | High-density foam for better comfort and support |
| Thread | Matching the color of the vinyl | Strong, durable thread for stitching |
| Upholstery Glue | For bonding foam and vinyl | Waterproof glue for longevity |
| Staple Gun | For securing the vinyl | Heavy-duty staple gun for thick vinyl |
| Scissors | For cutting the vinyl | Sharp, heavy-duty scissors or a utility knife |
| Measuring Tape | For measuring the chair | Accurate measurements for a perfect fit |
| Pencil | For marking the vinyl | Waterproof pencil for clear markings |
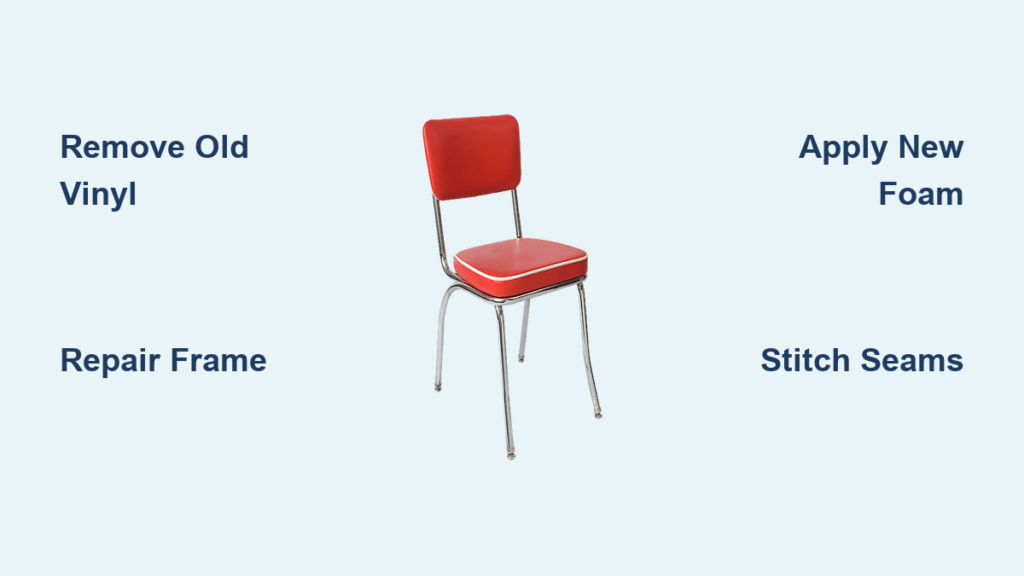
Step-by-Step Recovery Process
Recovering your retro vinyl chairs involves several steps, from preparing the chair to applying the new vinyl. Here’s a detailed guide to help you through the process:
Step 1: Remove the Old Vinyl
- Assess the Chair: Before starting, inspect the chair’s frame for any damage. Repair or replace any broken parts.
- Remove the Old Vinyl: Use a staple remover or pliers to remove the staples holding the old vinyl in place. Gently pull the vinyl away from the frame.
- Clean the Frame: Use a wire brush to remove any remaining staples, glue, or debris from the frame.
Step 2: Inspect and Repair the Frame
- Inspect the Frame: Check for any cracks or breaks in the frame. Repair any damage using wood glue and clamps.
- Sand the Frame: Sand the frame to smooth out any rough edges or splinters.
Step 3: Apply New Foam (If Necessary)
- Cut the Foam: Use a foam cutter or an electric carving knife to cut the foam to the desired shape and size.
- Glue the Foam: Apply upholstery glue to the frame and attach the foam, ensuring it’s securely in place.
Step 4: Cut the New Vinyl
- Measure the Chair: Use a measuring tape to measure the areas of the chair that need to be covered with vinyl.
- Cut the Vinyl: Add a few inches to your measurements to ensure a snug fit. Cut the vinyl using scissors or a utility knife.
Step 5: Apply the New Vinyl
- Stretch and Secure: Start applying the vinyl from the center, stretching it evenly to avoid wrinkles. Use a staple gun to secure it to the frame.
- Tuck and Fold: Tuck the excess vinyl under the edges of the frame and fold it neatly before stapling.
Step 6: Stitch the Seams (If Necessary)
- Thread Your Needle: Use a heavy-duty needle and thread that matches the color of your vinyl.
- Sew the Seams: Hand-stitch the seams where the vinyl pieces meet, ensuring they are secure and even.
Tips for a Successful Recovery
- Choose the Right Vinyl: Select a vinyl that is durable, easy to clean, and matches your desired color and pattern.
- Work in a Well-Ventilated Area: The fumes from the glue and the dust from the sanding can be harmful. Ensure good ventilation.
- Take Your Time: Recovering a chair can be a time-consuming process. Be patient and take your time to ensure a professional finish.
Preventing Future Damage
To extend the life of your newly recovered retro vinyl chairs, consider the following tips:
- Regular Cleaning: Clean the vinyl regularly with a mild soap solution to prevent dirt buildup.
- Avoid Direct Sunlight: If possible, keep your chairs away from direct sunlight to prevent fading and cracking.
- Use Chair Covers: Consider using chair covers when not in use to protect the vinyl from dust and spills.
Conclusion
Get Your Retro Vinyl Chairs Looking New Again
Recovering your retro vinyl chairs is a rewarding DIY project that can give your vintage furniture a second life. By following the steps outlined in this guide, you’ll be able to transform your worn-out chairs into stunning pieces that will complement any room. Remember to choose the right materials, work patiently, and take necessary precautions to ensure a professional finish. With these tips and a bit of elbow grease, you’ll be enjoying your newly recovered retro vinyl chairs in no time.
Have you successfully recovered your retro vinyl chairs? Share your experience and tips in the comments below to help other DIY enthusiasts!


