
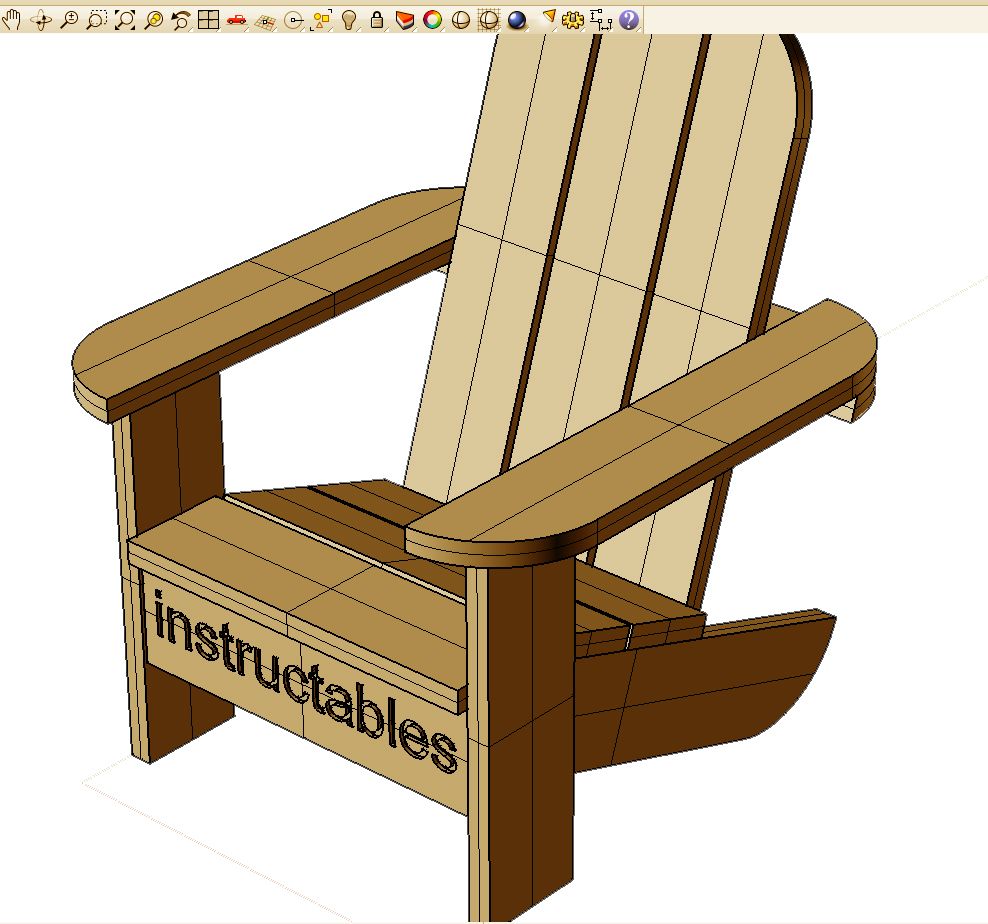
There’s nothing quite like sinking into a perfectly crafted Muskoka chair as the sun dips below the horizon, a cold drink in hand. But why spend $200-400 on store-bought versions when you can build your own heirloom-quality chair for under $150? Learning how to make Muskoka chairs puts you in control of the design, materials, and craftsmanship—resulting in outdoor furniture that perfectly matches your style and lasts for decades. This guide delivers the exact measurements, cutting lists, and professional techniques you need to transform basic lumber into stunning backyard seating.
Unlike mass-produced models that often use cheap materials and construction shortcuts, a DIY Muskoka chair lets you select premium cedar or other weather-resistant woods while implementing joinery techniques that ensure longevity. You’ll discover why these iconic chairs—with their distinctive slanted backs and wide armrests—became popular in Ontario’s Muskoka region after originating in New York’s Adirondack Mountains in 1903. By following this guide, you’ll create a chair that provides exceptional outdoor comfort while becoming a centerpiece of your patio or cottage.
Cut Perfect Muskoka Chair Pieces First
Complete Cutting List for One Chair
Before assembling anything, cut all pieces to precise measurements—this prevents mid-project surprises and ensures consistent results. For a standard chair, you’ll need:
Back Slats (7 total):
– 5 pieces: 1x6x36″ (main back slats)
– 2 pieces: 1x6x33″ (tapered end pieces)
Seat Slats (5 total):
– 1 piece: 1x6x22″ (front slat)
– 3 pieces: 1x6x21″ (middle slats)
– 1 piece: 1x6x20″ (back slat)
Frame Components:
– 2 pieces: 1x4x21″ (front legs)
– 2 pieces: 1x4x36″ (back legs)
– 2 pieces: 1x4x22.5″ (front stretcher)
– 2 pieces: 1x4x20″ (side stretchers)
– 1 piece: 1x4x24″ (back support)
Armrest Assembly:
– 2 pieces: 1x6x28″ (armrest tops)
– 2 pieces: 1x4x10″ (armrest supports)
Pro tip: Label each piece with pencil as you cut it. Nothing derails a project faster than grabbing the wrong dimension mid-assembly.
Build the Back Legs with Correct Angle
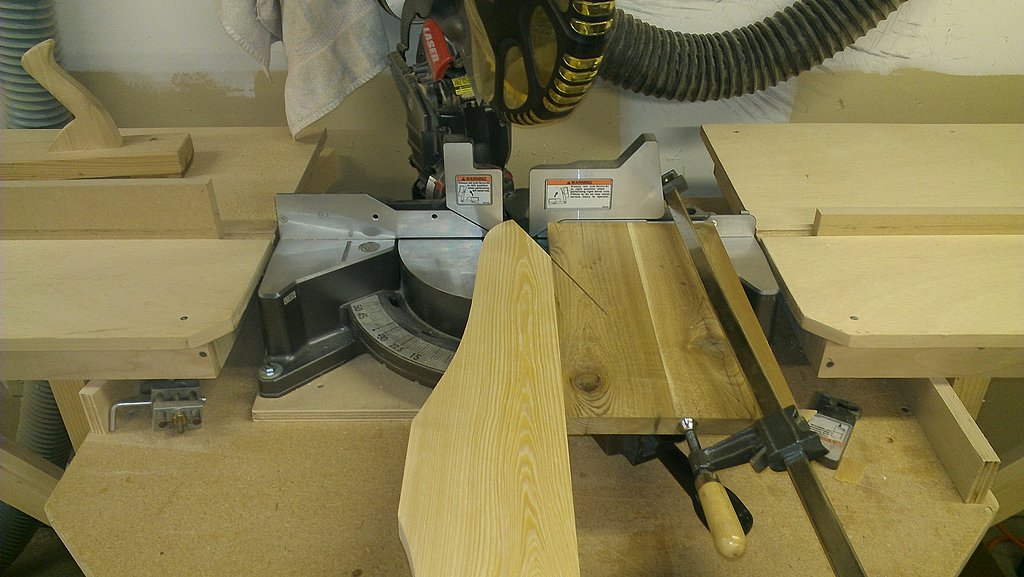
Precise Angle Cutting Technique
The distinctive reclined position of how to make Muskoka chairs comfortable comes from the precise 100-110 degree back angle. Here’s how to get it perfect:
- Measure exactly 16″ up from the bottom of each 36″ back leg
- Draw a crisp perpendicular line across both legs at this mark
- From this line, measure back 20″ at the top to create the correct angle
- Set your miter saw to 22.5 degrees and cut along your marked line
Critical step: Clamp both back legs together before cutting and sand them simultaneously. Even a 1-degree difference between legs will cause wobbling and uneven stress on joints. Test fit them against your seat frame before proceeding.
Assemble the Seat Frame Without Wobble
Square Frame Construction Method
A perfectly square seat frame is non-negotiable for building how to make Muskoka chairs that last. Follow this sequence:
- Connect the front legs (21″) to the back legs using the side stretchers (20″)
- Position the front stretcher (22.5″) between front legs, exactly 10″ from the bottom
- Check every joint with a combination square—90 degrees is mandatory
- Pre-drill all screw holes to prevent splitting your cedar
- Apply waterproof wood glue to all mating surfaces before joining
- Drive 2.5″ galvanized deck screws through pre-drilled holes
Troubleshooting tip: If your frame wobbles, place it on a known-flat surface and identify which leg is longer. Sand just enough material from the offending leg—never force the frame square as this creates internal stress that causes premature failure.
Install Seat Slats with Perfect Drainage
Professional Slat Spacing Technique
Proper seat slat installation ensures water doesn’t pool and rot your chair. Follow this exact sequence:
- Start with the front slat—align it flush with the front edge of the frame
- Maintain consistent 1/4″ spacing between slats using a spacer block
- Drive two 2.5″ deck screws per side, countersinking slightly below surface
- Ensure the back slat overhangs the frame by 1/2″ for smooth backrest transition
Why this matters: The 1/4″ spacing allows rainwater to drain freely while still providing comfortable seating. Too narrow and water pools; too wide and your feet slip through. Test your spacing with a standard nickel coin—it’s exactly 1/4″ thick.
Create the Curved Backrest for Spine Support
Contoured Backrest Installation Pattern
The curved backrest is what transforms how to make Muskoka chairs from ordinary to exceptionally comfortable. Here’s the professional installation method:
- Begin with the longest slat (36″) at the bottom, aligned with the seat back edge
- Gradually decrease slat length moving upward to create the curve
- Maintain consistent 1/2″ gaps between slats using a spacer block
- Ensure the top slat sits exactly 3″ below the back leg tops
- For enhanced comfort, trace a 2″ arc on each back slat before cutting with jigsaw
Expert secret: When tracing the arc, use a 4-foot length of string tied to a pencil with the anchor point 24″ away. This creates the perfect gentle curve that supports your spine without pressure points.
Attach Armrests with Proper Water Runoff
Precision Armrest Positioning
Mistakes here cause water damage and uncomfortable seating angles. Follow these exact measurements:
- Mount armrest supports vertically against back legs, exactly 14″ from seat
- Attach armrests with a precise 5-degree downward slope toward the back
- Ensure front extends exactly 6″ beyond front leg for optimal drink placement
- Verify both armrests match in height and angle using a level
Why the slope matters: That slight 5-degree downward angle toward the back ensures rainwater runs off rather than pooling. Standing water trapped in armrests is the #1 cause of premature rot in DIY Muskoka chairs.
Apply Finish Like a Professional Builder
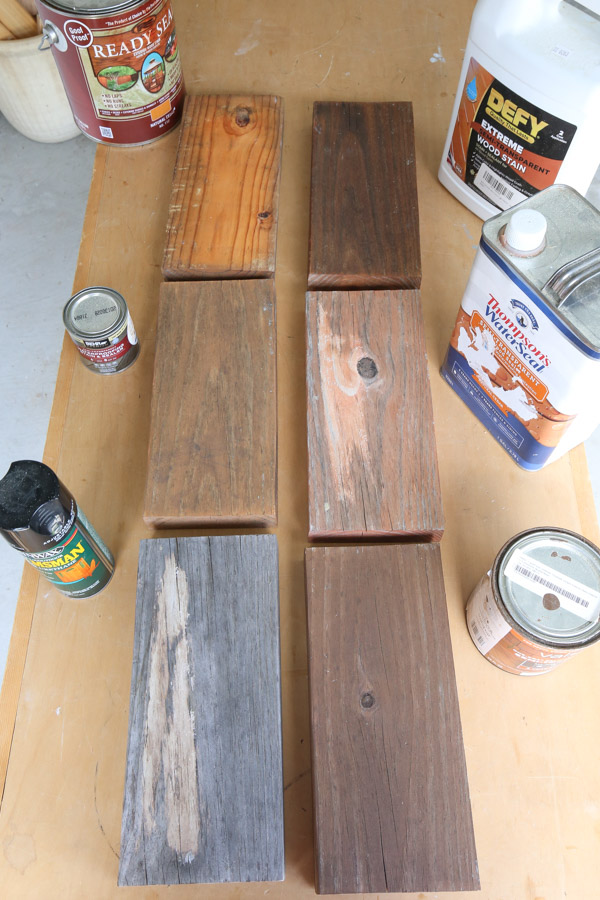
Weatherproofing Technique That Lasts
Proper finishing is what separates how to make Muskoka chairs that last decades from those that deteriorate in two seasons:
- Start sanding with 80-grit to remove saw marks
- Progress through 120-grit to 220-grit for smooth finish
- Round all edges slightly—sharp corners catch dirt and accelerate wear
- Apply exterior wood stain in thin, even coats with quality brush
- Allow 24 hours drying time between coats (cedar needs 2-3 coats)
- Don’t skip the underside—water wicks up from the ground
Critical step: Seal all cut ends with wood preservative before assembly. These end grains absorb moisture 10x faster than other surfaces and are the first to rot.
Fix Common Muskoka Chair Problems
Warping and Joint Failure Solutions
Even experienced builders encounter these issues when learning how to make Muskoka chairs:
Warping prevention:
– Use only kiln-dried lumber stored indoors until assembly day
– For minor warps: place in direct sun with weights on flat surface
– Never use green or construction-grade lumber
Joint reinforcement:
– Ensure complete glue coverage on all mating surfaces
– Clamp joints for full 24 hours minimum
– Consider pocket hole joinery for critical connections
Finish longevity:
– Strip old finish completely before recoating
– Wait for 48 hours of dry weather before applying new finish
– Apply thin coats—thick finishes crack and peel
Customize Your Muskoka Chair Design
Size and Material Variations That Work
Make your chair uniquely yours with these proven modifications:
Size adjustments:
– Child’s chair: Reduce all dimensions by 25% (perfect for little ones)
– Extra-large: 36″ width, 42″ height for larger adults
– Love seat: 48″ wide version with center support leg
Material swaps:
– Ipe hardwood: Pre-drill all holes—it’s incredibly dense
– Composite decking: Zero maintenance but costs 2x more
– Recycled plastic: Made from milk jugs, never needs staining
Design upgrades:
– Ottoman: Build matching footrest using same techniques
– Cup holders: Add 3″ holes in armrests with hole saw
– Cushions: Use outdoor foam with Sunbrella fabric covers
Final tip: When learning how to make Muskoka chairs, your first build will take 8-10 hours, but the satisfaction of sitting in furniture you crafted yourself is unmatched. Once you master the technique, build multiple chairs simultaneously—batch production cuts time to just 2-3 hours per chair. Start with cedar for its natural weather resistance and beautiful aging process, and you’ll have outdoor seating that becomes a family heirloom rather than seasonal furniture. Your perfect backyard relaxation spot awaits—grab your tools and start building today.


