
That neglected patio chair gathering rust in your garage doesn’t need to become landfill. When moisture and oxygen attack iron-based metal, unsightly orange corrosion spreads fast—but most rusty chairs can be revived with the right approach. Whether you’re facing light surface discoloration or deep pitting, this guide reveals exactly how to clean rusty chairs using proven methods matched to your specific damage level. You’ll learn to assess rust severity, choose between mechanical and chemical removal, and apply protective finishes that prevent recurrence. Stop replacing furniture and start restoring it—your chairs will look better than new with these field-tested techniques.
Diagnose Your Rust Damage Accurately
Spot Light Surface Rust Before It Spreads
Light surface rust appears as faint orange or brown discoloration that hasn’t penetrated the metal. You’ll notice it feels smooth to the touch, almost like a stain rather than actual corrosion. This early-stage rust responds well to gentle methods like vinegar soaks or baking soda pastes. Act within 48 hours—this stage progresses to pitting within weeks when exposed to moisture. If you see rust powder transfer to your gloves during inspection, the oxidation is active and needs immediate treatment.
Recognize Moderate Rust Warning Signs
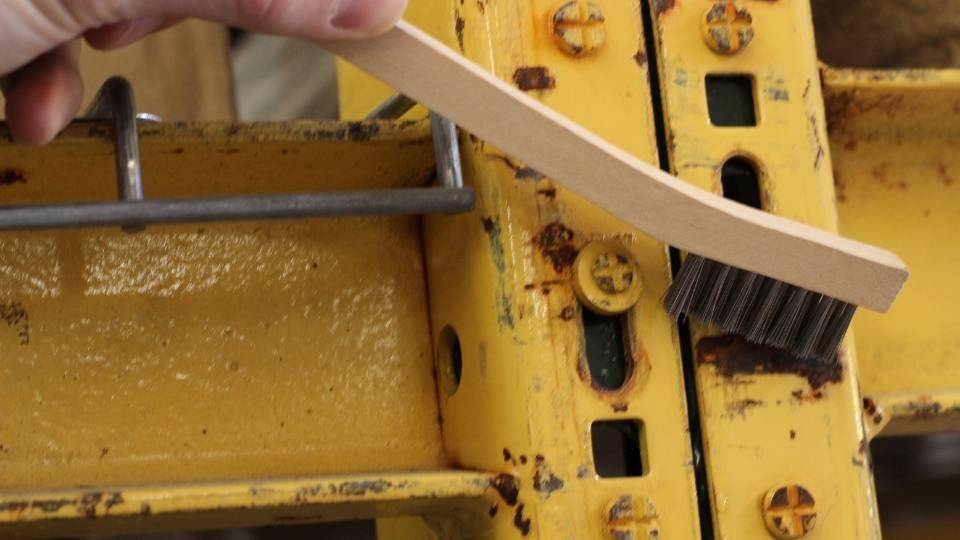
Moderate rust shows visible texture changes where metal flakes lift from the surface. Run your gloved hand over the chair frame—you’ll feel distinct pits and rough scaling. The metal retains structural integrity but requires aggressive treatment. Critical spots to check: weld joints, bolt holes, and crevices where water pools. If rust flakes detach when brushed lightly with a wire brush, you’re in the moderate stage where chemical converters work best. Ignoring this level leads to structural damage within months.
Identify Beyond-Recall Heavy Rust
Heavy rust creates deep corrosion that compromises the chair’s strength. Look for: holes where light passes through metal, flaking layers exposing raw iron underneath, or sections that bend easily under light pressure. Test structural integrity: try wiggling legs at connection points—excessive movement means metal loss. When rust penetrates more than 30% of the metal thickness, replacement becomes safer than restoration. Never attempt mechanical removal on severely weakened chairs—aggressive brushing could cause collapse.
Assemble Your Rust Removal Arsenal
Mechanical Removal Must-Haves
Grab a wire brush with stiff brass bristles—softer than steel but tough enough for light rust without scratching metal. For intricate chair designs, add a stainless steel toothbrush to reach crevices. Progress your abrasives: start with 80-grit sandpaper to blast through heavy scale, then move to 220-grit for smoothing, finishing with 400-grit for paint-ready surfaces. Power tool pro tip: fit a wire wheel attachment to your drill for 70% faster rust removal on straight sections (avoid curved areas where it can gouge metal).
Chemical Solutions for Stubborn Rust
White vinegar (5-6% acetic acid) dissolves light rust when soaked overnight—ideal for removable chair legs. For fixed frames, phosphoric acid rust converters turn iron oxide into stable black iron phosphate within 30 minutes. Natural alternatives: mix lemon juice and salt into a paste for spot treatment, or rub cut potato halves dipped in dish soap on delicate vintage pieces. Critical safety note: always keep baking soda solution nearby to neutralize acids after treatment—rinse vinegar-soaked parts with this paste before drying.
Execute Mechanical Rust Removal
Initial Debris Clearance
Begin by knocking off loose rust flakes with a nylon-tipped paint scraper—metal scrapers can gouge surfaces. Hold the chair over a drop cloth and use compressed air (or a stiff-bristled dry brush) to blow debris from joints and hinges. Visual cue: if you see metal color beneath the rust layer, mechanical removal will succeed. If the surface looks uniformly orange-brown, switch to chemical methods first.
Wire Brush Technique for Maximum Results
Scrub in straight lines following the metal grain—not circular motions—to avoid creating new rust traps. Apply firm pressure on flat surfaces but reduce pressure on curved areas where metal is thinner. For ornate chair backs, wrap coarse steel wool around a popsicle stick to access tight spots. Stop immediately if you see bright silver metal—this means you’ve removed all rust and reached bare steel. Continuing will create unnecessary scratches.
Apply Chemical Rust Removal
Vinegar Soak for Removable Parts
Disassemble completely—remove all non-metal components like plastic caps or fabric strapping. Submerge parts in a plastic tub filled with undiluted white vinegar (never metal containers). Check hourly: light rust lifts in 4-6 hours; heavy rust needs 12-24 hours. When bubbles stop forming around the metal, scrub with a brass brush. Neutralize acid by soaking in baking soda solution (1 tbsp per cup water) for 10 minutes before rinsing. Critical drying step: place parts in direct sunlight for 2 hours—UV rays accelerate oxidation prevention.
Rust Converter for Fixed Frames
Prep by wire-brushing only loose flakes—don’t try to remove all rust. Apply phosphoric acid converter with an acid-resistant brush, working from bottom to top so drips don’t create bare spots. Watch for the color change: rust turns dark purple/black within 15 minutes indicating successful conversion. Don’t rinse—most converters form a primer-ready surface. If paint won’t adhere later, the converter wasn’t fully dry—wait 48 hours before painting.
Restore Chair Surfaces Professionally
Primer Application Secrets
Degrease with mineral spirits using microfiber cloths—cotton leaves lint that ruins paint adhesion. Apply rust-inhibiting primer in thin coats with a 2-inch angled brush, hitting shadowed areas first. Critical technique: prime the undersides of chair seats before tops—gravity helps prevent drips. Dry time matters: wait 12 hours between coats in humid conditions (vs 6 hours in dry air). When light sanding reveals gray primer instead of black metal, you have full coverage.
Paint Finishing for Lasting Protection
Use spray paint for even coverage on complex frames—hold cans 10 inches from surface in sweeping motions. Apply three thin coats instead of one thick coat to prevent runs (wait 20 minutes between coats). For chairs used daily, finish with clear polyurethane sealant—it creates a barrier against sweat and rain. Pro tip: add nonslip tape to seat edges before painting to avoid hand-slip accidents during use.
Prevent Future Rust Formation
Immediate Post-Restoration Protection
Within 24 hours of final painting, apply automotive paste wax with a soft cloth. This creates an invisible moisture barrier that lasts 6 months. Focus on joints—water seeps through microscopic gaps here first. For folding chairs, lubricate hinges with silicone spray (never WD-40—it attracts dust). Test protection by spraying water droplets—if they bead up, your seal is effective.
Long-Term Defense System
Store chairs vertically on end during winter—this prevents water pooling in crevices. Use breathable cotton covers (not plastic) for outdoor storage—trapped moisture accelerates rust. Monthly maintenance ritual: wipe with vinegar-water solution (1:1 ratio) to neutralize early oxidation. Quarterly deep check: inspect weld points with a flashlight for “rust blooms”—reddish spots indicating subsurface corrosion.
Special Chair Type Solutions
Outdoor Metal Chair Protocol
Prioritize weld points—80% of rust starts here due to micro-fractures. After cleaning, apply metal epoxy filler to any pinholes before priming. Choose textured spray paint—smooth finishes show every scratch. Seasonal tip: apply rust converter every fall as winter protection—it works through light rust layers.
Vintage Chair Preservation
Preserve original patina on structurally sound areas—complete stripping destroys value. Use vinegar-soaked cotton balls held against rust spots for 3 hours instead of soaking entire frames. Document hardware with photos before disassembly—replacements often don’t match. For valuable pieces, stop after rust conversion—skip repainting to maintain authenticity.
Troubleshoot Common Restoration Failures
Fixing Paint That Peels Off
Peeling paint always means inadequate surface prep. Sand affected areas to bare metal, then clean with acetone (not mineral spirits) to remove invisible oils. Reapply converter if bare metal shows orange within 24 hours—this indicates residual rust. Wait 72 hours after final sanding before repainting—condensation in metal pores causes adhesion failure.
Stopping Persistent Rust Spots
Deep pits require metal filler after chemical treatment. Apply two-part epoxy putty to holes, overfilling slightly. Once cured, sand flush with 320-grit paper. Critical step: prime the filled area separately before overall priming—epoxy needs different adhesion. For recurring spots, drill small drainage holes below the rust point to prevent water trapping.
Your restored chairs will outlast new cheap furniture when you follow this rust eradication system. The key is matching your method to the rust’s aggression—vinegar for early-stage orange dust, converters for stubborn pits, and mechanical removal only when you see bare metal beneath the corrosion. Act within 48 hours of spotting rust to prevent structural damage, and always finish with wax protection. Within a weekend, you’ll transform eyesore seating into conversation pieces that withstand years of sun and rain. Start with one chair this afternoon—by sunset, you’ll see the first flakes of rust surrender to your efforts.


